FordParts
My Garage
My Account
Cart
OEM 2008 Lincoln Town Car Thermostat
Engine Coolant Thermostat- Select Vehicle by Model
- Select Vehicle by VIN
Select Vehicle by Model
orMake
Model
Year
Select Vehicle by VIN
For the most accurate results, select vehicle by your VIN (Vehicle Identification Number).
1 Thermostat found


2008 Lincoln Town Car Thermostat Part Number: 7L3Z-8575-E
$19.83 MSRP: $32.00You Save: $12.17 (39%)Ships in 1 Business DayProduct Specifications- Other Name: Thermostat Assembly; Engine Coolant Thermostat; Thermostat, Coolant
- Replaces: 7L3Z-8575-D, 7L3Z-8575-B, AL3Z-8575-B, RT-1196, RT-1230, 3L3Z-8575-AA, 3L3Z-8575-AC, 7L3Z-8575-C, AL3Z-8575-A, RT-1204, RT-1234, RT-1178, RT-1229, RT-1165
- Condition: New
- Fitment Type: Direct Replacement
- SKU: 7L3Z-8575-E
- Warranty: This genuine part is guaranteed by Ford's factory warranty.
2008 Lincoln Town Car Thermostat
If you're seeking quality and affordability, look no further than our extensive inventory of genuine 2008 Lincoln Town Car Thermostat available at FordPartsDeal.com. You can confidently purchase our OEM 2008 Lincoln Town Car Thermostat as they are supported by the manufacturer's warranty and our hassle-free return policy, alongside the benefit of our fast delivery service.
2008 Lincoln Town Car Thermostat Parts Q&A
- Q: How to ensure proper servicing of the thermostat on 2008 Lincoln Town Car?A: The first step for servicing the thermostat involves draining the cooling system. The first step when installing should be to tighten the coolant outlet adapter bolts by hand before applying final torque for proper seating of the adapter. Detach the two bolts to save the adapter and hose of the coolant. Follow the tightening protocol of 25 Nm (18 lb-ft) for the reinstall. The first step involves removing the O-ring seal alongside the coolant thermostat from the intake manifold for inspection of the O-ring seal before possible replacement. The installation process ends with reversing the removal steps followed by cooling system filling and bleeding.
Related 2008 Lincoln Town Car Parts
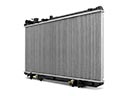 2008 Lincoln Town Car Radiator
 2008 Lincoln Town Car Water Pump
 2008 Lincoln Town Car Coolant Reservoir
 2008 Lincoln Town Car Coolant Reservoir Cap
 2008 Lincoln Town Car Cooling Fan Assembly
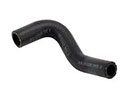 2008 Lincoln Town Car Cooling Hose
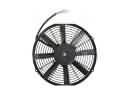 2008 Lincoln Town Car Engine Cooling Fan
 2008 Lincoln Town Car Fan Blade
 2008 Lincoln Town Car Fan Motor
 2008 Lincoln Town Car Radiator Hose
 2008 Lincoln Town Car Thermostat Gasket
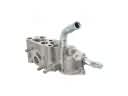 2008 Lincoln Town Car Thermostat Housing