FordParts
My Garage
My Account
Cart
OEM 2009 Ford Expedition Radiator
Cooling Radiator- Select Vehicle by Model
- Select Vehicle by VIN
Select Vehicle by Model
orMake
Model
Year
Select Vehicle by VIN
For the most accurate results, select vehicle by your VIN (Vehicle Identification Number).
1 Radiator found


2009 Ford Expedition Radiator Part Number: CL1Z-8005-A
$402.94 MSRP: $613.30You Save: $210.36 (35%)Ships in 1 Business DayProduct Specifications- Other Name: Radiator Assembly
- Replaces: 9L3Z-8005-B, 9L3Z-8005-A, RAD-47
- Item Weight: 19.30 Pounds
- Item Dimensions: 43.9 x 26.5 x 8.1 inches
- Condition: New
- Fitment Type: Direct Replacement
- SKU: CL1Z-8005-A
- Warranty: This genuine part is guaranteed by Ford's factory warranty.
2009 Ford Expedition Radiator
If you're seeking quality and affordability, look no further than our extensive inventory of genuine 2009 Ford Expedition Radiator available at FordPartsDeal.com. You can confidently purchase our OEM 2009 Ford Expedition Radiator as they are supported by the manufacturer's warranty and our hassle-free return policy, alongside the benefit of our fast delivery service.
2009 Ford Expedition Radiator Parts Q&A
- Q: How to Service and Repair a Radiator on 2009 Ford Expedition?A: Place the vehicle in neutral position on a hoist before starting radiator maintenance. Start by taking off both headlamp assemblies from the right and left side together with the cooling fan shroud. You must take out the two radiator bolts while making sure to retain them tight at 15 Nm (133 lb-in) after installing them. Next detach the two bolts which hold the coolant expansion tank in position before placing it aside but ensure all bolts reach a torque specification of 15 Nm (133 lb-in) when reinstalling the tank. First detach the horn assembly from its electrical connection, then remove the bolt while pulling out the assembly before tightening the bolt to 10 Nm (89 lb-in) when reinstalling. The process requires removal of six pin-type retainers that secure the left-hand and right-hand air deflector to the condenser core. There exists two transmission fluid cooler-to-radiator hoses you need to disconnect. Moving the cooling module backward allows separation of the condenser mounts from the radiator by first depressing the retaining tabs on the lower brackets followed by lifting upward to detach the brackets. After radiator removal you should reinstall it by following the removal steps in reverse while checking the transmission fluid level.
Related 2009 Ford Expedition Parts
 2009 Ford Expedition Water Pump
 2009 Ford Expedition Automatic Transmission Oil Cooler Line
 2009 Ford Expedition Coolant Reservoir
 2009 Ford Expedition Cooling Fan Assembly
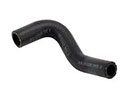 2009 Ford Expedition Cooling Hose
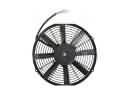 2009 Ford Expedition Engine Cooling Fan
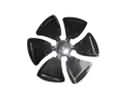 2009 Ford Expedition Fan Blade
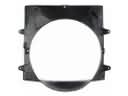 2009 Ford Expedition Fan Shroud
 2009 Ford Expedition Oil Cooler
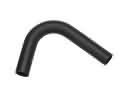 2009 Ford Expedition Radiator Hose
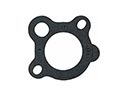 2009 Ford Expedition Thermostat Gasket
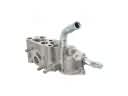 2009 Ford Expedition Thermostat Housing