FordParts
My Garage
My Account
Cart
OEM 2009 Lincoln Navigator Vapor Canister
Fuel Vapor Canister- Select Vehicle by Model
- Select Vehicle by VIN
Select Vehicle by Model
orMake
Model
Year
Select Vehicle by VIN
For the most accurate results, select vehicle by your VIN (Vehicle Identification Number).
1 Vapor Canister found


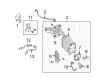
2009 Lincoln Navigator Vapor Canister Part Number: BL1Z-9D653-A
$277.04 MSRP: $460.00You Save: $182.96 (40%)Ships in 1-2 Business DaysProduct Specifications- Other Name: Cannister - Fuel Vapour Storage; Vapor Canister Purge Solenoid; Cannister - Fuel Vapour Store
- Replaces: 9L1Z-9D653-B, 7L1Z-9D653-E, 8L1Z-9D653-C, 9L1Z-9D653-D, 9L1Z-9D653-C, CX-2353, CX-2196
- Base No.: 9D653
- Item Weight: 11.90 Pounds
- Item Dimensions: 14.5 x 11.4 x 23.0 inches
- Condition: New
- Fitment Type: Direct Replacement
- SKU: BL1Z-9D653-A
- Warranty: This genuine part is guaranteed by Ford's factory warranty.
2009 Lincoln Navigator Vapor Canister
If you're seeking quality and affordability, look no further than our extensive inventory of genuine 2009 Lincoln Navigator Vapor Canister available at FordPartsDeal.com. You can confidently purchase our OEM 2009 Lincoln Navigator Vapor Canister as they are supported by the manufacturer's warranty and our hassle-free return policy, alongside the benefit of our fast delivery service.
2009 Lincoln Navigator Vapor Canister Parts Q&A
- Q: How to Service the Vapor Canister on 2009 Lincoln Navigator?A: Service of Evaporative Emission Control Canister requires the vehicle to be positioned on a hoist with neutral gear selected. You should disconnect the ground cable of the vehicle battery to avoid ignition risks from flammable mixtures. Starting with the disconnect of EVAP canister vent solenoid electrical jumper from wiring harness you must proceed to remove the Fuel Tank Pressure (FTP) sensor and vapor tube assembly from the EVAP canister quick connect coupling. The technician should perform the following sequence when replacing the EVAP canister components: disconnect the EVAP canister purge valve vapor tube from the quick connect coupling, follow this with the separation of the fresh air tube from the canister vent solenoid and dust separator assembly. When reinstalling the EVAP canister assembly bracket-to-frame rail bolt you should tighten it to 20 Nm (177 lb-in). Continue this process for the front bracket bolt by tightening it to 20 Nm (177 lb-in). Gradually remove the bolt which connects the EVAP canister assembly bracket along with the exhaust Y-pipe dual catalytic converter heat shield to the transmission crossmember before extracting the EVAP canister assembly from the vehicle and tighten the assembly bolts to 20 Nm (177 lb-in) during installation. Detach the EVAP canister vent solenoid electrical connector and remove the EVAP canister assembly bracket using five bolts which should be tightened to 6 Nm (53 lb-in) after reinstallation. The EVAP canister assembly requires unfastening from its brackets after which technicians remove the canister vent solenoid together with the dust separator assembly from the EVAP canister. Check the EVAP canister heat shield for damage because when needed replace it with a new one. The reverse installation procedure follows under which technicians complete the evaporative emission system leak test process.
Related 2009 Lincoln Navigator Parts
 2009 Lincoln Navigator Catalytic Converter
 2009 Lincoln Navigator Canister Purge Valve
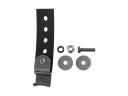 2009 Lincoln Navigator Exhaust Hanger
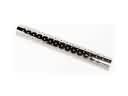 2009 Lincoln Navigator Exhaust Heat Shield
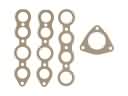 2009 Lincoln Navigator Exhaust Manifold
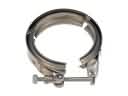 2009 Lincoln Navigator Exhaust Manifold Clamp
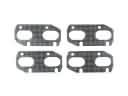 2009 Lincoln Navigator Exhaust Manifold Gasket
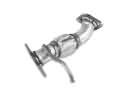 2009 Lincoln Navigator Exhaust Pipe
 2009 Lincoln Navigator Muffler
 2009 Lincoln Navigator Muffler Hanger Straps
 2009 Lincoln Navigator Tail Pipe