FordParts
My Garage
My Account
Cart
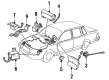
OEM Ford Crown Victoria Clock Spring
Spiral Cable Clock Spring- Select Vehicle by Model
- Select Vehicle by VIN
Select Vehicle by Model
orMake
Model
Year
Select Vehicle by VIN
For the most accurate results, select vehicle by your VIN (Vehicle Identification Number).
9 Clock Springs found


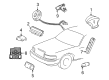
Ford Crown Victoria Clockspring Part Number: 6W1Z-14A664-A
$97.91 MSRP: $142.52You Save: $44.61 (32%)

Ford Crown Victoria Clockspring Part Number: F7AZ-14A664-BA


Ford Crown Victoria Clockspring Part Number: 1W1Z-14A664-AA
$214.42 MSRP: $314.87You Save: $100.45 (32%)


Ford Crown Victoria Clockspring Part Number: 1W7Z-14A664-AA
$447.49 MSRP: $657.10You Save: $209.61 (32%)


Ford Crown Victoria Clockspring Part Number: F8AZ-14A664-AA

Ford Crown Victoria Clockspring Part Number: F4AZ-14A664-A
Ford Crown Victoria Clockspring Part Number: F3AZ-14A664-A
Ford Crown Victoria Clockspring Part Number: F5AZ-14A664-A

Ford Crown Victoria Clockspring Part Number: F1VY-14A664-D
Ford Crown Victoria Clock Spring
OEM Clock Spring boasts unmatched quality. Each part goes through full quality checks. They adhere to Ford's official factory standards. These steps remove flaws and inconsistencies. So you can get Clock Spring with long life and a perfect fit. Come to our website and find genuine Ford Crown Victoria parts. We keep a wide inventory of OEM Crown Victoria parts at the highly affordable prices. It's easy to search, compare, and pick what you need. You'll love the clear info and simple checkout. We offer top-rated customer service, and we reply fast. We also ship promptly to ensure your order arrives on time.
Ford Crown Victoria Clock Spring Parts and Q&A
- Q: How to Service and Repair the Clock Spring Assembly on Ford Crown Victoria?A:Service procedures for the Clock Spring assembly start by executing an SRS depowering process and unmounting the driver air bag module before continuing. Keep the road wheels at a straight-ahead position so the Clock Spring remains undamaged before uninstalling the Steering Wheel. Two strips of masking tape should be applied crosswise on the Clock Spring to avoid unintended rotation while working. Raise the tilt Steering Column into its maximum position to enable easy extraction of the steering column lower and upper shrouds. First remove the tilt column lever and the three lower steering column shroud screws before freeing the retainers on the upper shroud to remove all components. Free the electrical connector of the Clock Spring then detach the three retaining clips for successful complete removal of the Clock Spring from the steering column. Before installation with a fresh Clock Spring the key needs replacement while keeping the rotor at its central position with no rotor movement. When recentering a Clock Spring start by turning the rotor counterclockwise until it stops before aligning the arrows using clockwise motion followed by making two full clockwise turns until the rotor stays at the center point without rotating. When reusing the original Clock Spring the tape should be removed without turning it. Place the flats of the Clock Spring against the steering column after which you should slide it along the column before locking in place using the retaining tabs. Proceed with connecting the electrical connector followed by fitting the upper steering column shroud and fastening the column shift lever boot when present before fastening three screws on the lower shroud. Complete the procedure by reinstalling the tilt column lever and steering wheel and driver air bag module before powering the SRS system. The vehicle should only go out when the SRS system demonstrates full operation and no faults are detected.
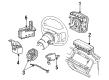
- Q: What Precautions Should Be Taken When Servicing the Clock Spring on Ford Crown Victoria?A:Safety glasses should be worn by all technicians while servicing the air bag sliding contact because it protects from accidental air bag deployment injuries. Always handle the live air bag module while pointing its air bag unit along with its trim cover in the opposite direction from your body and avoid placing it with the trim cover facing downward. Use soap and water for handwashing immediately after deployment to eliminate sodium hydroxide residue from your skin. Manual probing of connectors on the air bag module should be avoided to stop its deployment. Replacement requires new trim parts because damaged or discolored trim covering needs replacement. Vehicle sensor orientation must be correct for proper operation and all deformed sensor mounting brackets and damaged wiring pigtails require component replacement. Repair work must start with disconnecting the battery ground cable and expiration of one minute until auxiliary batteries have been disconnected. The front Air Bag Sensors exist in the front section while side air bag sensors are positioned at the B-pillar base. The procedure to remove the air bag sliding contact begins with disconnecting the battery followed by removing the driver air bag module and the Steering Wheel when placed in straight-ahead position. Masking tape application on the air bag sliding contact serves to stop unintentional rotation before you remove the tilt wheel handle and continue removal of lower steering column components like cover and reinforcement and shroud. The Ignition Switch lock cylinder can be removed when positioned to RUN mode by pushing the release tab while pulling outward. You must perform several steps before the upper steering column shroud removal process: first disconnect the transmission range indicator cable, next loosen the steering column mounting nuts and then remove the instrument panel lower insulator to enable steering column clearance to drop. The technicians must remove both Passive Anti-Theft System (PATS) transmitter and key-in-ignition warning indicator switch before disconnecting all air bag sliding contact electrical connectors. Practically disengage the retaining clips to detach the air bag sliding contact from its position. Install the new air bag sliding contact by positioning it correctly then fastening the retaining clips while you attach electrical connectors into the wire connector bracket. Install key-in-ignition warning indicator switch, PATS transmitter followed by upper steering column shroud and ignition switch lock cylinder. Ensure complete seat and alignment. First fix the steering column mounting nuts securely and then reattach the transmission range indicator cable followed by installing the lower steering column shroud with reinforcement and cover into place. The last steps include installing the tilt wheel handle followed by removing masking tape before placing the steering wheel and driver air bag module followed by air bag system proof testing. The diagnostic tool for the restraint system needs to be taken out of any operational vehicle for both safety reasons and to prevent violations of safety standards.


Related Ford Crown Victoria Parts
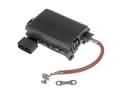 Ford Crown Victoria Fuse Box
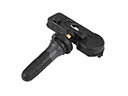 Ford Crown Victoria TPMS Sensor
 Ford Crown Victoria Air Bag Control Module
 Ford Crown Victoria Air Bag Sensor
 Ford Crown Victoria Airbag
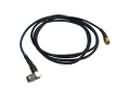 Ford Crown Victoria Antenna Cable
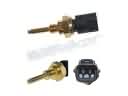 Ford Crown Victoria Cylinder Head Temperature Sensor
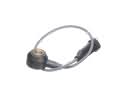 Ford Crown Victoria Knock Sensor
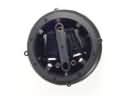 Ford Crown Victoria Mirror Actuator
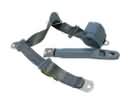 Ford Crown Victoria Seat Belt
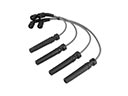 Ford Crown Victoria Spark Plug Wire
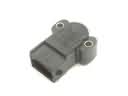 Ford Crown Victoria Throttle Position Sensor