FordParts
My Garage
My Account
Cart
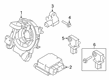
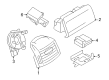
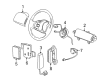
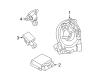
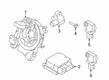
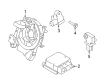
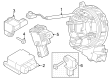
OEM Ford F-350 Super Duty Clock Spring
Spiral Cable Clock Spring- Select Vehicle by Model
- Select Vehicle by VIN
Select Vehicle by Model
orMake
Model
Year
Select Vehicle by VIN
For the most accurate results, select vehicle by your VIN (Vehicle Identification Number).
17 Clock Springs found


Ford F-350 Super Duty Clockspring Part Number: HC3Z-14A664-A
$150.52 MSRP: $219.10You Save: $68.58 (32%)


Ford F-350 Super Duty Clockspring Part Number: 8C3Z-14A664-B
$158.57 MSRP: $230.82You Save: $72.25 (32%)


Ford F-350 Super Duty Clockspring Part Number: 1L3Z-14A664-BA
$205.57 MSRP: $299.23You Save: $93.66 (32%)


Ford F-350 Super Duty Clockspring Part Number: 5C3Z-14A664-A
$224.49 MSRP: $349.67You Save: $125.18 (36%)
Ford F-350 Super Duty Clockspring Part Number: 1L3Z-14A664-AA
$238.74 MSRP: $350.57You Save: $111.83 (32%)
Ford F-350 Super Duty Clockspring Part Number: GC3Z-14A664-E
$33.58 MSRP: $48.88You Save: $15.30 (32%)Ships in 1 Business Day
Ford F-350 Super Duty Clockspring Part Number: LC3Z-14A664-AA
$941.42 MSRP: $1394.70You Save: $453.28 (33%)Ships in 1-2 Business DaysFord F-350 Super Duty Clockspring Part Number: JC3Z-14A664-A
$878.66 MSRP: $1394.70You Save: $516.04 (37%)
Ford F-350 Super Duty Clockspring Part Number: HC3Z-14A664-E
$941.42 MSRP: $1394.70You Save: $453.28 (33%)
Ford F-350 Super Duty Clockspring Part Number: PC3Z-14A664-A
$31.22 MSRP: $44.28You Save: $13.06 (30%)Ships in 1-2 Business DaysFord F-350 Super Duty Clockspring Part Number: PC3Z-14A664-B
$68.40 MSRP: $103.17You Save: $34.77 (34%)Ships in 1-2 Business DaysFord F-350 Super Duty Clockspring Part Number: HC3Z-14A664-H
$149.26 MSRP: $217.27You Save: $68.01 (32%)Ships in 1-2 Business Days
Ford F-350 Super Duty Clockspring Part Number: GC3Z-14A664-F
$46.50 MSRP: $66.52You Save: $20.02 (31%)
Ford F-350 Super Duty Clockspring Part Number: HC3Z-14A664-B
$166.80 MSRP: $242.80You Save: $76.00 (32%)


Ford F-350 Super Duty Clockspring Part Number: 5C3Z-14A664-AA
$218.20 MSRP: $320.42You Save: $102.22 (32%)Ford F-350 Super Duty Clockspring Part Number: 5C3Z-14A664-D
$160.91 MSRP: $234.22You Save: $73.31 (32%)Ford F-350 Super Duty Clockspring Part Number: HC3Z-14A664-G
$169.98 MSRP: $247.42You Save: $77.44 (32%)
Ford F-350 Super Duty Clock Spring
OEM Clock Spring boasts unmatched quality. Each part goes through full quality checks. They adhere to Ford's official factory standards. These steps remove flaws and inconsistencies. So you can get Clock Spring with long life and a perfect fit. Come to our website and find genuine Ford F-350 Super Duty parts. We keep a wide inventory of OEM F-350 Super Duty parts at the highly affordable prices. It's easy to search, compare, and pick what you need. You'll love the clear info and simple checkout. We offer top-rated customer service, and we reply fast. We also ship promptly to ensure your order arrives on time.
Ford F-350 Super Duty Clock Spring Parts and Q&A
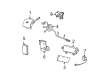
- Q: How to Service and Repair the Clock Spring Assembly on Ford F-350 Super Duty?A:Service and repair procedures for the Clock Spring assembly must start by disabling power from the SRS. You should first lower the Steering Wheel then lock its tilt mechanism before taking out the driver air bag module. Verify that the road wheel positions face straight ahead prior to steering wheel removal since this helps protect the Clock Spring from damage. The first task is to disconnect the Clock Spring electronics and take out the screws maintaining the Clock Spring. Do not remove the anti-rotation key from the Clock Spring before installing the steering wheel because early key removal could lead to Clock Spring damage that requires centralization before installation. Use the two screws to secure the installed Clock Spring before connecting its electrical connector. Follow the correct tightening procedures to avoid premature Clock Spring failure because any doubts should lead to another centralization attempt. A reinstalled Clock Spring requires accurate centering too while avoiding excessive inner rotor rotation which could damage the internal ribbon wire. The steering wheel installation should proceed after installing a new Clock Spring when an anti-rotation key has not been removed. According to proper procedure when using an anti-rotation key you should rotate the inner rotor counterclockwise until a slight resistance indicates wire ribbon limit then perform a clockwise rotation of the rotor for 2-1/2 revolutions to place them at the 12 clock position. To complete the installation, first put the steering wheel in its position while taking out any present anti-rotation key before you install the driver air bag module last. Then reset the SRS.

Related Ford F-350 Super Duty Parts
 Ford F-350 Super Duty ABS Control Module
 Ford F-350 Super Duty Air Bag Control Module
 Ford F-350 Super Duty Air Bag Sensor
 Ford F-350 Super Duty Airbag
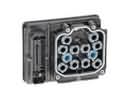 Ford F-350 Super Duty Brake Controller
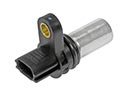 Ford F-350 Super Duty Camshaft Position Sensor
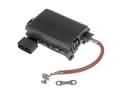 Ford F-350 Super Duty Fuse Box
 Ford F-350 Super Duty Headlight Relay
 Ford F-350 Super Duty Oil Pressure Gauge
 Ford F-350 Super Duty Parking Assist Sensor
 Ford F-350 Super Duty PCV Valve Elbow
 Ford F-350 Super Duty Wiper Linkage