FordParts
My Garage
My Account
Cart
OEM Ford Fusion Clock Spring
Spiral Cable Clock Spring- Select Vehicle by Model
- Select Vehicle by VIN
Select Vehicle by Model
orMake
Model
Year
Select Vehicle by VIN
For the most accurate results, select vehicle by your VIN (Vehicle Identification Number).
5 Clock Springs found


Ford Fusion Clockspring Part Number: BE5Z-14A664-A
$100.08 MSRP: $145.68You Save: $45.60 (32%)


Ford Fusion Clockspring Part Number: BE5Z-14A664-B
$105.15 MSRP: $153.05You Save: $47.90 (32%)
Ford Fusion Cover And Contact Plate Assembly Part Number: EG9Z-14A664-N
$171.48 MSRP: $264.63You Save: $93.15 (36%)Ships in 1-2 Business Days
Ford Fusion Clockspring Part Number: DG9Z-14A664-B
$161.39 MSRP: $234.92You Save: $73.53 (32%)Ships in 1-3 Business Days
Ford Fusion Cover And Contact Plate Assembly Part Number: EG9Z-14A664-M
$188.62 MSRP: $274.55You Save: $85.93 (32%)
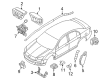
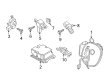
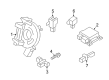
Ford Fusion Clock Spring
OEM Clock Spring boasts unmatched quality. Each part goes through full quality checks. They adhere to Ford's official factory standards. These steps remove flaws and inconsistencies. So you can get Clock Spring with long life and a perfect fit. Come to our website and find genuine Ford Fusion parts. We keep a wide inventory of OEM Fusion parts at the highly affordable prices. It's easy to search, compare, and pick what you need. You'll love the clear info and simple checkout. We offer top-rated customer service, and we reply fast. We also ship promptly to ensure your order arrives on time.
Ford Fusion Clock Spring Parts and Q&A
- Q: How to Service and Repair the Clock Spring Assembly to Ensure the Supplemental Restraint System (SRS) is Operational on Ford Fusion?A:Service and repair of Clock Spring assembly needs vehicle owners to confirm Supplemental Restraint System (SRS) functions optimally and has no defects before vehicle release. The first step requires taking out the driver air bag module. Place the road wheels in straight-ahead position before proceeding to take out the Steering Wheel to avoid Clock Spring harm. Press in on the sides of the upper steering column shroud while lifting it up until the piece can be taken away. Unscrew and remove the three screws which hold the lower steering column shroud in place. Afterward, take it off. Connectors should be disconnected and two screws removed before pulling out the steering angle sensor when one exists. Temporarily disconnect the electrical connector followed by removing the two screws to properly extract the Clock Spring. Begin installation by attaching the Clock Spring while securing it with two screws followed by electrical connector connection. The steering angle sensor needs to be placed with its screws attached and its electrical connector must be joined for proper installation. Fasten three screws onto the lower steering column shroud while you install the upper steering column shroud to the lower one. If your vehicle receives a new Clock Spring then install the steering wheel as the Clock Spring sealing key needs removal. The same Clock Spring must be centered correctly to prevent premature failure during its reinstall. Seize the Clock Spring outer housing to stay still while rotating the rotor against counter direction until detecting ribbon wire resistance then complete clockwise rotation two and a quarter rounds beyond for positioning the wiring connector and rotor at 12 o'clock. Verify the Clock Spring has proper centering. The technician must redo Clock Spring centralization before installing the steering wheel because vehicle unattended time can result in component damage. Drivers should execute the installation of the driver air bag module during the last step.

Related Ford Fusion Parts
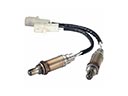 Ford Fusion Oxygen Sensor
 Ford Fusion Fuse Box
 Ford Fusion Airbag
 Ford Fusion Camshaft Position Sensor
 Ford Fusion Air Bag Control Module
 Ford Fusion Air Bag Sensor
 Ford Fusion Antenna Cable
 Ford Fusion Daytime Running Light Relay
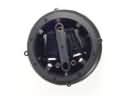 Ford Fusion Mirror Actuator
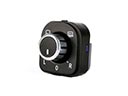 Ford Fusion Mirror Switch
 Ford Fusion Occupant Detection Sensor
 Ford Fusion Oil Pressure Switch