My Garage
Cart
Make sure this part fits

Ford BE5Z-14A664-A
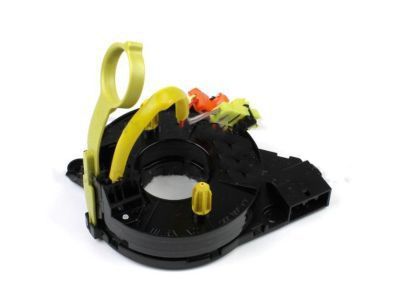
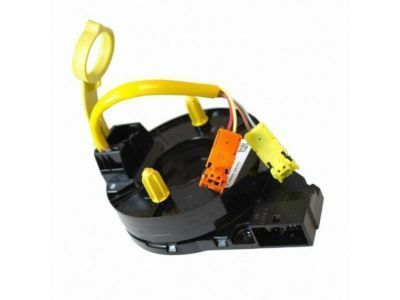
Clockspring

2006-2012 Ford BE5Z14A664A

Customer Questions & Expert Answers (7)
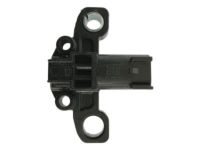
Ford BE5Z-14A664-A Clockspring
  • Part Description
    Cover And Contact Plate Assembly; Air Bag Clockspring
  • Base No.
    14A664
  • Replaces
    6E5Z-14A664-B, 8E5Z-14A664-A
  • Manufacturer
    Ford
Make sure this part fits
$85.65 MSRP: $124.67
You Save: $39.02 (32%)
1
ADD TO CART
  • Vehicle Fitment

    Year Make Model Trim Engine
    2007-2008 Ford EdgeLimited, SE, SEL, SEL Plus6 Cyl 3.5 L GAS
    2006-2012 Ford FusionHybrid, S, SE, SEL4 Cyl 2.3 L GAS, 4 Cyl 2.5 L FULL HYBRID EV-GAS (FHEV), 4 Cyl 2.5 L GAS, 6 Cyl 3.0 L FLEX, 6 Cyl 3.0 L GAS
    2007-2008 Lincoln MKXBase6 Cyl 3.5 L GAS
    2011-2012, 2007-2009 Lincoln MKZBase, Hybrid4 Cyl 2.5 L FULL HYBRID EV-GAS (FHEV), 6 Cyl 3.5 L GAS
    2006 Lincoln ZephyrBase6 Cyl 3.0 L GAS
    2006-2011 Mercury MilanBase, Hybrid, Premier4 Cyl 2.3 L GAS, 4 Cyl 2.5 L FULL HYBRID EV-GAS (FHEV), 4 Cyl 2.5 L GAS, 6 Cyl 3.0 L FLEX, 6 Cyl 3.0 L GAS
    Warning: California's Proposition 65
  • Customer Questions & Expert Answers

    Q:
    Will this BE5Z-14A664-A work in my car? Posted by FordPartsDeal Specialist
    A:
    Select Your Vehicle model to verify if part number BE5Z-14A664-A fits your car.
    Posted by FordPartsDeal Specialist
    Q:
    What Precautions Should Be Taken When Servicing the Clock Spring Assembly on Ford Fusion? Posted by Customer
    A:
    Use safety glasses for services to prevent accidental air bag incidents and do not deploy memory saver devices when working with the Clock Spring assembly. When the restraints control module (RCM) fuse is removed with the ignition ON the air bag warning lamp will illuminate normally indicating no fault exists. A complete examination to verify SRS functionality without any faults must always precede vehicle return to customers. The repair process demands the replacement of a new part while continuing diagnostics if the problem remains before reinstallation of the first part and conducting another test sequence. The first step includes disabling power flow followed by steering wheel tilting downward and securing the tilt mechanism. First remove the driver air bag module with the road wheels facing straight ahead and then detach the steering wheel from the vehicle foundation. Releasing two tabs simultaneously allows you to elevate the upper steering column shroud. At this point remove the three screws securing the lower shroud before disconnecting the Clock Spring electrical connector and unbolt the Clock Spring with its two screws. New Clock Spring installation requires screwing in the two mounting screws while the electrical connector gets reconnected and then adding the lower shroud using three screws before finishing with the upper shroud. After new Clock Spring installation the steering wheel should be put in place then the sealing key needs removal. Review the centralization status of your original Clock Spring to stop early damage by holding the housing still and rotating the rotor backward until resistance appears then rotating forward two and a quarter times to line up the wiring at the 12 o'clock mark and avoiding rotor motion at this stage. A technician who departs from the car needs to perform the centralizing procedure again during this task. The driver air bag module installation completes the process followed by reactivation of the system.
    Posted by FordPartsDeal Specialist
    Q:
    How to Service and Repair the Clock Spring Assembly to Ensure the Supplemental Restraint System (SRS) is Operational on Lincoln MKZ? Posted by Customer
    A:
    Service and repair of Clock Spring assembly needs vehicle owners to confirm Supplemental Restraint System (SRS) functions optimally and has no defects before vehicle release. The first step requires taking out the driver air bag module. Place the road wheels in straight-ahead position before proceeding to take out the steering wheel to avoid Clock Spring harm. Press in on the sides of the upper steering column shroud while lifting it up until the piece can be taken away. Unscrew and remove the three screws which hold the lower steering column shroud in place. Afterward, take it off. Connectors should be disconnected and two screws removed before pulling out the steering angle sensor when one exists. Temporarily disconnect the electrical connector followed by removing the two screws to properly extract the Clock Spring. Begin installation by attaching the Clock Spring while securing it with two screws followed by electrical connector connection. The steering angle sensor needs to be placed with its screws attached and its electrical connector must be joined for proper installation. Fasten three screws onto the lower steering column shroud while you install the upper steering column shroud to the lower one. If your vehicle receives a new Clock Spring then install the steering wheel as the Clock Spring sealing key needs removal. The same Clock Spring must be centered correctly to prevent premature failure during its reinstall. Seize the Clock Spring outer housing to stay still while rotating the rotor against counter direction until detecting ribbon wire resistance then complete clockwise rotation two and a quarter rounds beyond for positioning the wiring connector and rotor at 12 o'clock. Verify the Clock Spring has proper centering. The technician must redo Clock Spring centralization before installing the steering wheel because vehicle unattended time can result in component damage. Drivers should execute the installation of the driver air bag module during the last step.
    Posted by FordPartsDeal Specialist
    Q:
    What Precautions Should Be Taken When Servicing the Clock Spring Assembly to Minimize Injury Risk and Ensure Proper Installation on Lincoln MKX? Posted by Customer
    A:
    Safety glasses must be worn before servicing the Clock Spring assembly while keeping away from memory saver devices to minimize personal injury risk. With the ignition switch ON the air bag warning indicator should illuminate because the restraints control module (RCM) fuse removal does not indicate any SRS fault. Before returning the vehicle to customers you must verify the SRS has no faults while also requiring all repairs through new part installation. Additional diagnostics should occur after reinstalling the original part. System depowering starts with lowering the steering wheel while locking the tilt handle followed by removal of the driver air bag module. Patience needs to prevail for vehicle types equipped with absolute steering angle sensors or adaptive headlamp systems because turning the steering wheel Clock Spring rotor after removing the wheel can result in damages. Straighten the road wheels to a correct position before taking off the steering wheel and applying tape to immobilize the Clock Spring rotor on the steering column shaft. Remove the upper steering column shroud after releasing its two tabs to access the electrical connector of the Clock Spring. Then disconnect the connector and remove the three screws that secure the lower shroud. Proceed to align the arrows on the sensor ring against the housing after tape removal then extract the two screws to remove the Clock Spring. Disassemble the Clock Spring by removing its two screws. To correctly install the Clock Spring keep the housing stationary while rotating the rotor counterclockwise until a resistance feel is reached before making another clockwise rotation for about 2.25 turns until the wiring aligns at 12 o'clock. As a safety measure when leaving the Clock Spring unattended users should execute the centralizing procedure again. The multi-function switch housing requires a complete installation of the Clock Spring before screw attachment when reattaching its electrical connector. After lower and upper steering column shroud reinstallation along with the steering wheel attachment complete the procedure by extracting sealing key from new Clock Springs. Finish the process by placing the driver air bag module in position then turn on the system power.
    Posted by FordPartsDeal Specialist
    Q:
    What Precautions and Steps Are Involved in Installing a Clock Spring Assembly on Lincoln Zephyr? Posted by Customer
    A:
    Safety glasses are essential equipment during Clock Spring assembly servicing to protect from potential air bag discharges while memory saver devices should also be avoided for safety reasons. A warning light on the air bag will appear because the restraints control module (RCM) fuse is removed when the ignition switch is turned on through normal operation which does not indicate any fault. Thoroughly check the SRS functionality with no faults present before handing the vehicle back to the customer. When performing repairs the system requires new components yet a recurrence of the problem demands you replace the original component followed by diagnostic retesting. The restoration process starts with system depowering along with wheel steering adjustment to the downward position and tilt handle locking procedure. The driver air bag module must be taken out while directed to keep road wheels pointing directly forward until the steering wheel comes off. You can remove the steering column shroud upper section by freeing its two tabs and raising them up before using a screwdriver to take out the lower shroud screws and disconnect the Clock Spring electrical connector as well as release the two screws that support the Clock Spring. Installation of the new Clock Spring requires securing it with the two screws followed by reattaching the electrical connector. Fasten the lower steering column shroud by using its three screws while joining it to the upper shroud. After installing a new Clock Spring users should reinstall the steering wheel together with the removal of the sealing key. When maintaining the current Clock Spring ensure proper centralization by holding the housing still and rotating the rotor counterclockwise until resistance appears and continuing rotation clockwise 2.25 turns so the wires sit at the 12 o'clock position without rotating the rotor. The vehicle needs a new centralizing procedure after every instance when the technician departs without supervision. The installation process includes putting on the steering wheel as well as the driver air bag module followed by system power-up.
    Posted by FordPartsDeal Specialist
    Q:
    How to Service and Repair the Clock Spring Assembly on Mercury Milan? Posted by Customer
    A:
    The driver air bag module has to be removed first to access the Clock Spring assembly for service operations. Straighten the road wheels in their steering position before removing the steering wheel to protect the Clock Spring. Position the steering column shroud upper section by releasing two tabs then unfasten the three screws on the lower steering column shroud. The first step is to cut the power from the Clock Spring electrical connector before unscrewing the two fasteners retaining this component. After attaching the Clock Spring using two screws you must reconnect its electrical connector. The technical process requires attaching the lower steering column shroud by fastening its three screws before combining the upper shroud with the lower one. When using a new Clock Spring install the steering wheel and follow by removing the Clock Spring sealing key. Reusing the original Clock Spring requires correct centralization to extend its life by maintaining system stability; users should stabilize the outer casing while rotating the rotor opposite its normal direction until resistance appears followed by clockwise rotation for 2.25 turns until both the connector and rotor wiring settle at the 12 o'clock mark without allowing rotor movement. The technician must redo the centralization process when leaving the vehicle unattended. The installation process ends with incorporating the driver air bag module.
    Posted by FordPartsDeal Specialist
    Q:
    What should be ensured after removing the tape from the clockspring rotor for the 2008 Ford Edge? Posted by Customer
    A:
    Ensure the clockspring rotor remains centered.
    Posted by FordPartsDeal Specialist
    See expert answers on similar Clock Spring
    If you have any questions about this product, please don't hesitate to ask us. We will be happy to help you!

OEM Ford Clockspring BE5Z-14A664-A Designed for Proper Fit and Performance

The Ford part BE5Z-14A664-A Clockspring as a genuine Ford Clock Spring component delivers both authenticity and reliability. This item carries a warranty from the manufacturer which guarantees 12-month, 12,000-mile of use. The Ford BE5Z-14A664-A Clockspring is used with Ford Fusion, Edge vehicles and Mercury Milan models and Lincoln MKZ, MKX, Zephyr models. The original Ford part will bear the manufacturer part number: BE5Z-14A664-A and where it is made at Ford. It has the code: 14A664.
This component has dimensions of 6.2 x 4.6 x 4.6 inches and its weight is approximately 0.60 Pounds. The part BE5Z14A664A is available in New condition while meeting the standards of the product rating. The Cover And Contact Plate Assembly; Air Bag Clockspring belongs to the Direct Replacement category to guarantee it is suitable for its specific vehicle applications. This part BE5Z-14A664-A replaces 6E5Z-14A664-B, 8E5Z-14A664-A. The inventory reference for this item is SKU: BE5Z-14A664-A. The Ford manufacturer issues a factory warranty for this component which ensures dependable operation and peak performance. You can find delivery and returns information on our Shipping Policy and Return Policy pages.
Original equipment manufacturer parts are of the top standards and their performance is outstanding and top notch. This is explained by the fact that they follow the official manufacturing techniques of Ford, use of premium material and meets high standards of quality. Our site is worth visiting, in case you need high-quality and affordable OEM Ford components. We promise the optimal priced Ford parts on a wide range. You can relax that all OEM products you buy from us include a manufacturer warranty and will be covered by our simple and easy-to-use return policy, so you will not worry about buying a part.