FordParts
My Garage
My Account
Cart
OEM Ford Taurus X Oil Pan
Oil Drain Pan- Select Vehicle by Model
- Select Vehicle by VIN
Select Vehicle by Model
orMake
Model
Year
Select Vehicle by VIN
For the most accurate results, select vehicle by your VIN (Vehicle Identification Number).
1 Oil Pan found

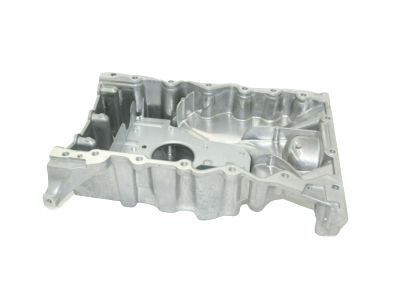
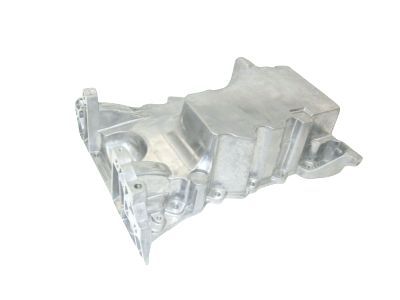
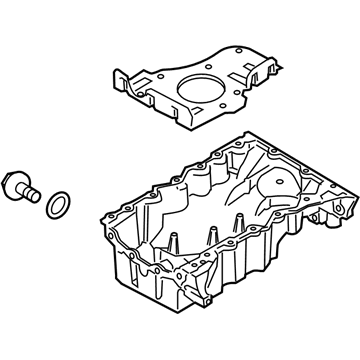
Ford Taurus X Oil Pan Part Number: 7T4Z-6675-A
$138.55 MSRP: $201.67You Save: $63.12 (32%)Ships in 1-3 Business Days
Ford Taurus X Oil Pan
OEM Oil Pan boasts unmatched quality. Each part goes through full quality checks. They adhere to Ford's official factory standards. These steps remove flaws and inconsistencies. So you can get Oil Pan with long life and a perfect fit. Come to our website and find genuine Ford Taurus X parts. We keep a wide inventory of OEM Taurus X parts at the highly affordable prices. It's easy to search, compare, and pick what you need. You'll love the clear info and simple checkout. We offer top-rated customer service, and we reply fast. We also ship promptly to ensure your order arrives on time.
It deals with the Oil Pan, which proves the sound construction of this Ford model, the Taurus X Crossover Utility, manufactured between 2008 and 2009. This Oil Pan is used as a storage tank for the engine oil and thus plays a vital role of circulating this fluid to cool and lubricate various components of the engine to enhance its efficiency and safety. Intended for use with wet sump type oiling, this oil pan gathers oil that is circulated in the engine to avoid leakage and oil movement during cornering forces. It is used in many Taurus X models as is evident in the detail and as such the Oil Pan can be considered as a flexible investment that any Taurus X owner would be wise to consider. For example, modern designs incorporate cast aluminum; this enhances the strength of the product while at the same time increasing efficiency of the engine. The Oil Pan is well designed in the automobile market to withstand the force of impact and has enough capacity to contain oil as per various operating conditions. This element is especially important for a car that needs to provide dependable and high-performance ride characteristics. Being an external part of the Ford Taurus X, the Oil Pan is designed in a highly advanced way to match the overall compatibility of the car, in order to make the car function effectively, thus making the journey safer on the roads. In conclusion, the Oil Pan is a perfect example of Ford products' quality, and it should be part of any Taurus X car.
Ford Taurus X Oil Pan Parts and Q&A
- Q: How to remove the oil pan from the engine on Ford Taurus X?A:Engine extraction starts with detaching the motor from the vehicle while cleaning the work area to stop machine breakdown issues. First unfasten the 8 bolts and remove the Flywheel and then the crankshaft sensor ring. Drive engine stand bolts through the cylinder block but exclude the oil pan and implement the engine on a proper stand for support. First remove any heat shield when present after disconnecting the block heater electrical connector then detach all engine block heater harness retainers to take out the harness. Disconnect the PCV hose that connects to the PCV Valve as well as disconnect the Throttle Body electrical connector and the wiring harness retainers on the upper intake manifold. At the beginning of the procedure remove the upper intake manifold support bracket bolt after that take off the fuel tube bracket bolt from the upper intake manifold followed by the 6 bolts securing the upper intake manifold while discarding all used gaskets. Unplug the Power Steering Pressure switch electrical connector along with the fuel efficient power steering system solenoid electrical connector and the Front Wheel Drive RH Catalyst Monitor Sensor electrical connector. The technicians should disconnect the solenoid for RH Variable Camshaft Timing and all 3 RH coil-on-plug connectors and the RH Heated Oxygen Sensor electrical connector. The wiring harness retainers should be detached from the RH valve cover before disconnecting the LH CMS and VCT solenoid electrical connectors and the 3 LH coil-on-plug connectors and the wiring harness retainers from the LH valve cover. Begin the A/C compressor clearance operation by removing six bolts and six coil-on-plugs but keep the A/C compressor affixed to the cylinder block before unfastening the A/C compressor nut and stud. The PSP tube bracket-to-Power Steering Pump bolt needs removal along with the nut and PSP tube bracket from the RH valve cover stud bolt so you can place the power steering pump aside after taking out its 3 bolts. The LH Catalytic Converter needs removal by unattaching 4 nuts together with the gasket and discarding all components while the accessory drive belt tensioner demands bolt removal from its 3 locations. In Front Wheel Drive applications the RH catalytic converter must also be removed by performing the same steps. The cylinder block coolant drain occurs by taking off the RH and LH cylinder block drain plugs. The procedure starts with valve cover gasket discarding of the LH mechanism followed by removing and loosening the cover. The same operation applies to the RH valve cover. The technician must use the VCT Spark Plug Tube Seal Remover and Handle device to remove and inspect damaged VCT solenoid seals plus spark plug tube seals. Begin by using a Strap Wrench to detach the crankshaft bolt with its washer before cutting them off through discarding the bolt but using a 3-Jaw Puller to separate the crankshaft pulley along with an Oil Seal Remover to extract the crankshaft front seal. Remove the engine mount bracket and the 2 engine mount studs by using hand tools alone before proceeding with engine mount bracket bolts. Reverse the engine front cover bolts before inserting six of them into the holes throughout the front cover. Alleviate the seal resistance by tightening the bolts in crisscrossed formation until the front cover can be detached. Use the 16 oil pan bolts to begin until the seal is released and then utilize 2 oil pan bolts to insert into the threaded holes before removing the oil pan. Employ 3M Roloc Bristle Disk (2-in white, part number 07528) at 15,000 rpm to clean the engine front cover and oil pan while washing all foreign items away completely. The exposed engine areas need protection from contamination by clean lint-free shop towels while cleanups of the cylinder block sealing surfaces should start by removing large silicone or gasket material then use silicone gasket remover followed by metal surface prep to eliminate all oil and coolant residue to properly position the 2 locating dowel pins.


