FordParts
My Garage
My Account
Cart
OEM Ford Taurus X Timing Cover
Engine Timing Cover- Select Vehicle by Model
- Select Vehicle by VIN
Select Vehicle by Model
orMake
Model
Year
Select Vehicle by VIN
For the most accurate results, select vehicle by your VIN (Vehicle Identification Number).
1 Timing Cover found


Ford Taurus X Timing Cover, Front Part Number: 7T4Z-6019-C
$127.10 MSRP: $185.00You Save: $57.90 (32%)Ships in 1-3 Business Days
Ford Taurus X Timing Cover
OEM Timing Cover boasts unmatched quality. Each part goes through full quality checks. They adhere to Ford's official factory standards. These steps remove flaws and inconsistencies. So you can get Timing Cover with long life and a perfect fit. Come to our website and find genuine Ford Taurus X parts. We keep a wide inventory of OEM Taurus X parts at the highly affordable prices. It's easy to search, compare, and pick what you need. You'll love the clear info and simple checkout. We offer top-rated customer service, and we reply fast. We also ship promptly to ensure your order arrives on time.
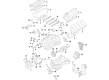
Another part that contributes towards the reliability and performance of Ford Taurus X is the Ford Taurus X Timing Cover as the car model is a crossover utility vehicle manufactured between 2008 and 2009. Located to shield the timing mechanism which is a belt or a chain, the Timing Cover is made of robust material like aluminum, plastic and steel to prevent intrusion of debris on the timing system. This very part comes with gaskets to increase the shield of the timing belt and thus improving on the overall efficiency and safety of the Ford Taurus X. From the various models of the Taurus X, it is clear that they are equally compatible which goes to show the standard and reliability that comes with the Timing Cover. The Ford Taurus X has a great contemporary style and enhanced engine features such as a strong 3.5L Duratec 35 V6 and, therefore, the Timing Cover must always be in good condition. Despite all the problems that accompanied the creation of the Ford Taurus X, it still stands as an example of the company's devotion to high quality, and the Timing Cover takes a big part in the vehicle's durability. Replacement for the Timing Cover is critical once it has worn out and therefore underlines the value of its role in the overall maint enance of the Ford Taurus X An ideal combination of strength and performance places the Ford Taurus X Timing Cover as a crucial component of this fantastic car.
Ford Taurus X Timing Cover Parts and Q&A
- Q: How to Service and Repair the Engine Front Timing Cover to Prevent Engine Failure on Ford Taurus X?A:The cleaning process for engine front cover repairs must be thorough to protect against engine failure brought by foreign material entry. Place the vehicle on a hoist before starting the repair process of the A/C system. Service professionals should remove the air cleaner outlet pipe followed by front wheels along with tires then disconnect the accessory Drive Belt and tensioner along with the power steering belt. Remove the degas bottle together with the Evaporative Emission Canister Purge Valve after you disconnect the A/C tubes while throwing away the O-ring seals. The first step to power steering fluid drainage involves draining the fluid while you remove the RH inner fender splash shield. Start by using a strap wrench to remove the crankshaft bolt with its washer before throwing away the bolt and continuing with a 3-jaw puller to detach the crankshaft pulley along with an oil seal remover to remove the crankshaft front seal. The Y-pipe becomes removable after disconnecting its gaskets and nuts which allows draining of engine oil along with power steering reservoir hose detachment. Begin by removing the valve covers then move on to unplug the wiring harness retainer along with the disconnecting the power steering connections between pressure switch and solenoid. A floor jack along with an Oil Pan Holding Fixture should be positioned beneath the oil pan before disconnecting engine mount brace, engine mount nuts and engine mount bracket. Use hand tools exclusively when removing the engine mount bolts along with the stud fasteners. Use a 3M Roloc Bristle Disk (part number 07528) to clean the engine front cover with care against the entry of foreign substances into the engine space. Use specified areas of Motorcraft High Performance Engine RTV Silicone before installing the engine front cover with bolts 17, 18, 19, and 20 in sequential order. Secure the engine mount bracket and its bolts first then add the engine mount with all its bolts while torquing them according to specifications. Reinstall the A/C system tubes followed by Power Steering Pump components then valve covers and check that all connections maintain their proper position. You should install the exhaust Y-pipe with new nuts before lubricating the crankshaft front seal bore and placing a new crankshaft front seal. Put the crankshaft pulley into position and follow a staged process of tightening the retaining bolt. The assembly continues with the A/C system and the engine and power steering system receive new clean fluids. After confirming complete installations all parts need to be checked and secured to make the vehicle operational.

Related Ford Taurus X Parts
 Ford Taurus X Cam Gear
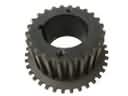 Ford Taurus X Crankshaft Gear
 Ford Taurus X Cylinder Head
 Ford Taurus X Cylinder Head Bolts
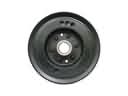 Ford Taurus X Harmonic Balancer
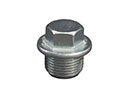 Ford Taurus X Oil Drain Plug
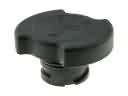 Ford Taurus X Oil Filler Cap
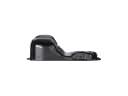 Ford Taurus X Oil Pan
 Ford Taurus X Oil Pump
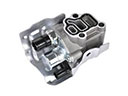 Ford Taurus X Spool Valve
 Ford Taurus X Valve Cover Gasket
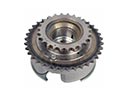 Ford Taurus X Variable Timing Sprocket