FordParts
My Garage
My Account
Cart
OEM Mercury Body Control Module
BCM- Select Vehicle by Model
- Select Vehicle by VIN
Select Vehicle by Model
orMake
Model
Year
Select Vehicle by VIN
For the most accurate results, select vehicle by your VIN (Vehicle Identification Number).
30 Body Control Modules found


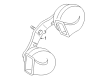
Mercury Ignition Immobilizer Module Part Number: 3W1Z-15607-AA
$52.43 MSRP: $60.00You Save: $7.57 (13%)Product Specifications- Other Name: Transceiver
- Replaces: 3R3Z-15607-AA


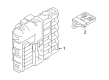
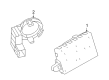
Mercury Control Module Part Number: BL8Z-15604-B
$249.70 MSRP: $400.00You Save: $150.30 (38%)Product Specifications- Other Name: Module - Door Lock And Alarm; Body Control Module; Module
- Replaces: 9L8Z-15604-A, 8L8Z-15604-A, 8L8Z-15604-B, AL8Z-15604-B, AL8Z-15604-A, BL8Z-15604-A


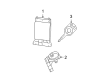
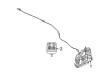
Mercury Control Module Part Number: AT4Z-15604-E
Product Specifications- Other Name: Module - Door Lock And Alarm; Body Control Module; Module
- Manufacturer Note: Smart Junction Box
- Replaces: 7T4Z-15604-B, 7T4Z-15604-C, 9T4Z-15604-A, AT4Z-15604-C, AT4Z-15604-A, AT4Z-15604-D, 8T4Z-15604-A


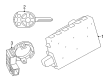
Mercury Receiver Part Number: 5F1Z-15604-C
Product Specifications- Other Name: Kit - Alarm/Keyless Lock System
- Replaces: 4F1Z-15604-CB


Mercury Control Module Part Number: 9E5Z-15604-F
Product Specifications- Other Name: Module - Door Lock And Alarm; Body Control Module; Receiver
- Manufacturer Note: Smart Junction Box
- Replaces: 9E5Z-15604-E, 9E5Z-15604-A, 9E5Z-15604-C, 9E5Z-15604-D


Mercury Control Module Part Number: 8E5Z-15604-B
Product Specifications- Other Name: Kit - Alarm/Keyless Lock System; Anti-Theft Alarm Control Unit; Body Control Module; Receiver; Module

Mercury Control Module Part Number: 8E5Z-15604-A
Product Specifications- Other Name: Kit - Alarm/Keyless Lock System; Anti-Theft Alarm Control Unit; Body Control Module; Receiver; Module


Mercury Control Module Part Number: 7E5Z-15604-B
Product Specifications- Other Name: Kit - Alarm/Keyless Lock System; Body Control Module
- Manufacturer Note: Smart Junction Box
- Replaces: 7E5Z-15604-A


Mercury Control Module Part Number: 6E5Z-15604-CB
Product Specifications- Other Name: Kit - Alarm/Keyless Lock System; Anti-Theft Alarm Control Unit; Body Control Module; Receiver; Module
- Replaces: 6E5Z-15604-CA


Mercury Control Module Part Number: 6E5Z-15604-AB
Product Specifications- Other Name: Kit - Alarm/Keyless Lock System; Anti-Theft Alarm Control Unit; Body Control Module; Receiver; Module
- Replaces: 6E5Z-15604-AA


Mercury Control Module Part Number: 4F2Z-15604-DA
Product Specifications- Other Name: Kit - Alarm/Keyless Lock System; Body Control Module

Mercury Control Module Part Number: 9G1Z-15604-B
Product Specifications- Other Name: Module - Door Lock Actuator; Body Control Module; Module - Door Lock And Alarm

Mercury Module Part Number: 5L8Z-15604-FA
Product Specifications- Other Name: Kit - Alarm/Keyless Lock System
- Manufacturer Note: Smart Junction Box
- Replaces: 5L8Z-15604-AA

Mercury Body Control Module Part Number: YF1Z-14B205-DB
Product Specifications- Other Name: Module - Multi Function
Mercury Body Control Module Part Number: YF1Z-14B205-BB
Product Specifications- Other Name: Module - Multi Function

Mercury Control Module Part Number: 9L9Z-15604-B
Product Specifications- Other Name: Kit - Alarm/Keyless Lock System; Body Control Module
- Replaces: 8L9Z-15604-CB

Mercury Control Module Part Number: 9G1Z-15604-A
Product Specifications- Other Name: Module - Door Lock And Alarm; Body Control Module; Antitheft Module; Module
- Replaces: 8G1Z-15604-A
Mercury Control Module Part Number: 7L9Z-15604-A
Product Specifications- Other Name: Kit - Alarm/Keyless; Body Control Module; Kit - Alarm/Keyless Lock System
Mercury Control Module Part Number: 6L9Z-15604-BA
Product Specifications- Other Name: Kit - Alarm/Keyless; Body Control Module; Kit - Alarm/Keyless Lock System
Mercury Control Module Part Number: 6F2Z-15604-A
Product Specifications- Other Name: Kit - Alarm/Keyless Lock System; Body Control Module
- Replaces: 6F2Z-15604-DC, 6F2Z-15604-DB
| Page 1 of 2 |Next >
1-20 of 30 Results
Mercury Body Control Module
If you own Mercury and want to keep it in top shape, choosing OEM Body Control Module is a smart move. They are precisely engineered and follow strict factory standards. They are made in advanced facilities that use cutting edge technology. Each part goes through thorough testing to confirm strength and safety, so you can trust it. FordPartsDeal.com gives you genuine Mercury Body Control Module at some of the affordable online prices without cutting quality. Every OEM Mercury part includes the manufacturer's warranty, easy returns, and super-fast delivery. So why wait? Shop now and get your vehicle back to peak condition.
Mercury Body Control Module harmonizes all the electric activities in the cabin, reduction of glitches, and the confidence of daily driving. Mercury was born in 1938 and cut a niche by blending soft ride, hard sheet metal, and midsize feasibility that was attractive to families, gearheads, and weekend cruisers. Post-war booms and fuel panics notwithstanding, Mercury continued to dial soft suspensions and silent cabins as long drives remained easy. The Roman term messenger name indicates that Mercury was hinting at speed without being rude in the manners of the streets. Cougar and Marquis made it known that Mercury could mix feisty engines with wide seats and rational prices. Even to date, 2011, fans still remember the as having cabins that were quiet with value that was not cheap. Large trunks, simple dashboards, and sound insulating compound emphasized a mission that was geared towards practical comfort rather than showroom drama. Finding a middle ground between emotion and price, the brand avoided flashy tricks and provided upgrades that were important on broken roads. The Body Control Module, which is inside the firewall and provides connection between signals to the windows, locks, lamps, and climate bits, filters out the voltage spikes before they burn anything. Since the Body Control Module takes control of routing power, it cuts wiring, reduces weight, and eliminates crank-over pull strains during freezing dawns. An active Body Control Module ensures that key fob clicks are sharp, dash lights are in place, and safety interlocks are set to ensure that doors latch precisely when they are supposed to. This is because solid-state drivers within the Body Control Module are open to software updates that will increase the lifespan without expensive part replacement.
Mercury Body Control Module Parts and Q&A
- Q: How to service and repair the Body Control Module in the Smart Junction Box on Mercury Mariner?A:Service and repair of the Smart Junction Box (SJB) should start with disconnecting the battery. The procedure for removing the SJB requires you to upload its configuration data to a diagnostic tool because the information is necessary for downloading into the new module after installation. Before accessing the SJB you must take off the floor console SJB cover followed by removal of the transmission selector lever bezel from the floor console finish panel. Engage the parking brake before removing the parking brake lever boot from the floor console finish panel which you should follow with removal of the floor console finish panel itself. You need to unscrew the SJB before disconnecting its electrical connectors to finally take out the SJB. Install the new SJB by first connecting its electrical connectors then placing the unit where it belongs before using the screw to secure it. You should reinstall the parking brake lever boot on the floor console finish panel while also releasing the parking brake before installing the transmission selector lever bezel and floor console SJB cover. Reconnect the battery. The SJB configuration data download from the diagnostic tool to the SJB will trigger the clearance of DTC B2477 thus signaling properly programming the SJB. Use diagnostic tool equipment to train the tire pressure sensors so the SJB will clear DTCs B2868, B2869, B2870, and B2871 till the sensors show recognition. Perform the SJB on-demand self-test to clear DTC C2780 because it enables the SJB to leave manufacturing mode before validating all other diagnostic codes. The diagnostic process should end with clearing all persistent DTCs while checking for any remaining DTCs.
- Q: How to service and repair the Driver Door Body Control Module on Mercury Milan?A:The first step when servicing a Driver Door Module (DDM) consists of uploading its module configuration to the right scan tool which will be used for downloading the data into the new module post-installation. Remove the panel from the driver door trim before removing two nuts that require tightness at 3 Nm (27 lb-in). The DDM removal process starts with disconnecting its two electrical connectors. After performing the removal steps in reverse order install the DDM so technicians can download its configuration data from the scan tool onto the new module. Take necessary care with electronic modules because they are vulnerable to static electrical discharges that may lead to damage exposure.


Related Mercury Parts
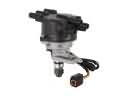 Mercury Distributor
 Mercury Coolant Temperature Sensor
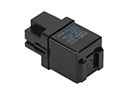 Mercury Flasher Relay
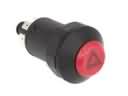 Mercury Hazard Warning Switch
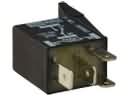 Mercury Headlight Relay
 Mercury Horn Relay
 Mercury Ignition Lock Cylinder
 Mercury Mirror Switch
 Mercury Oil Pressure Gauge
 Mercury Turn Signal Switch
 Mercury Windshield Washer Pump
 Mercury Yaw Sensor