FordParts
My Garage
My Account
Cart
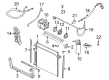
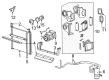
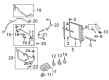
OEM Mercury Mountaineer A/C Accumulator
Accumulator- Select Vehicle by Model
- Select Vehicle by VIN
Select Vehicle by Model
orMake
Model
Year
Select Vehicle by VIN
For the most accurate results, select vehicle by your VIN (Vehicle Identification Number).
5 A/C Accumulators found


Mercury Mountaineer Dehydrator Part Number: XL2Z-19C836-AC
$63.87 MSRP: $105.09You Save: $41.22 (40%)
Mercury Mountaineer Dehydrator Part Number: F5TZ-19C836-A
$154.82 MSRP: $214.18You Save: $59.36 (28%)Ships in 1-2 Business Days
Mercury Mountaineer Drier Part Number: JU2Z-19C836-B


Mercury Mountaineer Dehydrator Part Number: 1L2Z-19C836-BA
Mercury Mountaineer Dehydrator Part Number: 1L2Z-19C836-AA
Mercury Mountaineer A/C Accumulator
OEM A/C Accumulator boasts unmatched quality. Each part goes through full quality checks. They adhere to Mercury's official factory standards. These steps remove flaws and inconsistencies. So you can get A/C Accumulator with long life and a perfect fit. Come to our website and find genuine Mercury Mountaineer parts. We keep a wide inventory of OEM Mountaineer parts at the highly affordable prices. It's easy to search, compare, and pick what you need. You'll love the clear info and simple checkout. We offer top-rated customer service, and we reply fast. We also ship promptly to ensure your order arrives on time.
Mercury Mountaineer A/C Accumulator Parts and Q&A
- Q: How to Service the A/C Accumulator in the HVAC System on Mercury Mountaineer?A:Refrigerant should be recovered first before starting the suction accumulator service process of HVAC systems. As a next step in the procedure, first remove the PCM from the system while also unbolting the low-side service port stem bracket. Reinstall the bracket with a torque of 11 Nm (8 lb-ft). Disconnect the electrical connector of the A/C cycling switch then unscrew the suction accumulator bolt using the torque setting of 11 Nm (8 lb-ft) which will be used again during reinstallation. After removal of the PCM bracket bolt, work to remove the PCM bracket nut before taking out the PCM bracket. When reinstalling the suction accumulator stud you must tighten it to 11 Nm (8 lb-ft). You should disconnect the suction accumulator-to-compressor line bracket nut at the condenser-to-evaporator line bracket when working on 4.6L vehicles. Use a screwdriver to remove the suction accumulator fitting nuts after which you should detach the fittings while throwing away the O-ring seals. The reinstall process requires tightening the fittings to a torque of 8 Nm which equals 71 lb-in. Drain and remove the suction accumulator bracket bolt followed by the suction accumulator. The installation ends by following the reverse order of removal while adding new O-ring seals and performing proper PAG oil lubrication of the refrigerant system. The refrigeration system ends with evacuating before testing for leaks and performing the charging process.

Related Mercury Mountaineer Parts
 Mercury Mountaineer A/C Compressor
 Mercury Mountaineer A/C Compressor Clutch
 Mercury Mountaineer A/C Compressor Cut-Out Switches
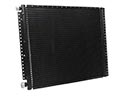 Mercury Mountaineer A/C Condenser
 Mercury Mountaineer A/C Hose
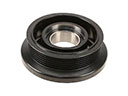 Mercury Mountaineer A/C Idler Pulley
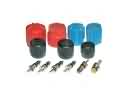 Mercury Mountaineer A/C System Valve Core
 Mercury Mountaineer Blower Motor
 Mercury Mountaineer Blower Motor Resistor
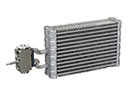 Mercury Mountaineer Evaporator
 Mercury Mountaineer Heater Core
 Mercury Mountaineer HVAC Pressure Switch