FordParts
My Garage
My Account
Cart
OEM Mercury Sable Clock Spring
Spiral Cable Clock Spring- Select Vehicle by Model
- Select Vehicle by VIN
Select Vehicle by Model
orMake
Model
Year
Select Vehicle by VIN
For the most accurate results, select vehicle by your VIN (Vehicle Identification Number).
7 Clock Springs found


Mercury Sable Clockspring Part Number: 8G1Z-14A664-A
$108.95 MSRP: $158.58You Save: $49.63 (32%)

Mercury Sable Clockspring Part Number: F7AZ-14A664-BA


Mercury Sable Clockspring Part Number: 4F1Z-14A664-AB
Mercury Sable Clockspring Part Number: YF1Z-14A664-AA

Mercury Sable Clockspring Part Number: F8DZ-14A664-AA
Mercury Sable Clockspring Part Number: F6ZZ-14A664-AA

Mercury Sable Clockspring Part Number: 2F1Z-14A664-AA
Mercury Sable Clock Spring
OEM Clock Spring boasts unmatched quality. Each part goes through full quality checks. They adhere to Mercury's official factory standards. These steps remove flaws and inconsistencies. So you can get Clock Spring with long life and a perfect fit. Come to our website and find genuine Mercury Sable parts. We keep a wide inventory of OEM Sable parts at the highly affordable prices. It's easy to search, compare, and pick what you need. You'll love the clear info and simple checkout. We offer top-rated customer service, and we reply fast. We also ship promptly to ensure your order arrives on time.
Mercury Sable Clock Spring Parts and Q&A
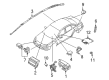
- Q: How to Service and Repair the Clock Spring Assembly on Mercury Sable?A:The procedure for Clock Spring assembly service starts by checking that the air bag warning indicator lights up after removing the right Restraints Control Module (RCM) fuse when turning the ignition switch to ON position. A complete operational check must be performed on the Supplemental Restraint System to ensure it has no faults before the vehicle is handed back to the customer. The first step requires positioning road wheels straight ahead to protect the Clock Spring followed by uninstalling the driver air bag module. Begin the procedure by disconnecting electrical components from both the Steering Wheel angle sensor and steering wheel before unscrewing the two attaching points. The process to remove the Clock Spring requires disconnecting its electrical connector followed by the removal of two screws. Do not install the Clock Spring in an incorrect central position since early failure could happen so perform the centralization procedure once again if it seems uncertain. The complete rotation of the Clock Spring inner rotor should be limited to avoid damaging the internal ribbon wire. Install an anti-rotation key after the steering wheel installation or maintain the initial Clock Spring centering when removing the key during previous work. Two complete rotations of the inner rotor clockwise motion will help achieve the correct centering position. The installation process requires you to install the steering wheel followed by removing the anti-rotation key if a new Clock Spring exists and finish the sequence by mounting the driver air bag module.
- Q: What Precautions Should Be Taken When Servicing the Clock Spring Assembly on Mercury Sable?A:Safety glasses should always be worn during Clock Spring assembly servicing to prevent injuries that could occur due to accidental air bag deployment. Always handle live air bag modules by directing the air bag and trim cover opposite your body and maintain them with the surface facing upward. Avoid using memory saver devices. The warning light on the air bag becomes active when the RCM fuse is taken out while the ignition remains turned on but this is a standard condition that does not validate a problem. All SRS systems need to show both full functionality without any detected faults before rebuilding vehicles for customers. The repair requires replacement of a new component but if problems continue the technician should reinstall the existing part followed by another diagnostic test. The first step requires system depowering followed by wheel alignment in a straight position. First reduce the Steering Wheel then lower the steering column opening cover with reinforcement followed by Clock Spring tape application across the spring for stopping rotation. First tilt-down the steering column and remove the tilt wheel components starting with the handle followed by the shank and then extract the ignition switch lock cylinder by setting the position to RUN and activating the release. The first step to replace the Clock Spring involves extracting the PATS transmitter from its position after removing the lower and upper steering column shrouds then disconnecting the key-in-ignition warning indicator switch. The shift indicator tube must be detached in car models with column shift. Disconnect the Clock Spring electrical connector pin-type retainers before directing the Clock Spring wire harness out of the wire holders. Use a tool to extract the retaining clips from the Clock Spring to perform its removal. New Clock Spring installation starts by removing the key while maintaining the rotor position in the center without rotation. When recentering the rotor you should keep the outer housing still while pushing the anti-rotation tab and turning the rotor counterwise until you feel resistance then move it three clockwise turns to achieve the center position. When performing a second use of an existing Clock Spring you must detach the tape without permitting the Clock Spring to rotate. Place the installed Clock Spring onto the steering column before you secure retaining clips while you guide the wire harness. Vehicle models with column shift need the installation of both the shift indicator tube and cable. The installation includes connecting Clock Spring electrical wires while mounting the key-in-ignition warning indicator switch as well as the PATS transmitter using its retaining screw. Secure the steering column shrouds by aligning their upper and lower parts and using screws for attachment. First install the ignition switch lock cylinder to its OFF mark until you add the tilt wheel handle and shank for placement. When you decide to reuse the Clock Spring you should remove the tape before installing the lower steering column opening cover with reinforcement by tightening bolts to 7 Nm (62 lb in). Finish the project by placing back the steering wheel and restarting the power system.


Related Mercury Sable Parts
 Mercury Sable Air Bag Control Module
 Mercury Sable Air Bag Sensor
 Mercury Sable Airbag
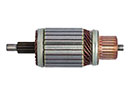 Mercury Sable Armature
 Mercury Sable Coolant Temperature Sensor
 Mercury Sable Crankshaft Position Sensor
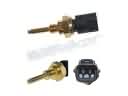 Mercury Sable Cylinder Head Temperature Sensor
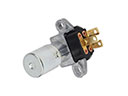 Mercury Sable Dimmer Switch
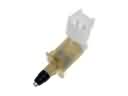 Mercury Sable Door Jamb Switch
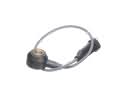 Mercury Sable Knock Sensor
 Mercury Sable Oil Pressure Gauge
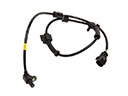 Mercury Sable Speed Sensor