FordParts
My Garage
My Account
Cart
OEM Mercury Seat Heater Switch
Seat Heater Level Switch- Select Vehicle by Model
- Select Vehicle by VIN
Select Vehicle by Model
orMake
Model
Year
Select Vehicle by VIN
For the most accurate results, select vehicle by your VIN (Vehicle Identification Number).
4 Seat Heater Switches found


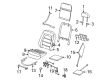
Mercury Switch Assembly, Front Part Number: 98AZ-14D694-AA
$55.25 MSRP: $90.91You Save: $35.66 (40%)Ships in 1-2 Business DaysProduct Specifications- Other Name: Seat Heater Switch, Front, Left; Power Seat Switch
- Position: Front


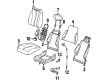
Mercury Switch Assembly Part Number: F8RZ-14D694-KA
$16.03 MSRP: $25.45You Save: $9.42 (38%)Product Specifications- Other Name: Seat Heater Switch; Power Seat Switch; Switch
- Manufacturer Note: RH AND LH

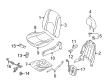
Mercury Switch Part Number: 5L8Z-14D694-AAA
$25.26 MSRP: $34.37You Save: $9.11 (27%)Product Specifications- Other Name: Switch Assembly; Seat Heater Switch


Mercury Switch Assembly Part Number: 3L2Z-14D694-AA
Product Specifications- Other Name: Seat Heater Switch; Power Seat Switch; Seat Heat Switch; Switch
Mercury Seat Heater Switch
If you own Mercury and want to keep it in top shape, choosing OEM Seat Heater Switch is a smart move. They are precisely engineered and follow strict factory standards. They are made in advanced facilities that use cutting edge technology. Each part goes through thorough testing to confirm strength and safety, so you can trust it. FordPartsDeal.com gives you genuine Mercury Seat Heater Switch at some of the affordable online prices without cutting quality. Every OEM Mercury part includes the manufacturer's warranty, easy returns, and super-fast delivery. So why wait? Shop now and get your vehicle back to peak condition.
Mercury Seat Heater Switch heats up the seats in a fast manner to ensure that each drive is comfortable in cases where the weather is very cold. In 1939, Mercury found its own niche by combining smooth suspensions with cabins quiet enough to have a conversation over the road, and this combination of ride quality and cost gave the company the ability to place itself above bargain transportation without resorting to luxury pose, and the badge, appropriated from the fleet-footed Roman deity, became a shortcut to cars that looked sharp, absorbed bumps, and remained civilized on the road. Mercury also maintained finely trimmed interiors, roomy seats, and smooth handling as non-negotiable features, and the comfort ensured could keep abreast with the times up until 2011, when its production was suspended but the brand image of no-nonsense comfort was still parked in the consciousness of the population. In the same tradition, Mercury installs the Seat Heater Switch to pass electricity through embedded elements in the seat that drivers use to select among three heat levels plus a status lamp, lock temperatures within safe ranges with resistors, and seal the unit to prevent shorting by winter grit or spilled coffee, making the Seat Heater Switch a control that is tough and easy to use with its glove-friendly controls keeping warmth focused on backs and thighs. With a pop of the Mercury panel and a minutes-long swap of a worn Seat Heater Switch, drivers are smiling with a warm and cozy back and can keep their hands steady on the seat instead of tapping at touchscreen menus.
Mercury Seat Heater Switch Parts and Q&A
- Q: How to safely service the Seat Heater Switch with an air bag supplemental restraint system (SRS) on Mercury Mariner?A:The heated seat switch service requires safety glasses when working on vehicles featuring air bag SRS systems to protect from accidental air bag deployment injuries. Probing air bag module or pretensioner connectors should be avoided because such action may cause deployment which presents serious injury risks. Safety glasses become necessary equipment for anyone who works on safety belt pretensioners and their associated components because they represent a pyrotechnic device. Memory saver devices must not be utilized because they fail to decrease the odds of injury. Begin by depowering the SRS. Start by removing the recliner handle cover together with the outboard front seat side cushion shield while you detach two screws when working on the outboard passenger seat shield before sliding it forward. Unplug the heated seat switch electrical link together with the additional disconnected accessory of the seat control switch electrical connector if present. The driver seat side cushion shield requires removing three screws before disconnecting its heated seat switch electrical connector. First reinstall the heated seat switch after completing the reverse installation steps and then activate the SRS with power before giving the vehicle back to the customer as long as the system operates without any issues.
- Q: How to safely service the Seat Heater Switch with an air bag supplemental restraint system (SRS) on Mercury Mountaineer?A:Safety glasses should be worn when servicing heated seat switches of vehicles with SRS air bag supplemental restraint systems and when touching air bag modules or safety belt pretensioners to prevent accidental deployment injuries. The servicing process must start only after depowering the SRS system if the seat integrates seat-mounted side air bags or safety belt pretensioners. A removal of the RCM fuse coupled with an ignition switch ON condition will cause the air bag warning lamp to illuminate but this does not signify a mechanical issue. The SRS needs to have full operation with no faults detected before handing over the vehicle to the customer. Begin with the front seat in position to reach the four mounting bolts while deactivating the SRS after which you should remove the seat in question. Remove the recliner handle and clip from the recliner if it includes them followed by taking off the lumbar adjuster knob and the seat backrest recliner lever. Begin by removing all screws present at the lumbar adjust mechanism and the rear trim section along with the lower trim section. The first step is to pull the lumbar mechanism slightly outward before taking the side trim off the mounting bracket while preserving its mounting tabs intact. Disconnect the heated seat switch electric wiring by pulling the locking devices on the edges and extracting it from the trim component. To install the heated seat switch put it inside the trim panel then connect the electrical connector. Apply the side trim to the seat spot and fasten its front retaining clip while avoiding extreme force that might damage the mounting tabs. After screwing in all mounting hardware at the lower side trim section and the lumbar adjust mechanism screws it is safe to proceed with the front retaining clip installation. Install the clip onto the recliner handle after you ensure the switch harness keeps the correct route and retention method. Complete the installation of the lumbar adjuster knob and seat backrest recliner handle by properly aligning the locator tab before reinstallation of the front seat and SRS can be repowered.

Related Mercury Parts
 Mercury Speedometer
 Mercury Antenna Cable
 Mercury Coolant Reservoir Hose
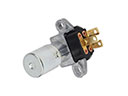 Mercury Dimmer Switch
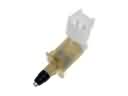 Mercury Door Jamb Switch
 Mercury Headlight Switch
 Mercury Instrument Cluster
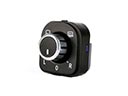 Mercury Mirror Switch
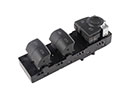 Mercury Power Window Switch
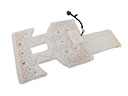 Mercury Seat Heater
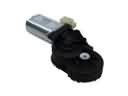 Mercury Seat Motor
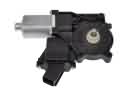 Mercury Window Motor