My Garage
Cart
Make sure this part fits

Ford 7F9Z-5A649-TR
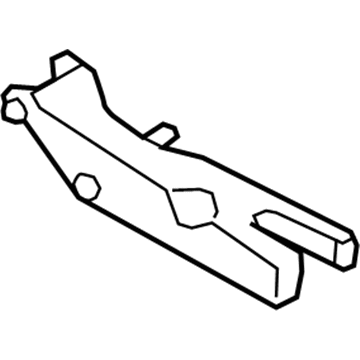
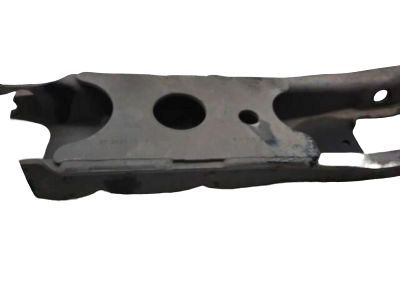
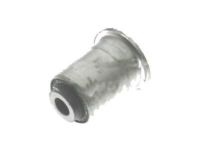
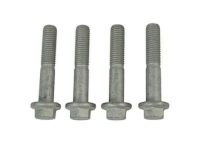
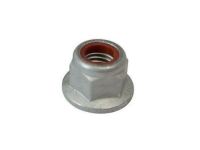
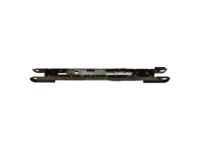
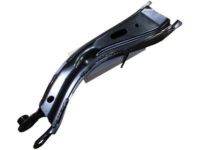
Lower Control Arm, Rear Passenger Side

2005-2009 Ford 7F9Z5A649TR

Customer Questions & Expert Answers (7)
Ford 7F9Z-5A649-TR Lower Control Arm, Rear Passenger Side
  • Part Description
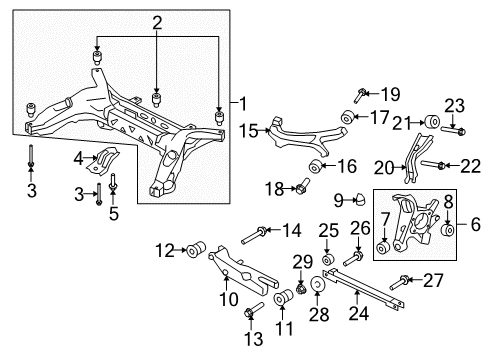
    Arm Assembly - Rear Suspension; Suspension Control Arm, Rear Right Lower, Rear Right Lower Rearward
  • Base No.
    5A649
  • Position
    Rear Lower Passenger Side
  • Replaces
    5F9Z-5A649-TR
  • Manufacturer
    Ford
Make sure this part fits
$66.54 MSRP: $92.05
You Save: $25.51 (28%)
Ships in 1-2 Business Days
1
ADD TO CART
  • Related Parts
  • Product Specifications
  • Vehicle Fitment
  • Customer Questions & Expert Answers
  • Product Specifications

    BrandGenuine Ford
    Base No.5A649
    Manufacturer Part Number7F9Z-5A649-TR
    Part DescriptionArm Assembly - Rear Suspension; Suspension Control Arm, Rear Right Lower, Rear Right Lower Rearward
    Other NamesControl Arm
    Manufacturer NoteLOWER ARM
    Item Dimensions26.8 x 6.5 x 14.7 inches
    Item Weight6.40 Pounds
    PositionRear Lower Passenger Side
    ConditionNew
    Fitment TypeDirect Replacement
    Replaces5F9Z-5A649-TR
    ManufacturerFord
    SKU7F9Z-5A649-TR
    Shipping & ReturnShipping Policy Return Policy
    Warning: California's Proposition 65
  • Vehicle Fitment

    Year Make Model Trim Engine
    2005-2007 Ford Five HundredLimited, SE, SEL6 Cyl 3.0 L GAS
    2005-2007 Ford FreestyleLimited, SE, SEL6 Cyl 3.0 L GAS
    2008-2009 Ford TaurusLimited, SE, SEL6 Cyl 3.5 L GAS
    2008-2009 Ford Taurus XEddie Bauer, Limited, SEL6 Cyl 3.5 L GAS
    2005-2007 Mercury MontegoLuxury, Premier6 Cyl 3.0 L GAS
    2008-2009 Mercury SableBase, Premier6 Cyl 3.5 L GAS
  • Customer Questions & Expert Answers

    Q:
    Can you verify if 7F9Z-5A649-TR is the right one for my car? Posted by FordPartsDeal Specialist
    A:
    Select Your Vehicle model to verify if part number 7F9Z-5A649-TR fits your car.
    Posted by FordPartsDeal Specialist
    Q:
    How to service and repair the trailing arm on Ford Freestyle? Posted by Customer
    A:
    Following are the instructions for measuring the trailing arm service and repair distance using a level ground setup. Shift the wheel and tire assembly to the side and put a jack stand under the vehicle front section to provide support. Insert a V-topped transmission jack under the lower control arm position where it meets the shock and spring assembly and lift until shock absorber and spring assembly becomes compressed. First remove the trailing arm-to-knuckle bolt along with its discarded parts and replace it with a new bolt that needs tightening to 105 Nm (77 ft. lbs.). The process requires you to replace the trailing arm-to-subframe components with new ones while securing them at 110 Nm (81 ft. lbs.). The rear suspension needs to be raised with a jack stand until the initial measurement between hub center and fender lip matches. Then tighten the lower arm bolts. The installation ends with performing the reverse order of removal steps.
    Posted by FordPartsDeal Specialist
    Q:
    How to service the trailing arm on Ford Five Hundred? Posted by Customer
    A:
    The first step for trailing arm service requires you to measure the hub center to fender lip distance when the vehicle rests on a flat surface. Take out the wheel and tire assembly before utilizing a suitable jackstand to stabilize the vehicle front sector. Apply a jackstand beneath the shock and spring assembly attachment point on the lower control arm then raise it to reduce the shock absorber and spring assembly compression. Begin by taking away both the trailing arm-to-knuckle nut and bolt before putting in new components of the same part numbers and torquing them to 81 ft. lbs (110 Nm). Move on to take out the trailing arm-to-subframe bolt and replace it with another new part containing the same part number before tightening it to 110 Nm (81 ft. lbs.). Tighten the lower arm bolts only after lifting the rear suspension with a jackstand until it reaches a measurement equal to the initial readings. Execute the installation by executing the reverse order of steps used during removal.
    Posted by FordPartsDeal Specialist
    Q:
    How to service and repair the trailing arm on Ford Taurus? Posted by Customer
    A:
    The first step toward servicing and repairing the trailing arm requires you to measure the wheel hub center to fender lip distance when the vehicle rests on level ground. Start the procedure by taking out the wheel and tire before installing a suitable jackstand under the vehicle front. Use a second jackstand to lift the attachment point of the control arm to shock absorber assembly while raising the assembly into compression mode. Follow the process by removing the trailing arm-to-wheel knuckle nut and bolt then tighten the new installation to 105 Nm (77 lb-ft). Discard the trailing arm-to-subframe bolt before installation while securing it to 110 Nm (81 lb-ft). Always use new suspension fasteners. Before tightening the lower arm bolts you must use a jackstand to lift the rear suspension until the center hub distance matches the original measurement from the fender lip. The installation ends with the reverse order of undoing steps.
    Posted by FordPartsDeal Specialist
    Q:
    How to service and repair the trailing arm on Ford Taurus X? Posted by Customer
    A:
    The first step toward servicing and repairing the trailing arm requires you to measure the wheel hub center to fender lip distance when the vehicle rests on level ground. Start the procedure by taking out the wheel and tire before installing a suitable jackstand under the vehicle front. Use a second jackstand to lift the attachment point of the control arm to shock absorber assembly while raising the assembly into compression mode. Follow the process by removing the trailing arm-to-wheel knuckle nut and bolt then tighten the new installation to 105 Nm (77 lb-ft). Discard the trailing arm-to-subframe bolt before installation while securing it to 110 Nm (81 lb-ft). Always use new suspension fasteners. Before tightening the lower arm bolts you must use a jackstand to lift the rear suspension until the center hub distance matches the original measurement from the fender lip. The installation ends with the reverse order of undoing steps.
    Posted by FordPartsDeal Specialist
    Q:
    How to service and repair the trailing arm on Mercury Sable? Posted by Customer
    A:
    Begin servicing the trailing arm by taking measurements between the wheel hub center and fender lip during flat-level vehicle position. Start by removing the wheel along with the tire before using a suitable jackstand to support the front of the vehicle. You should set a jackstand under the lower control arm at its shock and spring assembly point to elevate it and reduce the shock absorber and spring assembly tension. Install the new bolt by tightening it to 105 Nm (77 lb-ft) while removing and getting rid of the trailing arm-to-wheel knuckle bolt. The new bolt needs to be tightened to 110 Nm (81 lb-ft) when installing and replacing the trailing arm-to-subframe bolt. Always use new suspension fasteners. You must elevate the rear suspension with a jackstand until the measurement between the hub center and fender lip reaches the initial value before fastening the lower arm bolts. The reverse procedure should follow to finalize the installation process.
    Posted by FordPartsDeal Specialist
    Q:
    How to service the trailing arm on Mercury Montego? Posted by Customer
    A:
    The first step for servicing the trailing arm requires you to measure the hub center to fender lip distance when the vehicle rests on a flat surface. First remove the wheel together with the tire assembly. The old trailing arm-to-knuckle bolt needs replacement with a fresh one that requires tightening to 105 Nm (77 ft. lbs.). Follow this step by throwing away the trailing arm-to-subframe nut and bolt and installing fresh hardware which you should tighten up to 110 Nm (81 ft. lbs.). Before securing the lower arm bolts raise the rear suspension with a jack stand until you achieve the initial measurement distance between hub center and fender lip. The installation process ends by following every removal step backward and using new suspension fasteners to protect the complete system.
    Posted by FordPartsDeal Specialist
    If you have any questions about this product, please don't hesitate to ask us. We will be happy to help you!

OEM Ford 7F9Z-5A649-TR, Excellent Performance and Perfect Fitment

To ensure reliability, purchase Ford part # 7F9Z-5A649-TR Lower Control Arm, Rear Passenger Side. It is sometimes referred to as Ford Trailing Arm. For those Ford owners who aspire to maintain their vehicles in optimal shape, opting for OEM parts is a wise choice. Precisely engineered, these components adhere to stringent factory guidelines and are produced in state-of-the-art facilities using cutting-edge technologies. Moreover, they are subjected to thorough testing to certify their resilience and safety, thereby making them a dependable option for Ford owners.

FordPartsDeal.com is a leading supplier of genuine Ford parts such as Ford 7F9Z5A649TR Lower Control Arm, Rear Passenger Side. A vast selection of genuine Ford parts is available on our website, all offered at discounted prices. Every OEM Ford part is covered by the manufacturer's warranty, which also applies to our hassle-free return policy. Enjoy fast delivery service, ensuring you get your parts when you need them. Your shopping experience here is guaranteed to be pleasurable. For detailed Ford parts information, click here.
Choose FordPartsDeal for discounted prices, exceptional service and fast delivery