FordParts
My Garage
My Account
Cart
OEM 2001 Lincoln Continental A/C Accumulator
Accumulator- Select Vehicle by Model
- Select Vehicle by VIN
Select Vehicle by Model
orMake
Model
Year
Select Vehicle by VIN
For the most accurate results, select vehicle by your VIN (Vehicle Identification Number).
1 A/C Accumulator found


2001 Lincoln Continental Drier Part Number: XF3Z-19C836-BA
Product Specifications- Other Name: Accumulator Assembly - Air Intake; Drier Desiccant Element; A/C Receiver Drier; A/C Accumulator; Accumulator; Accumulator Assembly - Air Conditioning
- Manufacturer Note: Tank only, for switch refer to 19E561, w/integral A/C
- Base No.: 19C836
- Item Weight: 3.20 Pounds
- Item Dimensions: 3.9 x 7.3 x 12.5 inches
- Condition: New
- Fitment Type: Direct Replacement
- SKU: XF3Z-19C836-BA
- Warranty: This genuine part is guaranteed by Ford's factory warranty.
2001 Lincoln Continental A/C Accumulator
If you're seeking quality and affordability, look no further than our extensive inventory of genuine 2001 Lincoln Continental A/C Accumulator available at FordPartsDeal.com. You can confidently purchase our OEM 2001 Lincoln Continental A/C Accumulator as they are supported by the manufacturer's warranty and our hassle-free return policy, alongside the benefit of our fast delivery service.
2001 Lincoln Continental A/C Accumulator Parts Q&A
- Q: How to Service the A/C Accumulator on 2001 Lincoln Continental?A: Service of the HVAC accumulator begins by taking out the radiator upper sight shield. Recovery of refrigerant should follow the discharging process. Start by removing screws that attach the windshield washer fluid reservoir fill location. Follow by taking out screws from the RH fender support brace. The technician should move the power steering fluid reservoir aside after unscrewing it before moving on to remove the air suspension air compressor and drier assembly. Separate the screw that holds the vapor wrap around clip of the evaporator compressor suction line while removing power from the A/C cycling switch connector. Separate the suction accumulator/drier from the spring lock coupling of the evaporator to compressor suction line. First replace the degas bottle position by eliminating its screw and nut and after that move the A/C hose support bracket nut then the A/C accumulator tube support clip nut. The screw needs loosening as you lift the suction accumulator/drier from its bracket in the A/C accumulator system before disconnecting the spring lock coupling between the tube and suction accumulator/drier to remove the A/C cycling switch. The installation should begin by following removal steps backward after applying the correct amount of PAG Refrigerant Compressor Oil (R-134a Systems) or equivalent within the refrigerant system. Also lubricate the O-ring seal with this oil type.
Related 2001 Lincoln Continental Parts
 2001 Lincoln Continental Cabin Air Filter
 2001 Lincoln Continental A/C Compressor
 2001 Lincoln Continental A/C Switch
 2001 Lincoln Continental A/C System Valve Core
 2001 Lincoln Continental Ambient Temperature Sensor
 2001 Lincoln Continental Blend Door Actuator
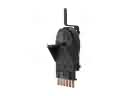 2001 Lincoln Continental Blower Control Switches
 2001 Lincoln Continental Blower Motor
 2001 Lincoln Continental Blower Motor Resistor
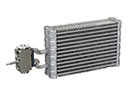 2001 Lincoln Continental Evaporator
 2001 Lincoln Continental Heater Core
 2001 Lincoln Continental HVAC Pressure Switch