My Garage
Cart
Make sure this part fits

Ford 7T4Z-6019-C
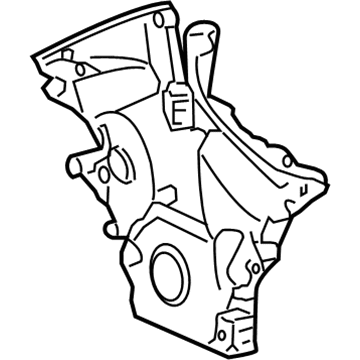
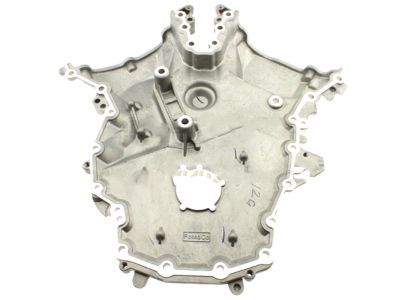
Timing Cover, Front

2007-2019 Ford 7T4Z6019C

Customer Questions & Expert Answers (7)
Ford 7T4Z-6019-C Timing Cover, Front
  • Part Description
    Cover - Cylinder Front; Engine Timing Cover
  • Base No.
    6019
  • Position
    Front
  • Replaces
    7T4Z-6019-GD
  • Manufacturer
    Ford
Make sure this part fits
$128.47 MSRP: $187.00
You Save: $58.53 (32%)
Ships in 1-3 Business Days
1
ADD TO CART
  • Related Parts
  • Product Specifications
  • Vehicle Fitment
  • Customer Questions & Expert Answers
  • Product Specifications

    BrandGenuine Ford
    Base No.6019
    Manufacturer Part Number7T4Z-6019-C
    Part DescriptionCover - Cylinder Front; Engine Timing Cover
    Other NamesFront Cover
    Manufacturer NoteUse RTV Silicone Sealer In Place Of Gasket For This Application. Refer To Workshop Manual For Specification
    Item Dimensions6.4 x 6.2 x 6.3 inches
    Item Weight1.00 Pounds
    PositionFront
    ConditionNew
    Fitment TypeDirect Replacement
    Replaces7T4Z-6019-GD
    ManufacturerFord
    SKU7T4Z-6019-C
    WarrantyThis genuine Ford part is guaranteed by Ford's factory warranty.
    Shipping & ReturnShipping Policy Return Policy
    Warning: California's Proposition 65
  • Vehicle Fitment

    Year Make Model Trim Engine
    2007-2010 Ford EdgeLimited, SE, SEL, SEL Plus, Sport6 Cyl 3.5 L GAS
    2013-2019 Ford ExplorerPlatinum, Sport6 Cyl 3.5 L GAS
    2009-2019 Ford FlexLimited, SE, SEL, Titanium6 Cyl 3.5 L GAS
    2010-2012 Ford FusionSport6 Cyl 3.5 L GAS
    2013-2019 Ford Police Interceptor SedanBase6 Cyl 3.5 L GAS
    2014-2019 Ford Police Interceptor UtilityBase6 Cyl 3.5 L GAS
    2008-2019 Ford TaurusLimited, SE, SEL, SHO6 Cyl 3.5 L GAS
    2008-2009 Ford Taurus XEddie Bauer, Limited, SEL6 Cyl 3.5 L GAS
    2009-2016 Lincoln MKSBase, EcoBoost6 Cyl 3.5 L GAS, 6 Cyl 3.7 L GAS
    2010-2019 Lincoln MKTBase, EcoBoost, Livery, Premiere, Reserve6 Cyl 3.5 L GAS, 6 Cyl 3.7 L GAS
    View More
  • Customer Questions & Expert Answers

    Q:
    Can you verify if 7T4Z-6019-C is the right one for my car? Posted by FordPartsDeal Specialist
    A:
    Select Your Vehicle model to verify if part number 7T4Z-6019-C fits your car.
    Posted by FordPartsDeal Specialist
    Q:
    How to service and repair the timing cover on Ford Edge? Posted by Customer
    A:
    The starting point for all timing cover servicing and repair practices includes complete cleanliness to avoid contaminants which could cause a breakdown. The recovery of A/C system must begin after hoisting the vehicle to NEUTRAL position and installing it on the lift. First disconnect the ground cable of the battery before removing the accessory drive belt with its tensioner and power steering belt. An appropriate Strap Wrench should be used to unscrew the crankshaft bolt while removing its washer for disposal. A 3 Jaw Puller will extract the crankshaft pulley while the Oil Seal Remover functions to remove the crankshaft front seal. Unfasten the exhaust flexible pipe clamp before you detach two exhaust hangers and extract the four nuts with the exhaust flexible pipe and Y-pipe assembly while discarding the nuts and gasket. The technician should first remove two nuts alongside the roll restrictor heat shield before moving on to the roll restrictor through bolt and heat shield then finishing with the removal of the two roll restrictor-to-transaxle bracket plate bolts. First cut the roll restrictor-to-subframe through bolt loose while moving the roll restrictor with transaxle bracket plate to the side. Strip away the right-hand front halfshaft after uncoupling the transaxle bracket and its three securing bolts. Drain the engine oil through the drain plug before reinstalling it with a torque of 27 Nm (20 lb-ft). Detach the engine-block-heater harness from the radiator support and A/C suction tube and engine wiring harness only when equipped. Start by taking off the engine Air Cleaner combined with the ACL outlet pipe and then detach both left-hand and right-hand valve covers. Separate the safety clip from the A/C suction tube fitting before disconnecting it and placing the tube to the side. Detach the bolt securing the A/C pressure tube bracket before disconnecting the fitting of the tube while discarding the O-ring and setting the tube to the side. The procedure starts with disconnecting the two engine wiring harness connectors and removing the bolt and ground wire attached to the engine front cover. Next, separate the nut and ground wire connected to the engine front cover stud and the cowl stud while removing the radio interference capacitor wire from both points. First disconnect the electrical connectors of the purge valve and the PCM along with three other connectors before setting the wiring harness to the side. The technician should remove three bolts before positioning the degas bottle out of the way. Free access should be maintained between engine front components and vehicle structure to enable trouble-free engine front cover insertion. The power steering reservoir needs its nuts removed so mechanic's wire can secure both tank and hose afterward they are moved away from engine front space. The pump and hose require support after removing their three bolts. Take out all bolts which secure the left-hand and right-hand Variable Camshaft Timing solenoids. Place a floor jack and Oil Pan Holding Fixture under the oil pan with detailed alignment to avoid any possible damage. A careful engine procedure begins with opening the transaxle mount through bolt to lower the engine front and prevent hydraulic transaxle mount internal damage. Begin by removing the engine mount brace bolt followed by its nut and engine mount brace before uninstalling the four nuts securing the engine mount and three bolts together with the engine mount. Two bolts need to be detached from the engine mount bracket before hand tools can remove both engine mount studs and two upper engine mount bracket bolts. You must lower the engine to get to the lower engine mount bracket bolt which you must loosen before removing it together with the bracket bolt. To separate the engine front cover from the cylinder block simply install six front cover bolts into its threaded holes while pressing each screw by hand and afterward tighten them in a criss-cross method to break loose the seal before pulling off the front cover.
    Posted by FordPartsDeal Specialist
    Q:
    How to service and repair the timing cover on Ford Flex? Posted by Customer
    A:
    The first step to serve and fix the timing cover starts with maintaining clean conditions to stop foreign objects from resulting in engine breakdown. Position the vehicle on a hoist while keeping it in the NEUTRAL gear then perform recovery of the A/C system. The service and repair procedure begins with removal of the Air Cleaner outlet pipe followed by front wheels and tires then accessory drive belt and tensioner and power steering belt until completion with the degas bottle along with Evaporative Emission canister purge valve. Separate the A/C pipes while discarding their O-ring elements and take away the hindmost tube of A/C equipment if necessary. Fellow professionals should drain power steering fluid while performing removal of the right-hand inner fender splash shield. Apply a Strap Wrench to remove the crankshaft bolt together with the washer followed by using a 3-Jaw Puller on the crankshaft pulley and finally using an Oil Seal Remover to discard the crankshaft front seal. Use tooling to remove the Y-pipe-to-catalytic converter nuts and the Y-pipe and discard both the gaskets and nuts that are removed. Attach the hose which drains engine oil back to the power steering reservoir. Americans should begin by removing the RH and LH valve covers and then separate the wiring harness retainer while disconnecting the Power Steering Pressure switch electrical connector. Set up the Oil Pan Holding Fixture correctly before removing the power steering pump with its engine mount parts. To protect the engine interior use a 3M Roloc Bristle Disk (part number 07528) which operates at 15,000 rpm to clean the engine front cover after extracting its bolts while preventing foreign matter from entering the engine. Add Motorcraft High Performance Engine RTV Silicone to designated locations before attaching and torquing the engine front cover bolts in a particular order. Begin by installing new thread sealer on the engine mount studs then place both the engine mount bracket and engine mount before final torque to designated settings. The refit process starts with power steering pump installation followed by valve covers and exhaust components installation. Before installing new front seal and crankshaft pulley it is necessary to apply lubrication to the crankshaft seal bore. The power steering cooler tube needs new O-ring seals when reconnecting its components. Also use the crankshaft pulley bolt tightening method in stages. The last procedure requires reinstallation of degas bottles followed by replacement of accessory drive belts and front wheels before finishing with clean fluid drips into the engine and power steering system to enable A/C recharge.
    Posted by FordPartsDeal Specialist
    Q:
    How to Service and Repair the Engine Front Timing Cover to Prevent Engine Failure on Ford Taurus X? Posted by Customer
    A:
    The cleaning process for engine front cover repairs must be thorough to protect against engine failure brought by foreign material entry. Place the vehicle on a hoist before starting the repair process of the A/C system. Service professionals should remove the air cleaner outlet pipe followed by front wheels along with tires then disconnect the accessory drive belt and tensioner along with the power steering belt. Remove the degas bottle together with the Evaporative Emission canister purge valve after you disconnect the A/C tubes while throwing away the O-ring seals. The first step to power steering fluid drainage involves draining the fluid while you remove the RH inner fender splash shield. Start by using a strap wrench to remove the crankshaft bolt with its washer before throwing away the bolt and continuing with a 3-jaw puller to detach the crankshaft pulley along with an oil seal remover to remove the crankshaft front seal. The Y-pipe becomes removable after disconnecting its gaskets and nuts which allows draining of engine oil along with power steering reservoir hose detachment. Begin by removing the valve covers then move on to unplug the wiring harness retainer along with the disconnecting the power steering connections between pressure switch and solenoid. A floor jack along with an Oil Pan Holding Fixture should be positioned beneath the oil pan before disconnecting engine mount brace, engine mount nuts and engine mount bracket. Use hand tools exclusively when removing the engine mount bolts along with the stud fasteners. Use a 3M Roloc Bristle Disk (part number 07528) to clean the engine front cover with care against the entry of foreign substances into the engine space. Use specified areas of Motorcraft High Performance Engine RTV Silicone before installing the engine front cover with bolts 17, 18, 19, and 20 in sequential order. Secure the engine mount bracket and its bolts first then add the engine mount with all its bolts while torquing them according to specifications. Reinstall the A/C system tubes followed by power steering pump components then valve covers and check that all connections maintain their proper position. You should install the exhaust Y-pipe with new nuts before lubricating the crankshaft front seal bore and placing a new crankshaft front seal. Put the crankshaft pulley into position and follow a staged process of tightening the retaining bolt. The assembly continues with the A/C system and the engine and power steering system receive new clean fluids. After confirming complete installations all parts need to be checked and secured to make the vehicle operational.
    Posted by FordPartsDeal Specialist
    Q:
    How to install the engine front timing cover on Lincoln MKX? Posted by Customer
    A:
    The first step to install the engine front cover includes raising the engine to its final position after ensuring that everything is clean to stop foreign particles from causing engine breakdown. Clean the engine front cover with a Bristle Disk operating at 15,000 rpm (part number 07528) while using the 3M Roloc® Bristle Disk (2-in white) until all abrasive particles have been removed. Thoroughwashing follows these cleaning steps. The engine needs clean lint-free shop towels for covering exposed cavities because contamination must be prevented. All gasket remains must be cleaned completely off the cylinder head and block and oil pan surfaces after removing big debris and using silicone gasket remover followed by metal surface preparation to remove any remaining oil or coolant residue. Set the two locating dowel pins properly into the cylinder block before you install the alignment pins. Apply 3.0 mm of Motorcraft® High Performance Engine RTV Silicone on front cover engine sealing surfaces while using 5.5 mm of the product around oil pan-to-cylinder block and cylinder head-to-cylinder block joint areas. Fasten engine front cover bolts 17, 18, 19 and 20 but begin tightening each one only to 3 Nm (27 lb-in) before removing the alignment pins. First lower the engine to mount the bracket and install its lower bolt before raising the engine again to bolt the upper bracket onto position. The remaining engine front cover bolts should be installed and tightened in two steps first by applying 10 Nm torque to bolts 1 through 22 and 15 Nm torque to bolts 23, 24, 25 then by applying 24 Nm torque to bolts 1 through 22 and 75 Nm torque to bolts 23, 24 and 25. After removing the thread sealer from the engine mount studs, apply fresh Threadlock and Sealer then install the two engine mount studs by torquing them to 20 Nm (177 lb-in). Proceed with the engine mount bracket bolt installation then move onto the engine mount and its three bolts followed by torqueing the engine mount nuts to 63 Nm. Connect the engine mount brace and its nut along with bolt to achieve 20 Nm (177 lb-in) torque before torquing the transaxle mount through bolt to 175 Nm (129 lb-ft). First install the LH and RH VCT solenoids with bolts tightened to 10 Nm before securing the power steering pump and its attached three bolts to 24 Nm. Next install the power steering reservoir with two nuts tightened to 8 Nm followed by the degas bottle and its three bolts tightened to 9 Nm. The system requires connector and metal harness connections of three PCM electrical connectors, purge valve electrical connector, radio interference components, ground wire, cowl stud nut, and engine front cover nut. All these hardware pieces need 10 Nm (89 lb-in) tightening force. First secure the two engine wiring harness connectors then install new O-ring seals on A/C pressure tube fittings and tighten each nut to 8 Nm (71 lb-in). Lastly attach A/C pressure tube bracket with its bolt secured to 8 Nm (71 lb-in). Following suction tube fitting safety clip installation, install both valve covers then put on engine Air Cleaner components along with ACL outlet pipe. If the engine block heater is present, install its harness. The technician should install the RH front halfshaft followed by the transaxle bracket using three bolts torqued to 90 Nm (66 lb-ft), then fit the engine roll restrictor before tightening three bolts on the transaxle to 90 Nm (66 lb-ft) and finally securing the engine roll restrictor-to-subframe through bolt to 103 Nm (76 lb-ft). First install the roll restrictor heat shield along with two nuts at 11 Nm (97 lb-in), afterward position the Y-pipe assembly alongside installing four nuts at 40 Nm (30 lb-ft) and then install two exhaust hangers while torquing the exhaust clamp to 40 Nm (30 lb-ft). Use the engine oil cleaning process to prepare the crankshaft front seal bore before installing a new front seal with the assistance of Crankshaft Vibration Damper Replacer and Front Crankshaft Seal Installer. Apply engine oil to outside diameter sealing surfaces before using same tools to install the crankshaft pulley through this procedure: apply 120 Nm torque (89 lb-ft), loosen one full turn, increase torque to 50 Nm (37 lb-ft) then apply an additional 90 degrees of torque. Complete the installation of accessory drive belt together with tensioner and power steering belt after filling the engine with engine oil while reconnecting the battery ground wire before evacuating and recharging the A/C system.
    Posted by FordPartsDeal Specialist
    Q:
    How to service and repair the timing cover on Lincoln MKZ? Posted by Customer
    A:
    Service or repair operations on the timing cover require first attaching two wiring harness retainers to the left-hand valve cover stud bolts then connecting both engine wiring harness electrical connectors. After installing two wiring harness retainers on the A/C tubes attach new O-ring seals and fasten nuts to 8 Nm (71 inch lbs.). Fasten the A/C tube bracket bolt to 8 Nm (71 inch lbs.) while the two A/C tube bracket bolts should be tightened to 10 Nm (89 inch lbs.). Connect the A/C tube to the condenser while using a new O-ring seal and tighten the nut to 8 Nm (71 inch lbs.). The installation process includes connecting the coolant tube retainer clips to the A/C tube and if present an engine block heater harness needs to be connected to the radiator support, power steering hose and A/C tube and engine wiring harness. Fasten the ground wire and bolt until they reach 12 Nm (9 ft. lbs.) torque setting before mounting the transaxle control cable bracket with three nuts which should be torqued to 12 Nm (9 ft. lbs.). Connect the transaxle control cable onto the control lever followed by attaching high and low radiator hoses and the two heater hoses to the thermostat housing. Securely fasten the ground wire along with its bolt by torquing it to 10 Nm (89 inch lbs.). Vent the battery and install the 6 Nm (53 inch lbs.) tightened nut on the connector feeding power to the battery terminal. The wiring harness retainers should be mounted on the transmission mount and battery tray bracket before connecting both engine harness electrical connectors. First, install the battery tray and then move to the engine air cleaner and air cleaner outlet pipe before mounting the degas bottle. The accessory drive belt must be installed before power steering belt installation. After which the engine requires clean engine oil for filling. Next, the cooling system needs both filling and bleeding before the power steering gets filled. Power steering system requires fluid then transaxle needs a fluid check to determine addition requirements and the air conditioning needs a recharging intervention.
    Posted by FordPartsDeal Specialist
    Q:
    How to service and repair the engine front timing cover to prevent engine failure on Lincoln MKS? Posted by Customer
    A:
    The service process of the engine front cover requires thorough cleaning to stop engine failure from foreign objects. The service process should begin with raising the vehicle on a hoist and completing A/C system debris containment. Start the service by removing sequential components including Air Cleaner outlet pipe followed by front wheels and tires and accessory drive belt and power steering belt with degas bottle as well as EVAP canister purge valve. First detach the A/C tubes from the receiver/drier along with their O-ring seals and then remove and discard the A/C tube-to-receiver/drier bolt with its O-ring seal included. First drain power steering fluid while removing the right hand inner fender splash shield. Start by removing the crankshaft bolt and washer using a Strap Wrench before discarding the bolt but using a 3-Jaw Puller to remove the crankshaft pulley when an Oil Seal Remover destroys the crankshaft front seal. Remove the Y-pipe-to-catalytic converter nuts together with flange nuts to detach the exhaust hanger while disposing gaskets and nuts. The first task consists of draining oil from the engine until empty while reinstalling the drain plug followed by hose disconnection from the steering reservoir. First remove RH and LH valve covers from the engine then detach wires connected to the wiring harness retainer along with disconnecting the Power Steering Pressure switch electrical connector. The power steering components along with engine mounts should be removed after positioning the Oil Pan Holding Fixture in correct alignment. Cleaning of the engine front cover requires use of 3M Roloc Bristle Disk (part number 07528) to remove debris before applying no foreign material. Place Motorcraft High Performance Engine RTV Silicone on all surface areas before attaching the engine front cover front and back with proper bolt torques. Proceed with the installation of engine mount components by first cleansing engine mount studs then sealing them with fresh thread sealer before inserting them into position. The installation process requires reattachment of power steering pump and valve covers as well as exhaust Y-pipe and crankshaft components while torquing all bolts according to the specified values. The last step involves reconnecting tubes associated with the A/C system followed by installing the degas bottle after filling both the engine with clean oil and the power steering system before performing A/C system recharging.
    Posted by FordPartsDeal Specialist
    If you have any questions about this product, please don't hesitate to ask us. We will be happy to help you!

OEM Ford 7T4Z-6019-C, Excellent Performance and Perfect Fitment

To ensure reliability, purchase Ford part # 7T4Z-6019-C Timing Cover, Front. It is sometimes referred to as Ford Timing Cover. For those Ford owners who aspire to maintain their vehicles in optimal shape, opting for OEM parts is a wise choice. Precisely engineered, these components adhere to stringent factory guidelines and are produced in state-of-the-art facilities using cutting-edge technologies. Moreover, they are subjected to thorough testing to certify their resilience and safety, thereby making them a dependable option for Ford owners.

FordPartsDeal.com is a leading supplier of genuine Ford parts such as Ford 7T4Z6019C Timing Cover, Front. A vast selection of genuine Ford parts is available on our website, all offered at discounted prices. Every OEM Ford part is covered by the manufacturer's warranty, which also applies to our hassle-free return policy. Enjoy fast delivery service, ensuring you get your parts when you need them. Your shopping experience here is guaranteed to be pleasurable. For detailed Ford parts information, click here.
Choose FordPartsDeal for discounted prices, exceptional service and fast delivery