FordParts
My Garage
My Account
Cart
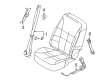
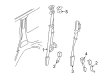
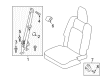
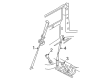
OEM Lincoln Seat Belt
Seat Safety Belt- Select Vehicle by Model
- Select Vehicle by VIN
Select Vehicle by Model
orMake
Model
Year
Select Vehicle by VIN
For the most accurate results, select vehicle by your VIN (Vehicle Identification Number).
1127 Seat Belts found


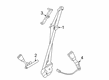
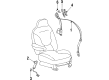
Lincoln Seat Belt Assembly, Driver Side Part Number: FA1Z-58611B09-AQ
$367.64 MSRP: $576.80You Save: $209.16 (37%)Ships in 1-3 Business DaysProduct Specifications- Other Name: Pretensioner - Seat Belt Retractor
- Position: Driver Side
- Replaces: FA1Z-58611B09-AC


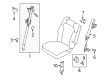
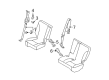
Lincoln Lap & Shoulder Belt, Rear Center Part Number: DG9Z-54611B64-AR
$89.06 MSRP: $137.05You Save: $47.99 (36%)Ships in 1-3 Business DaysProduct Specifications- Other Name: Seat Belt Assembly; Seat Belt Lap and Shoulder Belt, Rear Center; Center Seat Belt
- Position: Rear Center
- Replaces: DG9Z-54611B64-AA, DG9Z-54611B64-AC, DG9Z-54611B64-AP

Lincoln Lap & Shoulder Belt, Charcoal, Rear Center Part Number: DG9Z-54611B64-AQ
$94.15 MSRP: $137.05You Save: $42.90 (32%)Product Specifications- Other Name: Seat Belt Assembly; Seat Belt Lap and Shoulder Belt, Rear Center; Center Seat Belt
- Position: Rear Center
- Replaces: DG9Z-54611B64-AN, DG9Z-54611B64-AB, DG9Z-54611B64-AD


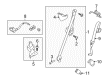
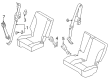
Lincoln Lap & Shoulder Belt, Charcoal, Driver Side Part Number: DE9Z-74611B69-AA
$139.23 MSRP: $214.87You Save: $75.64 (36%)Ships in 1-3 Business DaysProduct Specifications- Other Name: Seat Belt Assembly; Outer Belt Assembly
- Position: Driver Side
- Replaces: CE9Z-74611B69-AB


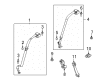
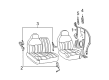
Lincoln Lap & Shoulder Belt, Charcoal, Front Center Passenger Side Part Number: DB5Z-78611B64-CB
$141.72 MSRP: $218.70You Save: $76.98 (36%)Ships in 1-2 Business DaysProduct Specifications- Other Name: Belt And Buckle Assembly; Seat Belt Lap and Shoulder Belt, Center; Center Seat Belt; Center Belt Assembly
- Position: Front Center Passenger Side
- Replaces: BB5Z-78611B64-CA


Lincoln Buckle, Charcoal Black, Center Passenger Side Part Number: BG1Z-5460044-AC
$60.34 MSRP: $92.68You Save: $32.34 (35%)Ships in 1-3 Business DaysProduct Specifications- Other Name: Belt And Buckle Assembly; Seat Belt Receptacle, Rear; Latch
- Position: Center Passenger Side
- Replaces: 8G1Z-5460044-AD


Lincoln Buckle, Passenger Side Part Number: 1L7Z-7861202-BAD
$88.27 MSRP: $128.48You Save: $40.21 (32%)Ships in 1-3 Business DaysProduct Specifications- Other Name: Seat Belt Assembly; Latch
- Position: Passenger Side
- Replaces: 1L7Z-7861202-BAA, 1L7Z-7861202-BAC, 1L7Z-7861202-BAB


Lincoln Lap & Shoulder Belt, Graystone, Rear Passenger Side Part Number: 7T4Z-78611B68-AA
$92.21 MSRP: $134.22You Save: $42.01 (32%)Ships in 1-3 Business DaysProduct Specifications- Other Name: Seat Belt Assembly; Seat Belt Lap and Shoulder Belt, Rear Right; Retractor Assembly
- Manufacturer Note: (-L*)
- Position: Passenger Side


Lincoln Lap & Shoulder Belt, Charcoal, Front Driver Side Part Number: 7L1Z-78611B09-AC
$95.22 MSRP: $138.60You Save: $43.38 (32%)Product Specifications- Other Name: Seat Belt Assembly; Seat Belt Lap and Shoulder Belt, Front Left; Retractor Assembly; Latch
- Manufacturer Note: (-W*)
- Position: Driver Side


Lincoln Lap & Shoulder Belt, Charcoal, Rear Driver Side Part Number: BT4Z-78611B69-AB
$96.09 MSRP: $139.87You Save: $43.78 (32%)Ships in 1-3 Business DaysProduct Specifications- Other Name: Seat Belt Assembly; Seat Belt Lap and Shoulder Belt, Rear Left; Retractor Assembly
- Position: Driver Side

Lincoln Buckle, Driver Side Part Number: 1L7Z-7861203-CAA
$97.94 MSRP: $142.57You Save: $44.63 (32%)Product Specifications- Other Name: Seat Belt Assembly; Latch
- Position: Driver Side


Lincoln Lap & Shoulder Belt, Charcoal, Front Driver Side Part Number: DT4Z-78611B09-AD
$102.20 MSRP: $148.77You Save: $46.57 (32%)Ships in 1-3 Business DaysProduct Specifications- Other Name: Pretensioner - Seat Belt Retractor; Seat Belt Lap and Shoulder Belt, Front Left; Retractor Assembly
- Position: Driver Side
- Replaces: DT4Z-78611B09-AB

Lincoln Lap & Shoulder Belt, Front Driver Side Part Number: DT4Z-78611B09-AC
$102.20 MSRP: $148.77You Save: $46.57 (32%)Ships in 1-3 Business DaysProduct Specifications- Other Name: Pretensioner - Seat Belt Retractor; Seat Belt Lap and Shoulder Belt, Front Left; Retractor Assembly
- Manufacturer Note: (-L*)
- Position: Driver Side
- Replaces: DT4Z-78611B09-AA


Lincoln Lap & Shoulder Belt, Charcoal, Center Driver Side Part Number: AL1Z-78611B69-AC
$106.30 MSRP: $154.73You Save: $48.43 (32%)Product Specifications- Other Name: Seat Belt Assembly; Seat Belt Lap and Shoulder Belt, Center Left; Latch
- Manufacturer Note: (-W*)
- Position: Driver Side
- Replaces: 9L1Z-78611B69-AC

Lincoln Lap & Shoulder Belt, Charcoal, Center Passenger Side Part Number: AL1Z-78611B68-AC
$106.30 MSRP: $154.73You Save: $48.43 (32%)Product Specifications- Other Name: Seat Belt Assembly; Seat Belt Lap and Shoulder Belt, Center Right; Latch
- Manufacturer Note: (-W*)
- Position: Passenger Side
- Replaces: 9L1Z-78611B68-AC


Lincoln Lap & Shoulder Belt, Charcoal Black, Rear Passenger Side Part Number: BG1Z-54611B68-AC
$115.90 MSRP: $168.70You Save: $52.80 (32%)Ships in 1-3 Business DaysProduct Specifications- Other Name: Seat Belt Assembly; Seat Belt Lap and Shoulder Belt, Rear Right, Rear Right Outer; Outer Belt Assembly
- Position: Passenger Side
- Replaces: AA5Z-54611B68-AA, 8G1Z-54611B68-AD


Lincoln Lap & Shoulder Belt, Front Passenger Side Part Number: CT4Z-78611B08-AA
$119.30 MSRP: $173.65You Save: $54.35 (32%)Ships in 1-3 Business DaysProduct Specifications- Other Name: Pretensioner - Seat Belt Retractor; Seat Belt Lap and Shoulder Belt, Front Right; Retractor Assembly
- Manufacturer Note: (-L*)
- Position: Passenger Side


Lincoln Lap & Shoulder Belt, Charcoal, Driver Side Part Number: DE9Z-74611B69-CB
$123.93 MSRP: $180.40You Save: $56.47 (32%)Ships in 1-3 Business DaysProduct Specifications- Other Name: Seat Belt Assembly
- Position: Driver Side


Lincoln Lap & Shoulder Belt, Charcoal, Center Part Number: BT4Z-78611B64-AB
$125.95 MSRP: $183.33You Save: $57.38 (32%)Product Specifications- Other Name: Seat Belt Assembly; Seat Belt Lap and Shoulder Belt, Center; Center Seat Belt
- Position: Center


Lincoln Lap & Shoulder Belt, Charcoal, Rear Driver Side Part Number: 8L1Z-40611B69-BC
$128.27 MSRP: $186.72You Save: $58.45 (32%)Ships in 1-3 Business DaysProduct Specifications- Other Name: Seat Belt Assembly; Seat Belt Lap and Shoulder Belt, Rear Left; Retractor Assembly; Latch
- Manufacturer Note: (-W*)
- Position: Driver Side
- Replaces: 7L1Z-40611B69-BC
| Page 1 of 57 |Next >
1-20 of 1127 Results
Lincoln Seat Belt
If you own Lincoln and want to keep it in top shape, choosing OEM Seat Belt is a smart move. They are precisely engineered and follow strict factory standards. They are made in advanced facilities that use cutting edge technology. Each part goes through thorough testing to confirm strength and safety, so you can trust it. FordPartsDeal.com gives you genuine Lincoln Seat Belt at some of the affordable online prices without cutting quality. Every OEM Lincoln part includes the manufacturer's warranty, easy returns, and super-fast delivery. So why wait? Shop now and get your vehicle back to peak condition.
Lincoln Seat Belt holds the passengers in position and alive when the unforeseen strikes your day. Lincoln possesses the silent highway by filling cabins with acoustically tuned systems and whisper silencing electricity. The company began back in 1917 and joined Ford in 1922 and became a serene driving champion. All Lincolns nowadays support that legacy by the Quiet Flight notion, which closes off rattle and glare and mental noise. Co-Pilot360 includes lane hold, blind spot, auto high beam, smart parking, reducing the stress of any highway. Optional ActiveGlide allows a driver to lower hands during stretches and cameras and maps maintain order. Soft leathers, crisp screens, and annual tech upgrades demonstrate that Lincoln is attentive to what owners are discussing that makes the miles easier. Such Seat Belt is made of thick woven polyester which has a capacity of over 28 kilonewtons and is matched with a locking tongue which secures you in position prior to the airbags being fired. When sudden stop is activated the Seat Belt retractor solidifies, which fixes bodies in the sweet position of cushioning airbags and steering. The Seat Belt cuts extreme traumas to the torso according to crash data of diverse models with a significant contrast across the entire line. Lincoln intermingles this Seat Belt with other electronic aids within such a way that protection begins and ends mechanically and ends digitally.
Lincoln Seat Belt Parts and Q&A
- Q: What Are the Inspection and Installation Requirements for Seat Belt Assemblies After a Collision on Lincoln Navigator?A:All safety belts need a complete check-up of retractors together with attached belt tension sensor (BTS) equipment (if present), buckles, shoulder belt adjusters (if installed) and child safety seat connectors after each vehicle collision takes place. New belt assemblies need installation when a qualified technician confirms that existing assemblies are undamaged with correct operation. New assemblies must be installed to every component that was not involved in the crash and shows any signs of damage or operational problems because failure to follow these guidelines will potentially enhance injuries during crashes. Proceed with the front center safety belt removal process by adjusting the driver seat to the maximum forward extent and the passenger seat to its maximum rearward position. Follow the procedure to take out the bolt from the seat then guide the safety belt through the clearance before securing it at 55 Nm (41 lb-ft) torque level. Before installing the safety belt webbing should not be twisted while also placing the safety belt anchor above the seat bracket and making sure the safety belt keeps available access for the occupant after its installation. The operation of the active restraint system should be checked for proper function as the last step.
- Q: Is Your Seat Belt Safe After a Collision on Lincoln Town Car?A:Every seat belt assembly which contains retractors along with belt tension sensor (BTS) must be inspected along with buckles and shoulder belt height adjusters if equipped, as well as child seat tether attachments and attaching hardware following collisions. The installation of new belt assemblies is required unless an expert technician identifies no damage or incorrect operation of existing assemblies. New belt assemblies need to be installed for unused components during a collision because failure to follow these procedures results in higher collision injury risks. Seat belt assembly checks must take place during regular maintenance because even severe stress can cause damage and affect operation efficiency. Seat belt assembly installation requires checking seat belt retaining areas for damage, which demands sheet metal structural restoration if retaining points suffer damage. The new seat belt assembly must be installed per instructions and require execution of a functional test.


Related Lincoln Parts
 Lincoln Ignition Coil
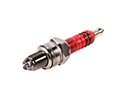 Lincoln Spark Plug
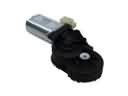 Lincoln Seat Motor
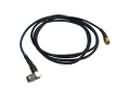 Lincoln Antenna Cable
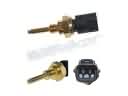 Lincoln Cylinder Head Temperature Sensor
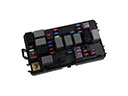 Lincoln Fuse
 Lincoln Instrument Cluster
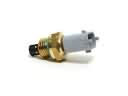 Lincoln Intake Manifold Temperature Sensor
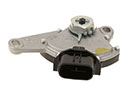 Lincoln Neutral Safety Switch
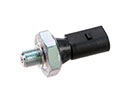 Lincoln Oil Pressure Switch
 Lincoln Starter Relay
 Lincoln Suspension Control Module