FordParts
My Garage
My Account
Cart
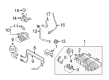
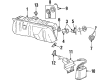
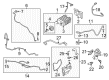
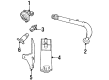
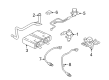
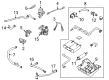
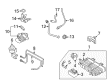
OEM Mercury Canister Purge Valve
Vapor Canister Purge Valve EVAP- Select Vehicle by Model
- Select Vehicle by VIN
Select Vehicle by Model
orMake
Model
Year
Select Vehicle by VIN
For the most accurate results, select vehicle by your VIN (Vehicle Identification Number).
33 Canister Purge Valves found


Mercury Solenoid Valve Part Number: 9U5Z-9F945-C
$45.80 MSRP: $72.73You Save: $26.93 (38%)Ships in 1 Business DayProduct Specifications- Other Name: Solenoid Assembly, Evaporative Emissions Adapter, Check Valve, Canister Purge Valve, PCV Hose, EGR Tube
- Replaces: 7U5Z-9F945-E


Mercury Vent Control Solenoid Part Number: 6F9Z-9F945-AA
$79.78 MSRP: $131.27You Save: $51.49 (40%)Ships in 1-3 Business DaysProduct Specifications- Other Name: Solenoid Assembly; Vapor Canister Purge Solenoid; Vapor Canister Vent Solenoid; Filter Solenoid; Solenoid; Vent
- Replaces: 5U5Z-9F945-CA


Mercury Purge Control Valve Part Number: 5U5Z-9C915-AA
$65.51 MSRP: $131.64You Save: $66.13 (51%)Ships in 1-3 Business DaysProduct Specifications- Other Name: Valve Assembly; Vapor Canister Purge Solenoid; Vapor Canister Vent Solenoid; Vapor Valve


Mercury Solenoid Valve Part Number: 9U5Z-9C915-BE
$59.56 MSRP: $98.00You Save: $38.44 (40%)Ships in 1-2 Business DaysProduct Specifications- Other Name: Valve Assembly; Vapor Canister Purge Solenoid; Emission Check Valve; Vapor Canister Vent Solenoid; Canister Purge Valve; Purge Valve; Purge Control Valve
- Manufacturer Note: VMV Valve
- Replaces: 9U5Z-9C915-A


Mercury Purge Solenoid Part Number: 8G1Z-9F945-A
$69.84 MSRP: $114.91You Save: $45.07 (40%)Ships in 1-2 Business DaysProduct Specifications- Other Name: Solenoid Assembly; Vapor Canister Purge Solenoid; Vapor Canister Vent Solenoid; Canister Purge Valve; Vent Control Solenoid; Solenoid


Mercury Purge Solenoid Part Number: 6L2Z-9F945-AA
$83.43 MSRP: $137.27You Save: $53.84 (40%)Ships in 1 Business DayProduct Specifications- Other Name: Solenoid Assembly; Vapor Canister Purge Solenoid; Vapor Canister Vent Solenoid; Canister Purge Valve; Vapor Canister; Vent Control Solenoid; Solenoid
- Manufacturer Note: All 3.0L
- Replaces: 5U5Z-9F945-GA


Mercury Solenoid Part Number: F75Z-9F945-CA
$99.78 MSRP: $164.18You Save: $64.40 (40%)Product Specifications- Other Name: Solenoid Assembly; Vapor Canister Purge Solenoid; Vent
- Replaces: F75Z-9F945-BA


Mercury Purge Valve Part Number: 6W7Z-9C915-A
$103.76 MSRP: $170.73You Save: $66.97 (40%)Ships in 1-2 Business DaysProduct Specifications- Other Name: Valve Assembly; Vapor Canister Purge Solenoid; Vapor Canister Vent Solenoid; Canister Purge Valve; Purge Solenoid
- Replaces: 5W7Z-9C915-AA


Mercury Solenoid Part Number: 6L3Z-9F945-A
$122.66 MSRP: $201.82You Save: $79.16 (40%)Ships in 1-2 Business DaysProduct Specifications- Other Name: Solenoid Assembly; Vapor Canister Purge Solenoid


Mercury Vent Control Solenoid Part Number: 9U5Z-9F945-E
$90.21 MSRP: $151.45You Save: $61.24 (41%)Ships in 1-3 Business DaysProduct Specifications- Other Name: Solenoid Assembly; Vapor Canister Purge Solenoid; Vapor Canister Vent Solenoid; Solenoid
- Replaces: 6E5Z-9F945-AA


Mercury Solenoid Valve Part Number: 7U5Z-9C915-D
$81.52 MSRP: $129.45You Save: $47.93 (38%)Ships in 1-3 Business DaysProduct Specifications- Other Name: Valve Assembly; Vapor Canister Vent Solenoid Bracket; Purge Solenoid; Emission Check Valve; Canister Purge Valve
- Manufacturer Note: Valve Only


Mercury Fuel Tank Vent Valve Part Number: E7DZ-9B593-A
$21.27 MSRP: $32.91You Save: $11.64 (36%)Ships in 1-2 Business DaysProduct Specifications- Other Name: Valve Assembly - Fuel Vapour; Valve Assembly; Vapor Valve


Mercury Solenoid Valve Part Number: 4U5Z-9J451-BA
$50.33 MSRP: $78.55You Save: $28.22 (36%)Product Specifications- Other Name: Valve Assembly; Vapor Canister Purge Solenoid; Vapor Canister Vent Solenoid; Canister Purge Valve; Purge Valve; Purge Solenoid

Mercury Solenoid Valve Part Number: 9U5Z-9C915-J
$40.88 MSRP: $64.91You Save: $24.03 (38%)Ships in 1-2 Business DaysProduct Specifications- Other Name: Valve Assembly; Vapor Canister Purge Solenoid; Vapor Canister Vent Solenoid; Canister Purge Valve; Purge Valve; Purge Control Valve
- Replaces: 9U5Z-9C915-H, 9U5Z-9C915-D, CX-2349, CX-2219


Mercury Solenoid Valve Part Number: E6ZZ-9C915-A
$67.56 MSRP: $107.27You Save: $39.71 (38%)Product Specifications- Other Name: Valve Assembly
- Replaces: FO2Z-9C915-A


Mercury Purge Valve Part Number: E9DZ-9C915-A
$78.20 MSRP: $124.18You Save: $45.98 (38%)Product Specifications- Other Name: Valve Assembly; Vapor Canister Vent Solenoid; Canister Purge Valve


Mercury Purge Control Valve Part Number: YL8Z-9C915-AA
Product Specifications- Other Name: Valve Assembly; Emission Check Valve; Vapor Canister Purge Solenoid; Vapor Canister Vent Solenoid; Valve


Mercury Solenoid Valve Part Number: F5AZ-9C915-A
Product Specifications- Other Name: Valve Assembly; Vapor Canister Purge Solenoid; Vapor Canister Vent Solenoid; Canister Purge Valve; Purge Valve; Purge Solenoid
- Manufacturer Note: Vapor Mgt. Valve in engine compartment.


Mercury Vent Control Solenoid Part Number: 6F7Z-9F945-AA
Product Specifications- Other Name: Solenoid Assembly; Vapor Canister Purge Solenoid; Vapor Canister Vent Solenoid; Solenoid
- Replaces: 6C3Z-9F945-A


Mercury Solenoid Valve Part Number: 4U5Z-9C915-CA
Product Specifications- Other Name: Valve Assembly; Vapor Canister Purge Solenoid; Vapor Canister Vent Solenoid; Purge Control Valve
- Manufacturer Note: Valve Only
| Page 1 of 2 |Next >
1-20 of 33 Results
Mercury Canister Purge Valve
If you own Mercury and want to keep it in top shape, choosing OEM Canister Purge Valve is a smart move. They are precisely engineered and follow strict factory standards. They are made in advanced facilities that use cutting edge technology. Each part goes through thorough testing to confirm strength and safety, so you can trust it. FordPartsDeal.com gives you genuine Mercury Canister Purge Valve at some of the affordable online prices without cutting quality. Every OEM Mercury part includes the manufacturer's warranty, easy returns, and super-fast delivery. So why wait? Shop now and get your vehicle back to peak condition.
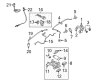
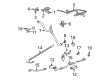
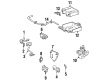
Mercury Canister Purge Valve directs trapped fuel vapor to the engine to make stronger, cleaner runs. In 1939, showrooms carried the names of Mercury, but it was marrying cushy suspension with sharp metal that marked its name. Mercury continued to make families happy by cutting more cabin room, silencing road noise, and simplifying the controls. Mercury was affordable and stylish enough; hence, many drivers did not empty pockets. Mercury enclosed decades of model hits such as Cougar and Grand Marquis with a ride that was smooth but spirited. Its vehicles absorbed crumbly pavement without floating, and commuters flowed to work with a relaxed demeanor. Although production was discontinued in 2011, the badge continues to represent the point of where comfort and value meet. The Canister Purge Valve will be in the EVAP loop and will be opened when commanded by the computer to draw the vapor-storing charcoal to the intake, and the resulting mixture burns with more heat and completes combustion, reducing hydrocarbon output and keeping the dash lamp off. The Canister Purge Valve is a new model that ensures smooth idleness, eliminates the smell of fuel, and wastes no gasoline in stop-and-go traffic. When the Canister Purge Valve becomes stuck, vapor pressure peaks and mileage decreases until it is replaced and the sealed circuit is re-established. Each Canister Purge Valve has a vent solenoid and pressure sensor, and through self-testing, they allow the driver to identify faults in time and avoid fines.
Mercury Canister Purge Valve Parts and Q&A
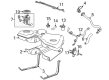
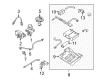
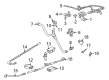
- Q: How to Service and Repair the Canister Purge Valve on Mercury Cougar?A:The process for Canister Purge Valve service starts with removing the air cleaner outlet tube then the intake air resonator. Start by removing first the electrical connector from the vapor management valve then loosening the nuts holding its place to the vehicle. Start by detaching the vacuum hose from the vapor management valve before completely removing the device by disconnecting its vapor tubes. Follow the steps in reverse order to reinstall the Canister Purge Valve after service.
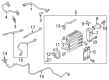
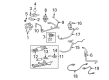
- Q: How to service the evaporative emission canister purge valve on Mercury Mariner?A:A proper servicing of the evaporative emission canister purge valve needs you to disconnect the battery ground cable first to eliminate the possibility of electrical sparks. These sparks can lead to fuel vapor ignition. The work space should stay without smoking devices or open flames while electrical devices used by personnel must be avoided to prevent flammable mixture ignition. The first step involves disconnecting the EVAP canister purge valve electrical connector followed by removing its two quick connect couplings from the fuel vapor tube. Pushing the tab allows you to remove the EVAP canister purge valve from its bracket. To install the system follow all reversal procedures from removal. A leak test should be performed to verify proper system operation after the installation process.


Related Mercury Parts
 Mercury Exhaust Manifold
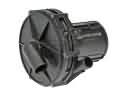 Mercury Air Injection Pump
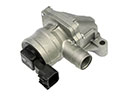 Mercury Air Pump Check Valve
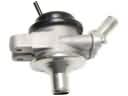 Mercury Diverter Valve
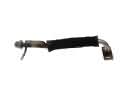 Mercury EGR Tube
 Mercury EGR Valve
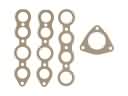
 Mercury EGR Valve Gasket
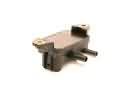 Mercury EGR Valve Position Sensor
 Mercury Exhaust Pipe
 Mercury Muffler
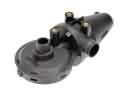 Mercury PCV Valve
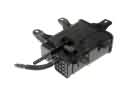 Mercury Vapor Canister