My Garage
Cart
Make sure this part fits

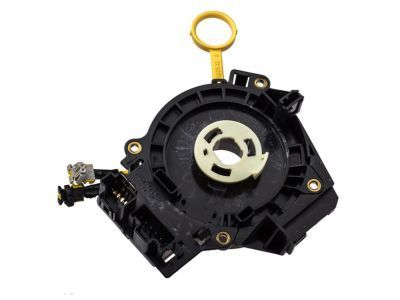
Ford 8L3Z-14A664-A
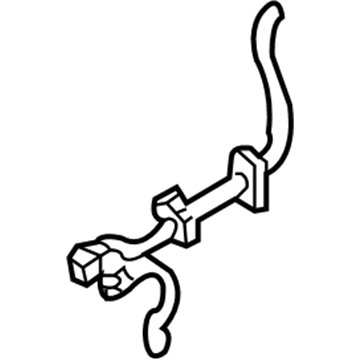
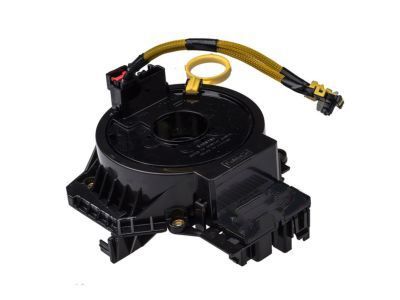
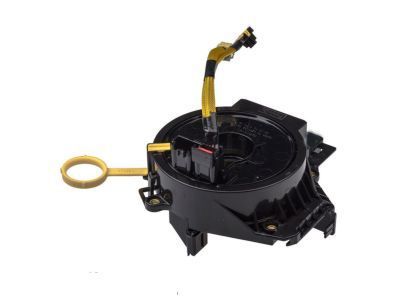
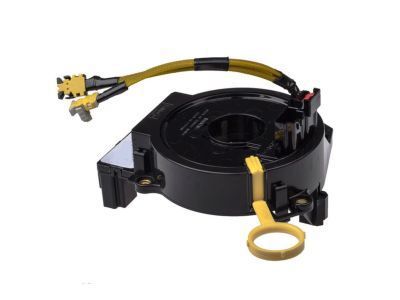
Clockspring

2002-2008 Ford 8L3Z14A664A

Customer Questions & Expert Answers (10)
Ford 8L3Z-14A664-A Clockspring
  • Part Description
    Cover And Contact Plate Assembly; Air Bag Clockspring
  • Base No.
    14A664
  • Replaces
    2L2Z-14A664-AB, 7L3Z-14A664-A
  • Manufacturer
    Ford
  • Manufacturer's Notes
    This part is discontinued.
Make sure this part fits
  • Related Parts
  • Product Specifications
  • Vehicle Fitment
  • Customer Questions & Expert Answers
  • Product Specifications

    BrandGenuine Ford
    Base No.14A664
    Manufacturer Part Number8L3Z-14A664-A
    Part DescriptionCover And Contact Plate Assembly; Air Bag Clockspring
    Item Dimensions8.2 x 6.1 x 4.5 inches
    Item Weight0.90 Pounds
    ConditionNew
    Fitment TypeDirect Replacement
    Replaces2L2Z-14A664-AB, 7L3Z-14A664-A
    ManufacturerFord
    SKU8L3Z-14A664-A
    WarrantyThis genuine Ford part is guaranteed by Ford's factory warranty.
    Shipping & ReturnShipping Policy Return Policy
    Warning: California's Proposition 65
  • Vehicle Fitment

    Year Make Model Trim Engine
    2002-2005 Ford ExplorerEddie Bauer, Limited, NBX, XLS, XLS Sport, XLT, XLT Sport6 Cyl 4.0 L FLEX, 6 Cyl 4.0 L GAS, 8 Cyl 4.6 L GAS
    2004-2008 Ford F-150FX2, FX4, Harley-Davidson Edition, King Ranch, Lariat, Limited, STX, THE 60TH ANNIVERSARY EDITION, XL, XLT6 Cyl 4.2 L GAS, 8 Cyl 4.6 L GAS, 8 Cyl 5.4 L FLEX, 8 Cyl 5.4 L GAS
    2004 Ford F-150 HeritageSVT Lightning, XL, XLT6 Cyl 4.2 L GAS, 8 Cyl 4.6 L GAS, 8 Cyl 5.4 L BI-FUEL, 8 Cyl 5.4 L CNG, 8 Cyl 5.4 L GAS
    2003-2005 Lincoln AviatorBase8 Cyl 4.6 L GAS
    2006-2008 Lincoln Mark LTBase8 Cyl 5.4 L GAS
    2002-2005 Mercury MountaineerBase, Convenience, Luxury, Premier6 Cyl 4.0 L FLEX, 6 Cyl 4.0 L GAS, 8 Cyl 4.6 L GAS
  • Customer Questions & Expert Answers

    Q:
    Will this 8L3Z-14A664-A work in my car? Posted by FordPartsDeal Specialist
    A:
    Select Your Vehicle model to verify if part number 8L3Z-14A664-A fits your car.
    Posted by FordPartsDeal Specialist
    Q:
    What Precautions Should Be Taken When Servicing the Clock Spring to Minimize Injury Risk and Ensure Proper Functionality on Ford F-150? Posted by Customer
    A:
    Both safety glasses and the absence of memory saver devices are essential during Clock Spring assembly maintenance to prevent accidental air bag deployment injuries and protect vehicle safety. The vehicle should return to customers only when the SRS operates correctly with no identified faults in its operation. The RCM fuse removal will activate the air bag warning lamp while the ignition switch remains ON but this is a normal condition that signifies no SRS defect is present. The repair process includes installing a fresh part until further problems occur where the technician will need to reinstall the original component before performing diagnosis again. Initiate systemic depowering procedures before realigning the road wheels to a forward position. The technician must first remove the driver air bag module coupled with the steering wheel and lower steering column shroud screw and upper steering column shroud screws to free the upper shroud. The Clock Spring can be reinstalled after users apply two pieces of masking tape to stop rotational movement while removing it. The next step involves uninstalling the multi-function switch screw and the switch from its position followed by sliding it out with the retaining tab release. You should then disconnect the Clock Spring electrical connectors before releasing the three clips for Clock Spring removal. Check the mounting bracket for damage and substitute it when required then perform final tightening up to 6 Nm (53 lb-in). Installation should have proper component centralization to prevent early malfunction while maintaining road wheel alignment. Secure the Clock Spring housing nonetheless while gradually turning the rotor backward until pushback occurs before following with a clockwise rotation of about three full turns to achieve positioning at the center point. To stop accidental rotation apply adhesive tape. Install the steering column by placing the Clock Spring flats properly then slide it onto the column while securing both electrical connectors firmly. Mount the multi-function switch and its screw and install both upper and lower steering column shrouds with their screws. The system requires the driver air bag module and steering wheel reinstallation prior to restarting the system power.
    Posted by FordPartsDeal Specialist
    Q:
    How to Service and Repair the Clock Spring Assembly to Ensure the Supplemental Restraint System (SRS) is Operational on Lincoln Mark LT? Posted by Customer
    A:
    The safety of returning vehicles to customers requires complete operation of the supplemental restraint system along with no errors detected in the SRS before performing Clock Spring service or repair work. During ignition the warning indicator should activate while the restraints control module (RCM) fuse is disconnected from its power source although no fault exists. The repair procedure includes new part installation but replacing the original part should be considered if problems continue and diagnostics need to be restarted. Start the SRS depowering process after verifying that all road wheels face forward. You need to uninstall the driver air bag module combined with the steering wheel as well as the lower steering column shroud screw and the two upper steering column shroud screws along with the upper shroud. Two strips of masking tape must be applied to the Clock Spring when reuse is planned to stop accidental rotation. The installation starts with removing the multi-function switch screw and the switch component following the steps of releasing the retaining tab before sliding it away. Remove the Clock Spring after disconnecting electrical connectors and removing its three clips. Check the mounting bracket for any damage and perform a replacement if needed while tightening it to 6 Nm (53 lb-in). Before assembly always position the Clock Spring at its installation center to prevent premature failure from occurring. Process the outer housing while keeping it static and turn the rotor counterclockwise until it meets resistance then continue turning clockwise for three rotations until the center point is reached. Use tape to protect the Clock Spring from unintended rotation. Place the flat sides of the Clock Spring opposite the steering column then insert it onto the column shaft. New Clock Springs require the removal of the retaining pin but reused parts need the tape to be removed. Hook up the electrical connectors by aligning them before choosing their complete seating position. Begin by installing both the multi-function switch together with its screw and continue with attaching screws for upper/lower steering column shrouds. Finish the installation process by adding the steering wheel along with the driver air bag module and then enable SRS power.
    Posted by FordPartsDeal Specialist
    Q:
    What Precautions and Steps Are Involved in Installing a Clock Spring Assembly on Lincoln Aviator? Posted by Customer
    A:
    Safety glasses serve as essential protective equipment when dealing with Clock Spring assembly service to prevent air bag deployment injuries and memory saver devices should remain out of use during servicing operations. The RCM fuse removal during an ignition switch ON operation activates the air bag warning lamp as an expected normal condition without indicating an SRS problem. A complete check of SRS operational readiness must occur without faults prior to returning the vehicle to the customer. To fix this problem you need to put in a fresh component yet if the problem remains constant you must reattach the original component and retest again. The first step should include system depowering followed by the arrangement of road wheels in a straight position. Start by taking out the driver air bag module together with the steering wheel after removing screws that secure the steering column opening cover and lower steering column shroud and then the upper steering column shroud. The Clock Spring should get tape installation before removal to stop its movement. To complete the procedure remove the multifunction switch first then detach the Clock Spring by disconnecting its electrical connectors and screws while verifying the mounting bracket has no damage. After locating the Clock Spring mounting bracket in position you should secure it with screws before connecting its electrical connectors. Oversee Clock Spring centralization by fixing the outer housing in place while rotating the rotor first counterclockwise until it meets resistance followed by clockwise motion of three turns to establish the central position. Move the Clock Spring flats to match the steering column while fastening it with screws before installing the multifunction switch and upper and lower steering column shrouds and the steering wheel. Distribute the driver air bag module before activating power to the system once more.
    Posted by FordPartsDeal Specialist
    Q:
    What should be ensured before returning to the customer for the 2002 Ford Explorer? Posted by Customer
    A:
    Ensure the SRS is operational and fault-free.
    Posted by FordPartsDeal Specialist
    See expert answers on similar Clock Spring
    Q:
    What should be done to prevent the clockspring from turning during removal for the 2004 Ford Explorer? Posted by Customer
    A:
    If reinstalling the clockspring, prevent it from turning during removal.
    Posted by FordPartsDeal Specialist
    See expert answers on similar Clock Spring
    Q:
    What should be done after disconnecting the clockspring electrical connectors for the 2005 Ford F-150? Posted by Customer
    A:
    Release the three clips and remove the clockspring.
    Posted by FordPartsDeal Specialist
    See expert answers on similar Clock Spring
    Q:
    How do you center the clockspring for the 2004 Lincoln Aviator? Posted by Customer
    A:
    Hold the outer housing stationary, turn the rotor counterclockwise until resistance is felt, then turn it clockwise approximately three turns to reach the center point.
    Posted by FordPartsDeal Specialist
    See expert answers on similar Clock Spring
    Q:
    What components need to be reinstalled after the clockspring installation for the 2002 Mercury Mountaineer? Posted by Customer
    A:
    Reinstall the multi-function switch, upper and lower steering column shrouds, gear selector boot, and instrument panel cover.
    Posted by FordPartsDeal Specialist
    See expert answers on similar Clock Spring
    Q:
    What components need to be removed to access the clockspring for the 2005 Mercury Mountaineer? Posted by Customer
    A:
    Remove the driver air bag module, steering wheel, and the two screws from the steering column opening cover, then detach the cover.
    Posted by FordPartsDeal Specialist
    See expert answers on similar Clock Spring
    If you have any questions about this product, please don't hesitate to ask us. We will be happy to help you!

OEM Ford 8L3Z-14A664-A, Excellent Performance and Perfect Fitment

To ensure reliability, purchase Ford part # 8L3Z-14A664-A Clockspring. It is sometimes referred to as Ford Clock Spring. For those Ford owners who aspire to maintain their vehicles in optimal shape, opting for OEM parts is a wise choice. Precisely engineered, these components adhere to stringent factory guidelines and are produced in state-of-the-art facilities using cutting-edge technologies. Moreover, they are subjected to thorough testing to certify their resilience and safety, thereby making them a dependable option for Ford owners.

FordPartsDeal.com is a leading supplier of genuine Ford parts such as Ford 8L3Z14A664A Clockspring. A vast selection of genuine Ford parts is available on our website, all offered at discounted prices. Every OEM Ford part is covered by the manufacturer's warranty, which also applies to our hassle-free return policy. Enjoy fast delivery service, ensuring you get your parts when you need them. Your shopping experience here is guaranteed to be pleasurable. For detailed Ford parts information, click here.
Choose FordPartsDeal for discounted prices, exceptional service and fast delivery