My Garage
Cart
Make sure this part fits

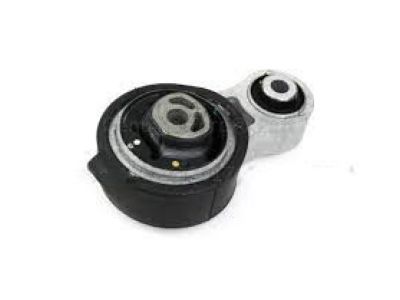
Ford 9G1Z-6068-A
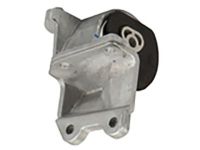
Torsion Arm, Lower

2008-2012 Ford 9G1Z6068A

Customer Questions & Expert Answers (9)
Ford 9G1Z-6068-A Torsion Arm, Lower
  • Part Description
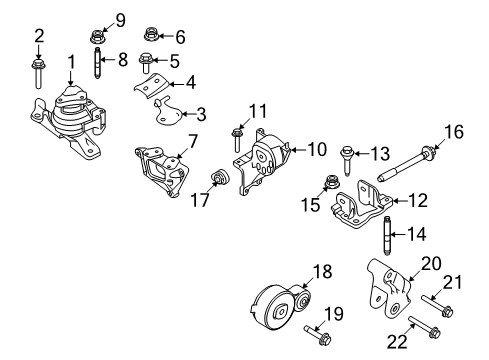
    Housing; Automatic Transmission Mount, Lower; Engine Support Rod; Engine Mount Bracket; Transfer Case Mount; Motor Mount
  • Base No.
    6068
  • Position
    Lower
  • Replaces
    8G1Z-6068-A
  • Manufacturer
    Ford
Make sure this part fits
$42.90 MSRP: $61.37
You Save: $18.47 (31%)
Ships in 1-2 Business Days
1
ADD TO CART
  • Vehicle Fitment

    Year Make Model Trim Engine
    2009-2012 Ford FlexLimited, SE, SEL, Titanium6 Cyl 3.5 L GAS
    2008-2012 Ford TaurusLimited, SE, SEL6 Cyl 3.5 L GAS
    2008-2009 Ford Taurus XEddie Bauer, Limited, SEL6 Cyl 3.5 L GAS
    2009-2012 Lincoln MKSBase6 Cyl 3.7 L GAS
    2008-2009 Mercury SableBase, Premier6 Cyl 3.5 L GAS
    Warning: California's Proposition 65
  • Customer Questions & Expert Answers

    Q:
    Is this 9G1Z-6068-A compatible with my car? Posted by FordPartsDeal Specialist
    A:
    Select Your Vehicle model to verify if part number 9G1Z-6068-A fits your car.
    Posted by FordPartsDeal Specialist
    Q:
    How to Service and Repair the Motor and Transmission Mount on a 6F50 on Ford Flex? Posted by Customer
    A:
    Initiate transmission mount repair of 6F50 vehicles by hoisting them to NEUTRAL position. The service starts with unfastening two Y-pipe nuts and separating the exhaust hanger for eventual disposal of the exhaust seal and its gasket and nuts. Remove the 4 nuts from the Y-pipe assembly before discarding the attached exhaust seals. Rotation of the engine roll restrictor-to-subframe through bolt should begin first before removing the 2 roll restrictor bracket bolts. The installation process for both the Mass Air Flow (MAF) sensor electrical connector and the engine breather from the Air Cleaner (ACL) assembly involves their disconnection. Untighten the outlet pipe clamp at the Throttle Body while removing the bolts from the ACL assembly bracket and taking out both the ACL and ACL outlet pipe assembly. Disassemble the battery while taking out its power supply and unplugging all harnesses from the battery tray. To remove the battery tray and bracket first unfasten the lower bracket bolts at two positions and the upper battery tray bolt with its matching nut and separate the Power Distribution Box fasteners. A floor jack should assist you in releasing transaxle support insulator pressure through careful installation of the Oil Pan Holding Fixture beneath the oil pan. First lower the transaxle from the mount about 50.8 mm (2 in) before removing its transaxle support insulator through bolt and flagnut. The procedure begins by removing four nuts along with the transaxle support insulator bracket before moving to the bottom and top bolts which detach the insulator bracket. Begin with the installation of bottom transaxle support insulator bolts through a torque of 55 Nm (41 lb-ft) and then move to the top bolts with the same torque value. The 4 bracket nuts must be torqued to 63 Nm (46 lb-ft) when securing the transaxle support insulator bracket. The floor jack and Oil Pan Holding Fixture allow you to lift the transaxle so you can install its support insulator through bolt while tightening it to 175 Nm (129 lb-ft). Place the floor jack and Oil Pan Holding Fixture to the side before installing the battery tray along with its bracket while applying 9 Nm (80 lb-in) to the battery tray bolt and 9 Nm (80 lb-in) to the lower bracket bolts. Secure the five pin-type wiring harness fasteners onto the battery tray while installing the battery. Position the ACL assembly before you install its bracket bolts which should be tightened to 11 Nm (97 lb-in) then apply 5 Nm (44 lb-in) torque to the ACL outlet pipe clamp at the TB. Position the engine breather at both the MAF sensor electrical connector and the ACL assembly. Hang the roll restrictor before installing its bolts to 90 Nm (66 lb-ft) while after installing the through bolt to match that torque. To complete the last steps, you need to add new exhaust seals before moving the Y-pipe into position and installing 4 new exhaust Y-pipe assembly nuts with a torque setting of 40 Nm (30 lb-ft). This needs to be followed by installing the new exhaust seal and placing the Y-pipe in the exhaust hanger before tightening 2 new exhaust flange nuts to 40 Nm (30 lb-ft).
    Posted by FordPartsDeal Specialist
    Q:
    How to remove and install the engine mount on Ford Taurus X? Posted by Customer
    A:
    The first step to remove the engine mount involves taking off the exhaust flexible pipe. Position a floor jack together with the Oil Pan Holding Fixture under the oil pan making sure the fixture matches with the mounting bosses while maintaining caution against any potential damage. The first step requires removal of the engine coolant degas bottle while the second step involves detaching the wiring harness retainer from the engine mount bracket stud bolt and subsequent removal of the nut and bolt and engine mount brace. After properly removing the four engine mount nuts along with the four engine mount studs it is essential to detach the three bolts and the engine mount from its position. The front cover engine mount stud holes should receive pressurized air cleaning for debris removal before installing the engine mount along with the three bolts while keeping them loose. After cleaning the engine mount studs along with fresh studs apply new thread sealer before screwing in the four engine mount studs which need to be torqued to 20 Nm (177 lb-in). Crank the engine mount bolts which number three to 90 Nm (66 lb-ft) tension while the four engine mount nuts require a torque of 63 Nm (46 lb-ft). The complete installation procedure includes tightening the engine mount brace along with its bolt and nut to 20 Nm (177 lb-in). Subsequently install the wiring harness retainer to the engine mount bracket stud bolt before reattaching the engine coolant degas bottle and the exhaust flexible pipe.
    Posted by FordPartsDeal Specialist
    Q:
    What is the first step to remove the engine mount for the 2009 Ford Flex? Posted by Customer
    A:
    Take off the exhaust flexible pipe.
    Posted by FordPartsDeal Specialist
    See expert answers on similar Engine Mount
    Q:
    How do you release pressure on the transaxle support insulator for the 2009 Ford Taurus X? Posted by Customer
    A:
    Carefully align the Oil Pan Holding Fixture under the oil pan using a floor jack.
    Posted by FordPartsDeal Specialist
    See expert answers on similar Motor And Transmission Mount
    Q:
    What should be done with the engine roll restrictor for the 2009 Lincoln MKS? Posted by Customer
    A:
    Loosen the engine roll restrictor-to-subframe through bolt and remove the 2 bolts from the roll restrictor bracket.
    Posted by FordPartsDeal Specialist
    See expert answers on similar Motor And Transmission Mount
    Q:
    What should be removed after the engine mount nuts and studs for the 2009 Lincoln MKS? Posted by Customer
    A:
    The three bolts and the engine mount itself.
    Posted by FordPartsDeal Specialist
    See expert answers on similar Engine Mount
    Q:
    What should be reinstalled after tightening the engine mount components for the 2009 Ford Taurus? Posted by Customer
    A:
    The engine mount brace, nut, and bolt.
    Posted by FordPartsDeal Specialist
    See expert answers on similar Engine Mount
    Q:
    What is the first step to remove the engine mount for the 2009 Mercury Sable? Posted by Customer
    A:
    Take off the exhaust flexible pipe.
    Posted by FordPartsDeal Specialist
    See expert answers on similar Engine Mount
    If you have any questions about this product, please don't hesitate to ask us. We will be happy to help you!

OEM Ford Torsion Arm, Lower 9G1Z-6068-A Designed for Proper Fit and Performance

The Ford part 9G1Z-6068-A Torsion Arm, Lower as a genuine Ford Engine Mount, Motor And Transmission Mount, Engine Torque Strut Mount component delivers both authenticity and reliability. This item carries a warranty from the manufacturer which guarantees 12-month, 12,000-mile of use. The Ford 9G1Z-6068-A Torsion Arm, Lower is used with Ford Taurus, Flex, Taurus X vehicles and Mercury Sable models and Lincoln MKS models. The original Ford part will bear the manufacturer part number: 9G1Z-6068-A and where it is made at Ford. It has been specifically developed to fit the Lower and has the code: 6068.
This component has dimensions of 8.2 x 4.5 x 3.0 inches and its weight is approximately 1.80 Pounds. The part 9G1Z6068A is available in New condition while meeting the standards of the product rating. The Housing; Automatic Transmission Mount, Lower; Engine Support Rod; Engine Mount Bracket; Transfer Case Mount; Motor Mount belongs to the Direct Replacement category to guarantee it is suitable for its specific vehicle applications. This part 9G1Z-6068-A can be known as Lower Mount; Lower Trans Mount; Transmission Mount, and it replaces 8G1Z-6068-A. The inventory reference for this item is SKU: 9G1Z-6068-A. The Ford manufacturer issues a factory warranty for this component which ensures dependable operation and peak performance. You can find delivery and returns information on our Shipping Policy and Return Policy pages.
Original equipment manufacturer parts are of the top standards and their performance is outstanding and top notch. This is explained by the fact that they follow the official manufacturing techniques of Ford, use of premium material and meets high standards of quality. Our site is worth visiting, in case you need high-quality and affordable OEM Ford components. We promise the optimal priced Ford parts on a wide range. You can relax that all OEM products you buy from us include a manufacturer warranty and will be covered by our simple and easy-to-use return policy, so you will not worry about buying a part.