My Garage
Cart
Make sure this part fits

Ford 1S7Z-6A321-B
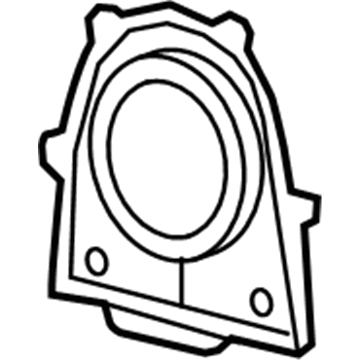
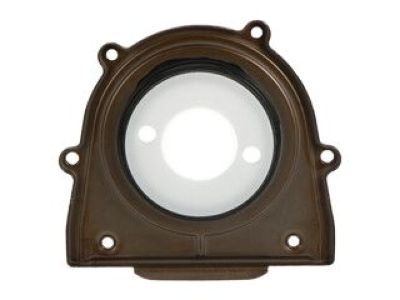
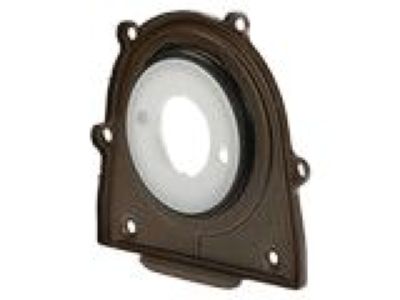
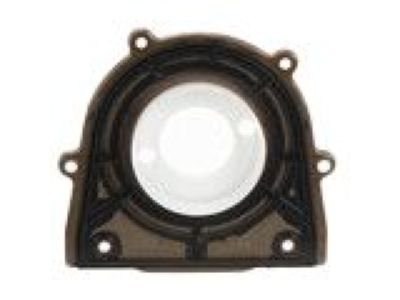
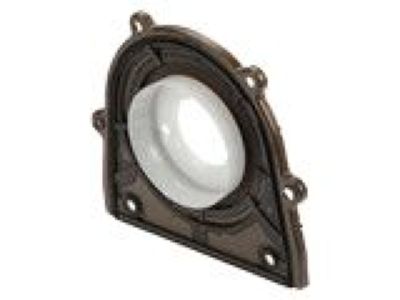
Rear Main Seal

2004-2023 Ford 1S7Z6A321B

Customer Questions & Expert Answers (7)
Ford 1S7Z-6A321-B Rear Main Seal
  • Part Description
    Seal Assembly - Crankshaft Oil; Engine Crankshaft Seal, Rear; Crankshaft Seal
  • Position
    Rear
  • Replaces
    1S7Z-6D309-AA, 1S7Z-6K301-AA, 1S7Z-6K301-BA
  • Manufacturer
    Ford
Make sure this part fits
$59.56 MSRP: $86.70
You Save: $27.14 (32%)
1
ADD TO CART
  • Related Parts
  • Product Specifications
  • Vehicle Fitment
  • Customer Questions & Expert Answers
  • Product Specifications

    BrandGenuine Ford
    Manufacturer Part Number1S7Z-6A321-B
    Part DescriptionSeal Assembly - Crankshaft Oil; Engine Crankshaft Seal, Rear; Crankshaft Seal
    Other NamesRear Seal; Rear Main Seal Retainer
    PositionRear
    ConditionNew
    Fitment TypeDirect Replacement
    Replaces1S7Z-6D309-AA, 1S7Z-6K301-AA, 1S7Z-6K301-BA
    ManufacturerFord
    SKU1S7Z-6A321-B
    WarrantyThis genuine Ford part is guaranteed by Ford's factory warranty.
    Shipping & ReturnShipping Policy Return Policy
    Warning: California's Proposition 65
  • Vehicle Fitment

    Year Make Model Trim Engine
    2021-2023 Ford BroncoBadlands, Base, Big Bend, Black Diamond, Everglades, Heritage Edition, Outer Banks4 Cyl 2.3 L GAS
    2013-2018 Ford C-MaxEnergi SE, Energi SEL, Energi Titanium, Hybrid SE, Hybrid SEL, Hybrid Titanium4 Cyl 2.0 L FULL HYBRID EV-GAS (FHEV), 4 Cyl 2.0 L PLUG-IN HYBRID EV-GAS (PHEV)
    2018-2022 Ford EcoSportS, SE, SES, Titanium4 Cyl 2.0 L GAS
    2012-2023 Ford EdgeLimited, SE, SEL, ST-Line, Titanium4 Cyl 2.0 L GAS
    2005-2023 Ford EscapeHybrid, Limited, Limited Hybrid, Platinum Hybrid, Plug-In Hybrid, S, SE, SE Hybrid, SE Plug-In Hybrid, SE Sport Hybrid, SEL, SEL Hybrid, SEL Plug-In Hybrid, ST-Line Elite Hybrid, ST-Line Hybrid, ST-Line Select Hybrid, Titanium, Titanium Hybrid, Titanium Plug-In Hybrid, XLS, XLT, XLT No Boundaries4 Cyl 2.0 L GAS, 4 Cyl 2.3 L FULL HYBRID EV-GAS (FHEV), 4 Cyl 2.3 L GAS, 4 Cyl 2.5 L FULL HYBRID EV-GAS (FHEV), 4 Cyl 2.5 L GAS, 4 Cyl 2.5 L PLUG-IN HYBRID EV-GAS (PHEV)
    2012-2023 Ford ExplorerBase, Limited, ST-Line, Timberline, XLT4 Cyl 2.0 L GAS, 4 Cyl 2.3 L GAS
    2005-2018 Ford FocusRS, S, SE, SEL, SES, ST, Titanium, ZX3, ZX4, ZX4 ST, ZX5, ZXW4 Cyl 2.0 L FLEX, 4 Cyl 2.0 L GAS, 4 Cyl 2.3 L GAS
    2006-2020 Ford FusionEnergi Platinum, Energi SE, Energi Titanium, Hybrid, Platinum, Platinum Hybrid, S, S Hybrid, SE, SE Hybrid, SEL, SEL Hybrid, Titanium, Titanium Hybrid4 Cyl 2.0 L FULL HYBRID EV-GAS (FHEV), 4 Cyl 2.0 L GAS, 4 Cyl 2.0 L PLUG-IN HYBRID EV-GAS (PHEV), 4 Cyl 2.3 L GAS, 4 Cyl 2.5 L FLEX, 4 Cyl 2.5 L FULL HYBRID EV-GAS (FHEV), 4 Cyl 2.5 L GAS
    2022-2023 Ford MaverickLariat, XL, XLT4 Cyl 2.5 L FULL HYBRID EV-GAS (FHEV)
    2015-2023 Ford MustangEcoBoost, EcoBoost Premium4 Cyl 2.3 L GAS
    View More
  • Customer Questions & Expert Answers

    Q:
    Is 1S7Z-6A321-B the part I need for my vehicle? Posted by FordPartsDeal Specialist
    A:
    Select Your Vehicle model to verify if part number 1S7Z-6A321-B fits your car.
    Posted by FordPartsDeal Specialist
    Q:
    How to Service the Rear Crankshaft Seal on Ford Escape? Posted by Customer
    A:
    Start the crankshaft rear seal service by placing the vehicle in NEUTRAL position on a hoist. Pull out the flexplate or flywheel before extracting all engine oil and installing the drain plug with a torque of 28 Nm (21 lb-ft). The entire process of removing the oil pan becomes essential since it protects the rear oil seal retainer joint from damage; thus 17 bolts need to be taken out. You need to take off the six bolts which anchor the crankshaft rear oil seal with its retainer plate. The Crankshaft Rear Main Oil Seal Installer helps install the crankshaft rear oil seal with retainer plate onto the crankshaft by combining with torque the specified bolts to 10 Nm (89 lb-in) while following a specific bolt tightening sequence. A plastic scraping instrument should be used for cleansing sealing surfaces in order to stop scratches that might trigger leaks. Uncapped oil pans must be cleaned of the sealant so the specified surface preparation process for metal products can take place following complete drying. Stipulate the appropriate procedure which consists of using a 2.5 mm (0.09 in) bead of silicone gasket and sealant to the oil pan followed by bolt installation finger-tight then full-tightening to 10 Nm (89 lb-in). The final step includes installing all remaining oil pan bolts while following the specified tightening sequence to 25 Nm (18 lb-ft). Then reattach the flexplate or flywheel before putting clean engine oil into the machine.
    Posted by FordPartsDeal Specialist
    Q:
    How to Service the Rear Crankshaft Seal on Ford Fusion? Posted by Customer
    A:
    Begin the crankshaft rear seal servicing operations only after the vehicle sits in NEUTRAL on a hoist. Empty engine oil before installing the drain plug which should be tightened to 28 Nm (21 lb-ft). To protect the rear oil seal retainer joint from damage the 16 bolts and stud bolt along with oil pan must be taken off. You must disconnect the 6 bolts and remove the crankshaft rear oil seal together with its retainer plate. Affect installation requires using the Crankshaft Rear Main Oil Seal Installer to mount the crankshaft rear oil seal with retainer plate onto the crankshaft along with correct bolt torques to 10 Nm (89 lb-in). The use of metal scrapers along with abrasive tools should be prohibited for sealing surface cleaning operations since plastic scraping tools should be used instead. The mating surfaces of the oil pan alongside the engine front cover and cylinder block need thorough cleaning before inspection. After applying sealant to the oil pan it should be secured within 4 minutes or else the operator must remove the sealant followed by cleaning and drying the surface area for at least 4 minutes using metal surface prep. Depose 2.5 mm (0.09 in) of silicone gasket and sealant onto the oil pan before installing the oil pan and securing its 2 bolts lightly. First install the 3 bolts and stud bolt before tightening them to 10 Nm (89 lb-in), then proceed with tightening the remaining oil pan bolts in sequence to 20 Nm (177 lb-in). The flexible part and mechanical wheel should be reinstalled and the power unit should receive appropriate clean engine lubrication.
    Posted by FordPartsDeal Specialist
    Q:
    How to Service and Repair the Main Bearing Crankshaft Seal on Ford Focus? Posted by Customer
    A:
    A hoisted vehicle in NEUTRAL position should be used for crankshaft main bearing seal servicing and repair work. Open the flywheel or flexplate before removing all engine oil from the compartment and installing the drain plug fastened to 28 Nm (21 lb-ft). Move on to the following step by removing the oil level indicator together with its tube. Removing the 17 bolts from the oil pan will prevent any damage to the rear oil seal retainer joint. You must remove six bolts securing the crankshaft rear seal along with its retainer plate. To install the crankshaft rear oil seal with its retainer plate the Crankshaft Rear Main Oil Seal Installer helps place the new components over the crankshaft before securing them using 6 bolts that need to be torqued to 10 Nm (89 lb-in) following a particular installation order. A plastic scraping tool should be used to clean the sealing surfaces but if the sealant remains unsecured for more than four minutes it must be removed before cleaning the area with silicone gasket remover and metal surface prep. Apply a 2.5 mm (0.10 in) bead of silicone gasket and sealant to the oil pan before securely installing 2 bolts by hand and torquing the 4 front cover-to-oil pan bolts to 10 Nm (89 lb-in) and the rest of the oil pan bolts to 25 Nm (18 lb-ft) according to the specified sequence. Place back the oil level indicator together with tube before reinstalling the flywheel or flexplate. Completing the procedure requires adding clean engine oil to the engine.
    Posted by FordPartsDeal Specialist
    Q:
    How to Service the Rear Crankshaft Seal on Mercury Milan? Posted by Customer
    A:
    Begin the crankshaft rear seal servicing operations only after the vehicle sits in NEUTRAL on a hoist. Empty engine oil before installing the drain plug which should be tightened to 28 Nm (21 lb-ft). To protect the rear oil seal retainer joint from damage the 16 bolts and stud bolt along with oil pan must be taken off. You must disconnect the 6 bolts and remove the crankshaft rear oil seal together with its retainer plate. Affect installation requires using the Crankshaft Rear Main Oil Seal Installer to mount the crankshaft rear oil seal with retainer plate onto the crankshaft along with correct bolt torques to 10 Nm (89 lb-in). The use of metal scrapers along with abrasive tools should be prohibited for sealing surface cleaning operations since plastic scraping tools should be used instead. The mating surfaces of the oil pan alongside the engine front cover and cylinder block need thorough cleaning before inspection. After applying sealant to the oil pan it should be secured within 4 minutes or else the operator must remove the sealant followed by cleaning and drying the surface area for at least 4 minutes using metal surface prep. Depose 2.5 mm (0.09 in) of silicone gasket and sealant onto the oil pan before installing the oil pan and securing its 2 bolts lightly. First install the 3 bolts and stud bolt before tightening them to 10 Nm (89 lb-in), then proceed with tightening the remaining oil pan bolts in sequence to 20 Nm (177 lb-in). The flexible part and mechanical wheel should be reinstalled and the power unit should receive appropriate clean engine lubrication.
    Posted by FordPartsDeal Specialist
    Q:
    How to Service the Rear Crankshaft Seal on Mercury Mariner? Posted by Customer
    A:
    Start the crankshaft rear seal service by placing the vehicle in NEUTRAL position on a hoist. Pull out the flexplate or flywheel before extracting all engine oil and installing the drain plug with a torque of 28 Nm (21 lb-ft). The entire process of removing the oil pan becomes essential since it protects the rear oil seal retainer joint from damage; thus 17 bolts need to be taken out. You need to take off the six bolts which anchor the crankshaft rear oil seal with its retainer plate. The Crankshaft Rear Main Oil Seal Installer helps install the crankshaft rear oil seal with retainer plate onto the crankshaft by combining with torque the specified bolts to 10 Nm (89 lb-in) while following a specific bolt tightening sequence. A plastic scraping instrument should be used for cleansing sealing surfaces in order to stop scratches that might trigger leaks. Uncapped oil pans must be cleaned of the sealant so the specified surface preparation process for metal products can take place following complete drying. Stipulate the appropriate procedure which consists of using a 2.5 mm (0.09 in) bead of silicone gasket and sealant to the oil pan followed by bolt installation finger-tight then full-tightening to 10 Nm (89 lb-in). The final step includes installing all remaining oil pan bolts while following the specified tightening sequence to 25 Nm (18 lb-ft). Then reattach the flexplate or flywheel before putting clean engine oil into the machine.
    Posted by FordPartsDeal Specialist
    Q:
    What tool should be used to take out the crankshaft rear seal for the 2009 Ford Ranger? Posted by Customer
    A:
    Use the Oil Seal Remover.
    Posted by FordPartsDeal Specialist
    See expert answers on similar Crankshaft Seal
    If you have any questions about this product, please don't hesitate to ask us. We will be happy to help you!

OEM Ford 1S7Z-6A321-B, Excellent Performance and Perfect Fitment

To ensure reliability, purchase Ford part # 1S7Z-6A321-B Rear Main Seal. It is sometimes referred to as Ford Crankshaft Seal. For those Ford owners who aspire to maintain their vehicles in optimal shape, opting for OEM parts is a wise choice. Precisely engineered, these components adhere to stringent factory guidelines and are produced in state-of-the-art facilities using cutting-edge technologies. Moreover, they are subjected to thorough testing to certify their resilience and safety, thereby making them a dependable option for Ford owners.

FordPartsDeal.com is a leading supplier of genuine Ford parts such as Ford 1S7Z6A321B Rear Main Seal. A vast selection of genuine Ford parts is available on our website, all offered at discounted prices. Every OEM Ford part is covered by the manufacturer's warranty, which also applies to our hassle-free return policy. Enjoy fast delivery service, ensuring you get your parts when you need them. Your shopping experience here is guaranteed to be pleasurable. For detailed Ford parts information, click here.
Choose FordPartsDeal for discounted prices, exceptional service and fast delivery