FordParts
My Garage
My Account
Cart
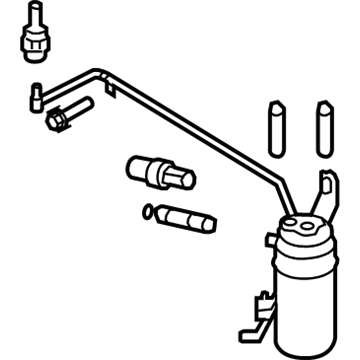
OEM 2006 Mercury Mountaineer A/C Accumulator
Accumulator- Select Vehicle by Model
- Select Vehicle by VIN
Select Vehicle by Model
orMake
Model
Year
Select Vehicle by VIN
For the most accurate results, select vehicle by your VIN (Vehicle Identification Number).
1 A/C Accumulator found
2006 Mercury Mountaineer Drier Part Number: JU2Z-19C836-B
Product Specifications- Other Name: Accumulator Assembly - Air Conditioning; A/C Accumulator; Drier Desiccant Element; A/C Receiver Drier; Accumulator
- Replaces: 7L2Z-19C836-B, 6L2Z-19C836-A, 8L2Z-19C836-A, 7L2Z-19C836-A, YF-3330, YF-3492, YF-3284
- Condition: New
- Fitment Type: Direct Replacement
- SKU: JU2Z-19C836-B
- Warranty: This genuine part is guaranteed by Ford's factory warranty.
2006 Mercury Mountaineer A/C Accumulator
If you're seeking quality and affordability, look no further than our extensive inventory of genuine 2006 Mercury Mountaineer A/C Accumulator available at FordPartsDeal.com. You can confidently purchase our OEM 2006 Mercury Mountaineer A/C Accumulator as they are supported by the manufacturer's warranty and our hassle-free return policy, alongside the benefit of our fast delivery service.
2006 Mercury Mountaineer A/C Accumulator Parts Q&A
- Q: How to Service the A/C Accumulator in the HVAC System on 2006 Mercury Mountaineer?A: The HVAC refrigerant servicing process for the suction accumulator must start with refrigerant recovery. Starting by disassembling the PCM then the low-side service port stem bracket bolt needs to be tightened at 8 Nm (71 lb-in). Reinstallation follows the same torque specifications. Detach the electrical connector of A/C cycling switch and remove suction accumulator bolt by tightening it to 9 Nm (80 lb-in) for the installation phase. Tighten the suction accumulator stud to 9 Nm (80 lb-in) after its replacement. The suction accumulator-to-compressor line bracket nut should be removed from the condenser-to-evaporator line at 4.6L vehicles. The technician should first disconnect the two suction accumulator fittings by removing their nuts before disposal of O-ring seals and proper tightening of new fittings to 8 Nm (71 lb-in) during reinstallation. Disassemble the suction accumulator bracket bolt as well as the suction accumulator. The final step for installation involves the reversal of current procedures followed by new O-ring seal installation and correct PAG oil lubrication of the refrigerant system. The refrigerant system needs evacuation followed by leak testing and charging during completion.


