FordParts
My Garage
My Account
Cart
OEM Ford Expedition Air Suspension
Air Ride- Select Vehicle by Model
- Select Vehicle by VIN
Select Vehicle by Model
orMake
Model
Year
Select Vehicle by VIN
For the most accurate results, select vehicle by your VIN (Vehicle Identification Number).
2 Air Suspensions found


Ford Expedition Air Spring, Rear Part Number: 7L1Z-5A891-B


Ford Expedition Air Spring, Front Part Number: 6L1Z-3C199-AA
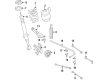
Ford Expedition Air Suspension
OEM Air Suspension boasts unmatched quality. Each part goes through full quality checks. They adhere to Ford's official factory standards. These steps remove flaws and inconsistencies. So you can get Air Suspension with long life and a perfect fit. Come to our website and find genuine Ford Expedition parts. We keep a wide inventory of OEM Expedition parts at the highly affordable prices. It's easy to search, compare, and pick what you need. You'll love the clear info and simple checkout. We offer top-rated customer service, and we reply fast. We also ship promptly to ensure your order arrives on time.
The Air Suspension employed in Ford Expedition vehicles and meant for improving the comfort level and employs a rubber bag with compressed air. This design allows the vehicle to control the air pressure inside spring hence having and option to adjust on the performance and comfort. The various types of the Air Suspensions that have been used through the years are fitted in the various models of the Expedition to enhance the premier handling and stability. The main difference between them can be found in the choice of algorithms for adaptation to various driving conditions and offer the customer a personalized version. Altogether, the Air Spring system contribute significantly to the Ford Expedition's ability to provide a compliant and configurable ride.
Ford Expedition Air Suspension Parts and Q&A
- Q: How to Remove and Replace the Rear Air Suspension Shock Absorber on Ford Expedition?A:The procedure of removing and installing the rear air Shock Absorber begins with venting all air pressure from the air suspension system because unsafe conditions would otherwise develop. A scan tool should first be used to vent the proper air spring then you can move on to taking out the lower arm. Detach the electrical connector of the solenoid valve and break the air line connections at the valve through the orange lock ring compression followed by downward pulling on the air supply line. Use new upper shock nuts by discarding existing ones and applying torque of 40 Nm (30 lb-ft) to the new installations. My first step involves removing the air shock absorber while applying the hex holding feature to stop the shock rod from turning apart from removing and disposing of the shock rod nut which needs tightening at a torque force of 45 Nm (33 lb-ft) during assembly. Failure will occur when the retainer tabs break so the vehicle needs a new air spring installation. Referencing the position of index marks on the air spring and shock absorber will allow you to push down retainer tabs to extract the air spring assembly. Take out and dispose of the shock rod O-ring seal, washer and each of the lower air spring O-ring seals. The next step requires removal of two retainer screws together with the upper mount and two upper air spring O-ring seals and their disposal. A suitable press installation tool must be used to install the retainer pins on the upper mount through avoidance of hammer tools for preventing damage. SERE all seals for cleanliness and free this area from debris before you apply thin grease to new O-ring seals using the reverse removal process to install the components.

Related Ford Expedition Parts
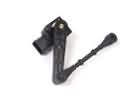 Ford Expedition Ride Height Sensor
 Ford Expedition Sway Bar Link
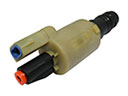 Ford Expedition Air Suspension Solenoid
 Ford Expedition Axle Support Bushings
 Ford Expedition Bump Stop
 Ford Expedition Coil Springs
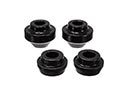 Ford Expedition Radius Arm Bushing
 Ford Expedition Spindle
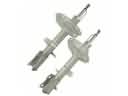 Ford Expedition Strut Housing
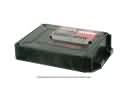 Ford Expedition Suspension Control Module
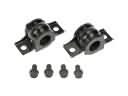 Ford Expedition Sway Bar Bracket
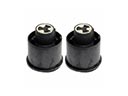 Ford Expedition Trailing Arm Bushing