FordParts
My Garage
My Account
Cart
OEM Lincoln A/C Switch
Air Conditioning Switch- Select Vehicle by Model
- Select Vehicle by VIN
Select Vehicle by Model
orMake
Model
Year
Select Vehicle by VIN
For the most accurate results, select vehicle by your VIN (Vehicle Identification Number).
147 A/C Switches found


Lincoln Fan Switch Part Number: 1L2Z-19986-AA
$50.34 MSRP: $84.36You Save: $34.02 (41%)Ships in 1 Business DayProduct Specifications- Other Name: Switch Assembly; HVAC Blower Control and Motor Switch; A/C Heater Motor Switch; Climate Control Module; Blower Resistor


Lincoln Heater Control Part Number: EA5Z-19980-D
$186.70 MSRP: $310.00You Save: $123.30 (40%)Product Specifications- Other Name: Control; Climate Control Module; Blower Control Switch; Dash Control Unit
- Replaces: EA5Z-19980-A, EA5Z-19980-B


Lincoln Heater Control Part Number: EE9Z-19980-D
$187.90 MSRP: $312.00You Save: $124.10 (40%)Product Specifications- Other Name: Control; Climate Control Module; Blower Control Switch; Dash Control Unit
- Manufacturer Note: Heating Ventilation Air Conditioning (HVAC) Module
- Replaces: EE9Z-19980-C

Lincoln Heater Control Part Number: DE9Z-19980-B
$327.40 MSRP: $560.00You Save: $232.60 (42%)Ships in 1-3 Business DaysProduct Specifications- Other Name: Control; Climate Control Module; Heater & A/C Control

Lincoln Heater & A/C Control Part Number: DE9Z-19980-F
$334.42 MSRP: $572.00You Save: $237.58 (42%)Ships in 1-3 Business DaysProduct Specifications- Other Name: Control; Climate Control Module

Lincoln Heater Control Part Number: LJ7Z-19980-E
$146.12 MSRP: $246.00You Save: $99.88 (41%)Ships in 1-2 Business DaysProduct Specifications- Other Name: Control; Climate Control Module; Blower Control Switch; Dash Control Unit
- Replaces: CCM-456, LJ7Z-19980-C

Lincoln Heater Control Part Number: EA1Z-19980-E
$127.63 MSRP: $210.00You Save: $82.37 (40%)Product Specifications- Other Name: Control; Climate Control Module; Blower Control Switch; Dash Control Unit
- Manufacturer Note: Heating Ventilation Air Conditioning (HVAC) Module
- Replaces: EA1Z-19980-C

Lincoln Control Part Number: MC5Z-19980-B
$156.80 MSRP: $258.00You Save: $101.20 (40%)Ships in 1-2 Business DaysProduct Specifications- Replaces: CCM-448, MC5Z-19980-A
Lincoln Control Module Part Number: LC5Z-19980-A
$156.80 MSRP: $258.00You Save: $101.20 (40%)Ships in 1-2 Business DaysProduct Specifications- Other Name: Control; Heater Control

Lincoln Heater Control Part Number: FL1Z-19980-K
$192.72 MSRP: $320.00You Save: $127.28 (40%)Product Specifications- Other Name: Control; Climate Control Module; Blower Control Switch; Dash Control Unit
- Manufacturer Note: Heating Ventilation Air Conditioning (HVAC) Module
- Replaces: CCM-112, CCM-51, FL1Z-19980-J, FL1Z-19980-C, FL1Z-19980-L


Lincoln Temperature Control Switch Part Number: F85Z-19C733-AA
$23.03 MSRP: $35.64You Save: $12.61 (36%)Product Specifications- Other Name: Potentiometer Assembly
- Replaces: F65Z-19C733-AA


Lincoln Heater Control Part Number: 7L3Z-19980-C
Product Specifications- Other Name: Control; HVAC Temperature Control Panel; Climate Control Module; Blower Control Switch; Dash Control Unit
- Replaces: 6L3Z-19980-AA


Lincoln Control Part Number: F75Z-19C733-CE
Product Specifications- Other Name: Potentiometer Assembly


Lincoln Blower Motor Switch Part Number: F75Z-19986-BA
Product Specifications- Other Name: Switch Assembly; Climate Control Module; Blower Control Switch; Blower Motor Resistor

Lincoln Heater Control Part Number: DA5Z-19980-G
Product Specifications- Other Name: Control; Climate Control Module; Blower Control Switch; Dash Control Unit
- Replaces: DA5Z-19980-E, DA5Z-19980-F, DA5Z-19980-D, DA5Z-19980-C


Lincoln Temperature Control Part Number: 7W1Z-19980-A
Product Specifications- Other Name: Control; Climate Control Module; Blower Control Switch; Dash Control Unit


Lincoln Heater Control Part Number: 7L3Z-19980-J
Product Specifications- Other Name: Control; HVAC Temperature Control Panel; Climate Control Module; Blower Control Switch; Dash Control Unit
- Replaces: 6L3Z-19980-GA, 7L3Z-19980-G

Lincoln Heater Control Part Number: 7L3Z-19980-E
Product Specifications- Other Name: Control; HVAC Temperature Control Panel; Climate Control Module; Blower Control Switch; Dash Control Unit
- Replaces: 6L3Z-19980-CA, 5L3Z-19980-CA


Lincoln Heater Control Part Number: 7A1Z-19980-A
Product Specifications- Other Name: Control; Climate Control Module; Blower Control Switch; Dash Control Unit

Lincoln Temperature Control Part Number: 6W1Z-19980-AA
Product Specifications- Other Name: Control; Climate Control Module; Blower Control Switch; Dash Control Unit
- Replaces: 5W1Z-19980-AA
| Page 1 of 8 |Next >
1-20 of 147 Results
Lincoln A/C Switch
If you own Lincoln and want to keep it in top shape, choosing OEM A/C Switch is a smart move. They are precisely engineered and follow strict factory standards. They are made in advanced facilities that use cutting edge technology. Each part goes through thorough testing to confirm strength and safety, so you can trust it. FordPartsDeal.com gives you genuine Lincoln A/C Switch at some of the affordable online prices without cutting quality. Every OEM Lincoln part includes the manufacturer's warranty, easy returns, and super-fast delivery. So why wait? Shop now and get your vehicle back to peak condition.
Lincoln A/C Switch maintains cabin temperature and you can cruise without fiddling or fuss. Lincoln realizes its Quiet Flight concept by silencing road noise, settling dashboards and matching plush seats with smooth screens that allow drivers to look once, gain enough knowledge, and get their eyes back on the road. Lincoln also supplies every car with Co-Pilot360, which includes lane keeping, blind-spot notifications, and self-parking in the deal so nerves do not rise during congested commutes. Lincoln refreshes these aids once a year and pays close attention to the feedback of the owners, showing the badge values to be genuinely the comfort of the real world as opposed to showroom boasting. Soft-touch panels reduce reflections, and laminated glass reduces wind noise in such a way that even as highway speeds are increased, conversation flows at whisper level. The A/C Switch, housed in the dash, connects sensors, blend doors and fan logic via a sturdy circuit board reading temperature changes in milliseconds and then commands heaters or compressors to respond before the passengers realize they have fallen asleep. The A/C Switch can handle daily bangs, shocks, humidity changes and it turns a blind eye on wear and tear which kills other weakly built buttons in other cabins. Drivers press the A/C Switch once to order dual-zone balance by relying on its sharp detents instead of scrolling through sluggish screens. In case of outside air spurt or plunge, the A/C Switch will switch modes with no noise, and no one will bother with clothes or glasses. That uniform sanity corresponds to Lincoln devotion to placid self-confidence in every mile.
Lincoln A/C Switch Parts and Q&A
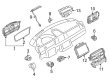
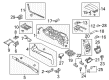
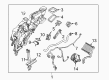
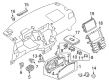
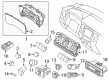
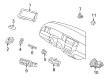
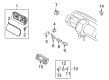
- Q: How to service and repair the rear A/C Switch control assembly on Lincoln Navigator?A:Start the service and repair of the rear control assembly through console finish rear panel removal by opening the cup holder then removing the four screws. Proceed to remove the finish panel after releasing its retaining clips. The servicing process should start with disconnecting electrical connectors and unscrewing all screws from the auxiliary climate control assembly. The installation process will be the opposite sequence of removal steps.
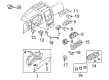
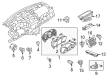
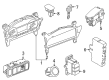
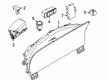
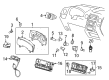
- Q: How to Service and Repair the A/C Switch in the HVAC Module on Lincoln Town Car?A:The first step for servicing or repairing the heating ventilation air conditioning (HVAC) module requires instrument cluster finish panel removal. The HVAC module needs its four screws to be removed. Remove the HVAC module after disconnecting both electrical connectors that belong to it. Reinstallation of the new or fixed HVAC module requires the same procedure in reverse order of removal steps.


Related Lincoln Parts
 Lincoln Cabin Air Filter
 Lincoln A/C Compressor Clutch
 Lincoln A/C Condenser
 Lincoln A/C Idler Pulley
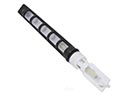 Lincoln A/C Orifice Tube
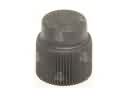 Lincoln A/C Service Cap
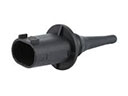 Lincoln Ambient Temperature Sensor
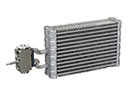 Lincoln Evaporator
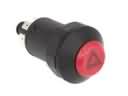 Lincoln Hazard Warning Switch
 Lincoln Heater Core
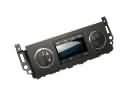 Lincoln HVAC Control Module
 Lincoln HVAC Pressure Switch