FordParts
My Garage
My Account
Cart
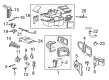
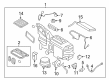
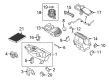
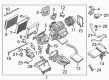
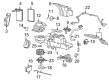
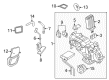
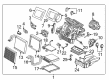
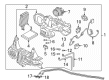
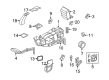
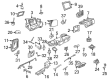
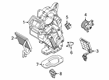
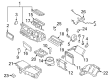
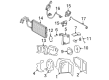
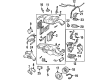
OEM Lincoln Blower Motor
A/C Heater Blower Motor- Select Vehicle by Model
- Select Vehicle by VIN
Select Vehicle by Model
orMake
Model
Year
Select Vehicle by VIN
For the most accurate results, select vehicle by your VIN (Vehicle Identification Number).
46 Blower Motors found


Lincoln Blower Motor Part Number: 4W7Z-19805-AA
$77.59 MSRP: $142.55You Save: $64.96 (46%)Ships in 1-2 Business DaysProduct Specifications- Other Name: Motor - Cooling Blower; HVAC Blower Motor; Blower Assembly
- Manufacturer Note: 1980/1991: Also order F1AZ-18C629-A & 4W7Z-14A411-B jumpers. 1992/2004 (Before 4/19/04): Only the 4W7Z-14A411-B is needed. 2004 (From 4/19/04): No jumper is needed., FROM 4/19/2004


Lincoln Blower Motor Part Number: AE9Z-19805-B
$84.42 MSRP: $138.91You Save: $54.49 (40%)Ships in 1-2 Business DaysProduct Specifications- Other Name: Fan And Motor Assembly; HVAC Blower Motor Assembly; Blower Assembly; HVAC Blower Motor


Lincoln Blower Motor Part Number: 7T4Z-19805-A
$82.10 MSRP: $135.09You Save: $52.99 (40%)Ships in 1-2 Business DaysProduct Specifications- Other Name: Motor - Cooling Blower; HVAC Blower Motor; Blower Assembly


Lincoln Blower Motor Part Number: 8G1Z-19805-BB
$96.02 MSRP: $158.00You Save: $61.98 (40%)Ships in 1-2 Business DaysProduct Specifications- Other Name: Fan And Motor Assembly; HVAC Blower Motor Assembly; HVAC Blower Motor; Blower Assembly
- Manufacturer Note: Includes Motor, Wheel And Retainer
- Replaces: 8G1Z-19805-BA


Lincoln Blower Motor, Front Part Number: H1FZ-19805-A
$102.35 MSRP: $168.40You Save: $66.05 (40%)Ships in 1-2 Business DaysProduct Specifications- Other Name: Blower Assembly; HVAC Blower Motor Assembly, Front; HVAC Blower Motor
- Position: Front
- Replaces: CV6Z-19805-A, DV6Z-19805-B, MM-1111, MM-1056


Lincoln Blower Motor, Front Part Number: 6L1Z-19805-B
$111.61 MSRP: $183.64You Save: $72.03 (40%)Ships in 1-2 Business DaysProduct Specifications- Other Name: Motor Assembly - Blower; HVAC Blower Motor, Front; Blower Assembly; HVAC Blower Motor
- Position: Front
- Replaces: 5L3Z-19805-BB


Lincoln Blower Motor, Rear Part Number: 7L1Z-19805-B
$105.20 MSRP: $173.09You Save: $67.89 (40%)Ships in 1-2 Business DaysProduct Specifications- Other Name: Fan And Motor Assembly; HVAC Blower Motor, Rear
- Position: Rear


Lincoln Blower Motor Part Number: GV6Z-19805-AA
$131.50 MSRP: $216.36You Save: $84.86 (40%)Ships in 1-2 Business DaysProduct Specifications- Other Name: Blower Assembly; HVAC Blower Motor Assembly; HVAC Blower Motor


Lincoln Blower Motor, Rear Part Number: JL1Z-19805-AA
$176.80 MSRP: $290.91You Save: $114.11 (40%)Ships in 1-2 Business DaysProduct Specifications- Other Name: Fan And Motor Assembly; HVAC Blower Motor Assembly, Rear
- Position: Rear


Lincoln Blower Motor, Front Driver Side Part Number: DG9Z-19805-B
$89.17 MSRP: $146.73You Save: $57.56 (40%)Ships in 1-2 Business DaysProduct Specifications- Other Name: Fan And Motor Assembly; HVAC Blower Motor Assembly, Front
- Manufacturer Note: LHD
- Position: Front Driver Side
- Replaces: DG9Z-19805-A


Lincoln Blower Motor, Front Part Number: 7L1Z-19805-D
$93.59 MSRP: $154.00You Save: $60.41 (40%)Ships in 1-2 Business DaysProduct Specifications- Other Name: Fan And Motor Assembly; HVAC Blower Motor, Front; Blower Assembly; HVAC Blower Motor
- Position: Front


Lincoln Blower Motor Part Number: AE5Z-19805-D
$94.70 MSRP: $155.82You Save: $61.12 (40%)Ships in 1-2 Business DaysProduct Specifications- Other Name: Motor - Cooling Blower; HVAC Blower Motor; Blower Assembly
- Replaces: AE5Z-19805-C, AE5Z-19805-A, AE5Z-19805-B, MM-1063, MM-1051

Lincoln Blower Motor, Front Part Number: DG1Z-19805-D
$100.67 MSRP: $165.64You Save: $64.97 (40%)Ships in 1-2 Business DaysProduct Specifications- Other Name: Fan And Motor Assembly; HVAC Blower Motor, Front; Blower Assembly; HVAC Blower Motor
- Position: Front
- Replaces: DG1Z-19805-A, MM-1067


Lincoln Blower Motor, Rear Part Number: AE9Z-19805-D
$201.04 MSRP: $333.82You Save: $132.78 (40%)Ships in 1 Business DayProduct Specifications- Other Name: Fan And Motor Assembly; HVAC Blower Motor Assembly, Rear; HVAC Blower Motor, Rear; Blower Assembly
- Position: Rear
- Replaces: AE9Z-19805-C

Lincoln Blower Motor, Rear Part Number: 6L1Z-19805-A
$81.54 MSRP: $149.82You Save: $68.28 (46%)Ships in 1-2 Business DaysProduct Specifications- Other Name: Motor Assembly - Blower; HVAC Blower Motor, Rear; Blower Assembly
- Position: Rear
- Replaces: 2L7Z-19805-CA

Lincoln Blower Motor, Front Part Number: XL7Z-19805-EA
$94.78 MSRP: $159.13You Save: $64.35 (41%)Product Specifications- Other Name: Motor - Cooling Blower; HVAC Blower Motor, Front; Blower Assembly; HVAC Blower Motor
- Manufacturer Note: Main unit: kit includes motor, retainer, & seal
- Position: Front
- Replaces: F85Z-19805-CA

Lincoln Blower Motor Part Number: L1MZ-19805-CA
$126.41 MSRP: $208.00You Save: $81.59 (40%)Ships in 1-3 Business DaysProduct Specifications- Other Name: Fan And Motor Assembly; HVAC Blower Motor Assembly


Lincoln Blower Motor Part Number: 8E5Z-19805-C
$73.05 MSRP: $116.00You Save: $42.95 (38%)Product Specifications- Other Name: Motor - Cooling Blower; HVAC Blower Motor; Blower Assembly
- Replaces: 6E5Z-19805-AA, 8E5Z-19805-B, 8E5Z-19805-A, MM-1050


Lincoln Blower Motor Part Number: 3W1Z-19805-AA
Product Specifications- Other Name: Motor - Cooling Blower; HVAC Blower Motor; Blower Assembly


Lincoln Blower Motor Part Number: F4SZ-19805-HA
Product Specifications- Other Name: Motor - Cooling Blower; HVAC Blower Motor; Blower Assembly
- Manufacturer Note: Kit, includes motor, harness, seal & retainer
| Page 1 of 3 |Next >
1-20 of 46 Results
Lincoln Blower Motor
If you own Lincoln and want to keep it in top shape, choosing OEM Blower Motor is a smart move. They are precisely engineered and follow strict factory standards. They are made in advanced facilities that use cutting edge technology. Each part goes through thorough testing to confirm strength and safety, so you can trust it. FordPartsDeal.com gives you genuine Lincoln Blower Motor at some of the affordable online prices without cutting quality. Every OEM Lincoln part includes the manufacturer's warranty, easy returns, and super-fast delivery. So why wait? Shop now and get your vehicle back to peak condition.
Lincoln Blower Motor ensures that the cabin air moves in a smooth manner and provides instant heat or cold during each ride. Lincoln seeks Quiet Flight, with silent outside sound, multi-layered glass, additional insulation, and tuned engine mount to make sure that conversation remains clear and music remains sharp on poor pavements when making cross-country journeys. Lincoln began in 1917, and once it acquired Ford in 1922, it gained the magnitude that allowed it to push refinement, which enabled the company to invest in smoother body work, more powerful drive train, more warranties, and a wider dealer base across the continent. Lincoln makes the cabins soft-touch and bright with piano-key switchgear and ambient lighting and puts cup holders, USB ports, and wireless chargers where hands want them. Lincoln supports these comforts with Co-Pilot360 tools; lanes are kept in position, blind areas are warned, high beams are switched on automatically, parking is made easy, and ActiveGlide allows hands to stay on long highways that are controlled by the camera in all directions. The control module handles power to Blower Motor by either increasing or decreasing the speed of the fans the moment you rotate the dash knob, which coordinates sensors and voltage along with zero lag. Blower Motor forces either cold or hot air in several ducts and clears fogged glass quickly, keeping the passengers relaxed over many miles. Blower Motor responds to changes in temperature, and hence cold season mornings or desert heat are never a problem. The Blower Motor does not lose power unless it is wired incorrectly or fails, and early repairs make the climate system dependable all year round.
Lincoln Blower Motor Parts and Q&A
- Q: How to remove and install a blower motor in a Lincoln Town Car?A:Disconnect the blower motor electrical connector from the motor. Remove the cooling tube from the underside of the blower motor. Remove the retaining screws from the blower motor mounting plate. Turn the blower motor slightly to the right and lift the motor assembly out of the heater housing assembly. Position the motor and fan assembly so that the bottom edge aligns with the contour of the wheel well splash panel. Transfer the fan wheel to the new motor if necessary. Maneuver the assembly past the wheel well splash panel and into the top portion of the housing opening, then down into position. The remainder of the installation is the reverse of removal. For 1982 through 1987 Continental and 1984 through 1992 Mark VII models, disconnect the negative battery cable. Remove the glove compartment liner. Disconnect the hose from the recirculation door vacuum motor. Disconnect the blower motor electrical connector. Remove the support brace at the top of the air inlet duct. Unbolt and remove the lower right side cowl trim panel. Remove the nut connecting the evaporator case to the lower support brace. Remove the screw attaching the inlet duct to the heater assembly. Separate the air duct and blower case from the heater housing and remove it. Remove the blower motor from the housing. Transfer the fan to the new motor if necessary. Tape the blower motor power lead to the air intake duct. Position the blower motor and fan assembly into the blower housing. Install the retaining screws. Ensure the blower wire is routed to the passenger side of the evaporator case. Install the air intake duct and the blower housing to the evaporator case. Hold the outside-recirculation door open and rotate the blower wheel to ensure it operates freely. Reconnect the blower motor electrical connector. Install the air inlet duct to cowl support brace attaching screw. Connect the vacuum hose to the vacuum motor. Install the glove compartment liner and door. Install the lower right side instrument panel bolt. Reinstall the lower right cowl trim and connect the battery cable.

Related Lincoln Parts
 Lincoln Cabin Air Filter
 Lincoln A/C Accumulator
 Lincoln A/C Compressor Clutch
 Lincoln A/C Compressor Cut-Out Switches
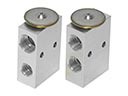 Lincoln A/C Expansion Valve
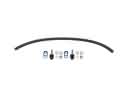 Lincoln A/C Hose
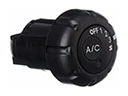 Lincoln A/C Switch
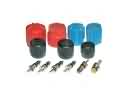 Lincoln A/C System Valve Core
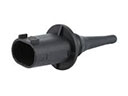 Lincoln Ambient Temperature Sensor
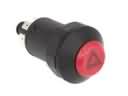 Lincoln Hazard Warning Switch
 Lincoln HVAC Control Module
 Lincoln HVAC Pressure Switch