FordParts
My Garage
My Account
Cart
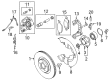
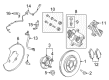
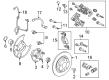
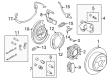
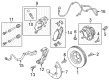
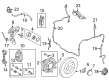
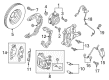
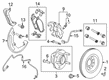
OEM Lincoln Brake Caliper
Caliper- Select Vehicle by Model
- Select Vehicle by VIN
Select Vehicle by Model
orMake
Model
Year
Select Vehicle by VIN
For the most accurate results, select vehicle by your VIN (Vehicle Identification Number).
154 Brake Calipers found


Lincoln Caliper, Red, Front Passenger Side Part Number: BV6Z-2B120-A
$96.90 MSRP: $160.91You Save: $64.01 (40%)Ships in 1-2 Business DaysProduct Specifications- Other Name: Caliper Assembly - Brake - Less Pad; Disc Brake Caliper, Front Right; Brake Caliper Repair Kit
- Manufacturer Note: Warranty Eligible
- Position: Passenger Side


Lincoln Caliper, Rear Passenger Side Part Number: CG1Z-2552-A
$92.89 MSRP: $154.18You Save: $61.29 (40%)Ships in 1-2 Business DaysProduct Specifications- Other Name: Housing; Disc Brake Caliper, Rear Right; Brake Caliper Repair Kit; Brake Caliper
- Manufacturer Note: With Bracket
- Position: Passenger Side
- Replaces: BRCF-241, 8A8Z-2552-A, AG1Z-2552-A, AG1Z-2552-B, BRCF-148, BRCF-31


Lincoln Caliper, Rear Driver Side Part Number: 6E5Z-2553-C
$109.35 MSRP: $181.82You Save: $72.47 (40%)Ships in 1-2 Business DaysProduct Specifications- Other Name: Housing; Disc Brake Caliper, Rear Left; Brake Caliper Repair Kit; Brake Caliper
- Manufacturer Note: Warranty Eligible
- Position: Driver Side
- Replaces: 6E5Z-2553-A


Lincoln Caliper, Rear Passenger Side Part Number: 7L1Z-2552-B
$99.28 MSRP: $164.91You Save: $65.63 (40%)Ships in 1-2 Business DaysProduct Specifications- Other Name: Housing; Disc Brake Caliper, Rear Right; Brake Caliper Repair Kit; Brake Caliper
- Position: Passenger Side
- Replaces: 7L1Z-2552-A


Lincoln Caliper, Front Driver Side Part Number: 8A8Z-2B121-AA
$77.52 MSRP: $125.82You Save: $48.30 (39%)Product Specifications- Other Name: Caliper Assembly - Brake - Less Pad; Disc Brake Caliper, Front Left; Brake Caliper Repair Kit
- Position: Driver Side
- Replaces: 8A8Z-2B121-A, AG1Z-2B121-B, AG1Z-2B121-BA, BRCLF-50, BRCF-100


Lincoln Caliper, Front Driver Side Part Number: AL3Z-2B121-B
$95.42 MSRP: $155.27You Save: $59.85 (39%)Ships in 1-2 Business DaysProduct Specifications- Other Name: Caliper Assembly - Brake - Less Pad; Disc Brake Caliper, Front Left; Brake Caliper Repair Kit
- Manufacturer Note: Warranty Eligible
- Position: Driver Side
- Replaces: AL3Z-2B121-A, AL3Z-2B121-AA, BRCF-98, BRCLF-52


Lincoln Caliper, Red, Front Driver Side Part Number: BV6Z-2B121-A
$96.19 MSRP: $156.55You Save: $60.36 (39%)Ships in 1-2 Business DaysProduct Specifications- Other Name: Caliper Assembly - Brake - Less Pad; Disc Brake Caliper, Front Left; Brake Caliper Repair Kit
- Manufacturer Note: Warranty Eligible
- Position: Driver Side

Lincoln Caliper, Front Passenger Side Part Number: 8A8Z-2B120-AA
$97.07 MSRP: $158.00You Save: $60.93 (39%)Ships in 1-2 Business DaysProduct Specifications- Other Name: Caliper Assembly - Brake - Less Pad; Disc Brake Caliper, Front Right; Brake Caliper Repair Kit
- Position: Passenger Side
- Replaces: 8A8Z-2B120-A, AG1Z-2B120-BA, AG1Z-2B120-B, BRCLF-49, BRCF-101

Lincoln Caliper, Rear Driver Side Part Number: CG1Z-2553-A
$94.75 MSRP: $154.18You Save: $59.43 (39%)Ships in 1-2 Business DaysProduct Specifications- Other Name: Housing; Disc Brake Caliper, Rear Left; Brake Caliper Repair Kit; Brake Caliper
- Position: Driver Side
- Replaces: 8A8Z-2553-A, AG1Z-2553-A, AG1Z-2553-B, BRCF-149, BRCF-32, BRCF-33


Lincoln Caliper, Front Driver Side Part Number: E1GZ-2B121-A
$104.81 MSRP: $170.73You Save: $65.92 (39%)Ships in 1-3 Business DaysProduct Specifications- Other Name: Caliper Assembly - Brake - Less Pad; Disc Brake Caliper, Front Left; Brake Caliper Repair Kit
- Position: Driver Side

Lincoln Caliper, Front Passenger Side Part Number: AL3Z-2B120-C
$101.16 MSRP: $164.73You Save: $63.57 (39%)Ships in 1-2 Business DaysProduct Specifications- Other Name: Caliper Assembly - Brake - Less Pad; Disc Brake Caliper, Front Right; Brake Caliper Repair Kit
- Manufacturer Note: Warranty Eligible
- Position: Passenger Side
- Replaces: BRCLF-51, AL3Z-2B120-AA, AL3Z-2B120-B, BRCF-260, BRCF-99, AL3Z-2B120-A

Lincoln Caliper, Rear Passenger Side Part Number: 6E5Z-2552-C
$111.55 MSRP: $181.82You Save: $70.27 (39%)Ships in 1-2 Business DaysProduct Specifications- Other Name: Housing; Disc Brake Caliper, Rear Right; Brake Caliper Repair Kit; Brake Caliper
- Manufacturer Note: Warranty Eligible
- Position: Passenger Side
- Replaces: 6E5Z-2552-A


Lincoln Caliper, Rear Driver Side Part Number: 7L1Z-2553-B
$101.27 MSRP: $164.91You Save: $63.64 (39%)Ships in 1-2 Business DaysProduct Specifications- Other Name: Housing; Disc Brake Caliper, Rear Left; Brake Caliper Repair Kit; Brake Caliper
- Position: Driver Side
- Replaces: 7L1Z-2553-A


Lincoln Caliper, Front Passenger Side Part Number: DG1Z-2B120-E
$114.87 MSRP: $187.27You Save: $72.40 (39%)Ships in 1-2 Business DaysProduct Specifications- Other Name: Caliper Assembly - Brake - Less Pad; Disc Brake Caliper, Front Right; Brake Caliper Repair Kit
- Position: Passenger Side
- Replaces: BRCF-212, DG1Z-2B120-B

Lincoln Caliper, Front Driver Side Part Number: DG1Z-2B121-E
$127.02 MSRP: $207.27You Save: $80.25 (39%)Ships in 1-2 Business DaysProduct Specifications- Other Name: Caliper Assembly - Brake - Less Pad; Disc Brake Caliper, Front Left; Brake Caliper Repair Kit
- Position: Driver Side
- Replaces: BRCF-213, DG1Z-2B121-B


Lincoln Caliper, Front Passenger Side Part Number: 9U2Z-2V120-BRM
Product Specifications- Other Name: Remanufactured Caliper Assembly - Brake Less Pads; Front Right Disc Brake Caliper; Repair Kit.
- Position: Passenger Side
- Replaces: 4L3Z-2B120-BB, 9U2Z-2V120-B, BRCF-113, BRC-210-RM


Lincoln Caliper Assembly, Rear Driver Side Part Number: 1F1Z-2553-BA
Product Specifications- Other Name: Caliper Assembly - Brake; Disc Brake Caliper, Rear Left; Brake Caliper Repair Kit
- Manufacturer Note: LH Less pads, 4 wheel disc
- Position: Driver Side


 Product Specifications
- Other Name: Remanufactured Caliper Assembly - Brake Less Pads; Front Left Disc Brake Caliper; Repair Kit.; Caliper
- Position: Driver Side
- Replaces: BRCL-125-RM, F75Z-2B121-AF, BRC-125-RM, XL3Z-2V121-BARM, XL3Z-2B121-EA, XL3Z-2V131-BARM


Lincoln Caliper, Front Driver Side Part Number: 9U2Z-2V121-BRM
Product Specifications- Other Name: Remanufactured Caliper Assembly - Brake Less Pads; Front Left Disc Brake Caliper; Repair Kit.
- Position: Driver Side
- Replaces: 4L3Z-2B121-BB, 9U2Z-2V121-B, BRCF-114, BRC-211-RM


Lincoln Caliper, Front Part Number: 7L3Z-2B121-A
Product Specifications- Other Name: Caliper Assembly - Brake; Disc Brake Caliper, Front Left, Front Right; Brake Caliper Repair Kit
- Manufacturer Note: For Banjo Washer Refer To Brake Line Section
- Position: Driver Side
- Replaces: 6L3Z-2B121-AA
| Page 1 of 8 |Next >
1-20 of 154 Results
Lincoln Brake Caliper
If you own Lincoln and want to keep it in top shape, choosing OEM Brake Caliper is a smart move. They are precisely engineered and follow strict factory standards. They are made in advanced facilities that use cutting edge technology. Each part goes through thorough testing to confirm strength and safety, so you can trust it. FordPartsDeal.com gives you genuine Lincoln Brake Caliper at some of the affordable online prices without cutting quality. Every OEM Lincoln part includes the manufacturer's warranty, easy returns, and super-fast delivery. So why wait? Shop now and get your vehicle back to peak condition.
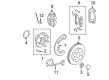
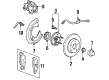
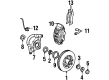
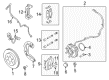
Lincoln Brake Caliper is hard and uniform, transforming body pressure into rapid predictable halts. Lincoln solicits its Quiet Flight concept to keep the cabins almost silent, road buzz is eliminated, and clear digital gauges provide information without screaming at people. Lincoln supports the claims made in that, with Co-Pilot360, there are features like lane assistance, blind-spot warnings, automatic high beams, and parking assistance that will intervene intelligently, but never take over. Lincoln optimizes ActiveGlide to highway hands-free work and delivers updates wirelessly and lessons based on owner survey directly into the subsequent code drop. Cabins of Lincoln blend soft leather, pure metal switches, broad armrests, and enormous glass tops that fill the room with light and maintain conversation levels on the whisper-low. The importance of quiet cabins is that the more energy one has left over after commuting is over with noise, the more time they can engage in conversation or enjoy music or even just watch what the traffic will do next. Brake Caliper modeled of rugged iron are housings of a piston or several pistons which push pads against rotors when pressurized fluid is detected entering and balance the clamp force between disc to slice fade under repeated stops. The designs of the Brake Caliper are in the fixed type where the pistons are on both sides to wear evenly and sharp bite. Brake Caliper designs also feature floating designs which slide on pins which reduce weight but require increasing pad inspections. Performance package upgrades of Brake Calipers replace larger bores and glitzy paint primarily with more robust, cooler, and more consistent stops.
Lincoln Brake Caliper Parts and Q&A
- Q: What steps should be taken before beginning the brake caliper service to ensure safety and proper operation on Lincoln Town Car?A:Disabling electrical power to the air suspension system is essential before brake caliper service because unexpected air spring behavior could move the vehicle while having operations. First disconnect the wheel with its attached tire from the vehicle. Avoid eye contact with brake fluid and immediately wash your hands when you finish working with this substance because it contains polyglycol ethers and polyglycols. Eyes should receive running water flushing for 15 minutes when exposed to the substance and you should get medical help if irritation continues. You should promptly wash away brake fluid spills from painted and plastic materials by using water. First cut the brake hose then remove its retaining bolt before unplugging the rear wheel brake hose but throw away its copper washers by plugging the brake hose. The guides pins and guide pin boots must stay sealed for life unless there is reason to investigate possible issues. To do this task you should unmount the rear disc brake caliper by removing its brake caliper bolts and placing the caliper off the anchor plate. Check the caliper for leakage while examining its sliding pins for binding issues; replace with a new caliper if either problem exists. Install stainless steel shoe slippers correctly on their position while changing to new ones whenever they become worn or damaged and position the anti-rattle clip on the anchor plate rail. Install the caliper bolt of proper size to prevent caliper interference while using the brake pad locator notch at the top of the caliper area. Reinstall the rear disc brake caliper followed by sewerage of the rear wheel brake hose and then install the caliper flow bolt with brand new copper washers. Bleed the brake system before continuing with the operation then rebuild the air suspension system after the vehicle touches the ground. To check proper brake functionality you should mount the wheel assembly and then perform several brake applications for confirmation before vehicle operation.
- Q: How to service and repair the rear brake caliper on Lincoln Navigator?A:Service and repair operations for the rear brake caliper begin with wheel and tire removal. Detach the brake hose by removing the flow bolt along with the copper washers and tighten the new connection to 40 Nm (30 lb-ft). Start by removing the two guide pin caps from the brake caliper together with their bolts to check if any damage exists to guide pin threads before replacing any broken pins while tightening them to 38 Nm (28 lb-ft) torque. Tensor all threads until they achieve a dry condition. Check the brake caliper dust boot for leaks while assessing its condition; if damage is detected or leaks are present you must replace the brake caliper. The application of lubricant on guide pin threads should be avoided because it leads to improper thread tightening. Installation requires the opposite steps of removal while using new guide pin bushings and applying supplied white lubricant inside the bushings. The brake system needs bleeding after finishing the service procedure. Use exclusively clean brake fluid which matches manufacturer requirements while paying attention because brake fluid has the potential to harm painted surfaces and plastics which requires immediate water-based cleaning if leakage occurs. Customers requiring Ford/Motorcraft emergency medical information can reach 1-800-959-3673 while utilizing available Material Safety Data Sheet (MSDS) documentation for their products.


Related Lincoln Parts
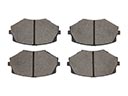 Lincoln Brake Pads
 Lincoln ABS Sensor
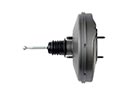 Lincoln Brake Booster
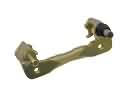 Lincoln Brake Caliper Bracket
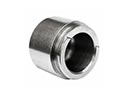 Lincoln Brake Caliper Piston
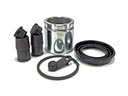 Lincoln Brake Caliper Repair Kit
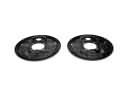 Lincoln Brake Dust Shields
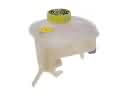 Lincoln Brake Master Cylinder Reservoir
 Lincoln Brake Shoe Set
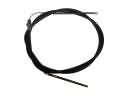 Lincoln Parking Brake Cable
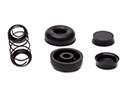 Lincoln Wheel Cylinder Repair Kit
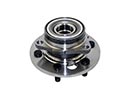 Lincoln Wheel Hub