FordParts
My Garage
My Account
Cart
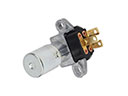
OEM Lincoln Seat Motor
Car Seat Motor- Select Vehicle by Model
- Select Vehicle by VIN
Select Vehicle by Model
orMake
Model
Year
Select Vehicle by VIN
For the most accurate results, select vehicle by your VIN (Vehicle Identification Number).
23 Seat Motors found


Lincoln Adjust Motor, Front Driver Side Part Number: CU5Z-14547-D
$187.25 MSRP: $310.91You Save: $123.66 (40%)Ships in 1-2 Business DaysProduct Specifications- Other Name: Motor Assembly - Seat Adjuster; Seat Motor, Front Left; Motor
- Position: Driver Side
- Replaces: DU5Z-14547-C, MM-1125


Lincoln Adjust Motor, Center Part Number: FB5Z-74600E22-A
$135.00 MSRP: $227.27You Save: $92.27 (41%)Ships in 1-3 Business DaysProduct Specifications- Other Name: Motor Assembly - Seat Adjuster; Seat Motor, Center; Motor
- Manufacturer Note: RH/LH
- Position: Center


Lincoln Recline Motor, Driver Side Part Number: AA1Z-14547-B
$93.48 MSRP: $153.82You Save: $60.34 (40%)Product Specifications- Other Name: Motor Assembly - Seat Adjuster; Seat Motor, Front Left, Left
- Manufacturer Note: For Power Recliner
- Position: Driver Side
- Replaces: 7A1Z-14547-B


Lincoln Recline Motor, Front Passenger Side Part Number: AA1Z-14547-A
$103.10 MSRP: $169.64You Save: $66.54 (40%)Ships in 1-2 Business DaysProduct Specifications- Other Name: Motor Assembly - Seat Adjuster; Seat Motor, Front Right, Right
- Manufacturer Note: For Power Recliner
- Position: Passenger Side
- Replaces: 7A1Z-14547-A


Lincoln Adjust Motor, Front Passenger Side Part Number: CU5Z-14547-B
$179.01 MSRP: $294.55You Save: $115.54 (40%)Ships in 1-2 Business DaysProduct Specifications- Other Name: Motor Assembly - Seat Adjuster; Seat Motor, Front Right; Motor
- Manufacturer Note: RH/LH
- Position: Passenger Side
- Replaces: DU5Z-14547-A, MM-1123


Lincoln Adjust Motor, Passenger Side Part Number: 8A5Z-14547-A
$34.92 MSRP: $55.45You Save: $20.53 (38%)Ships in 1 Business DayProduct Specifications- Other Name: Motor Assembly - Seat Adjuster; Seat Motor, Front, Front Left, Front Right, Right; Recline Motor; Motor
- Position: Passenger Side


Lincoln Adjust Motor, Driver Side Part Number: 8A5Z-14547-B
$37.21 MSRP: $59.09You Save: $21.88 (38%)Ships in 1-2 Business DaysProduct Specifications- Other Name: Motor Assembly - Seat Adjuster; Seat Motor, Front Left, Left; Recline Motor; Motor
- Position: Driver Side


Lincoln Adjust Motor Part Number: KU5Z-14547-A
$220.10 MSRP: $365.45You Save: $145.35 (40%)Ships in 1-3 Business DaysProduct Specifications- Other Name: Motor Assembly - Seat Adjuster

Lincoln Adjust Motor Part Number: MU5Z-14547-B
$233.24 MSRP: $387.27You Save: $154.03 (40%)Ships in 1-2 Business DaysProduct Specifications- Other Name: Motor Assembly - Seat Adjuster; Motor

Lincoln Adjust Motor, Rear Part Number: JU5Z-14547-D
$44.63 MSRP: $72.91You Save: $28.28 (39%)Ships in 1-3 Business DaysProduct Specifications- Other Name: Motor Assembly - Seat Adjuster; Seat Motor, Rear, Rear Left, Rear Right
- Position: Passenger Side

Lincoln Adjust Motor Part Number: GU5Z-14547-D
$39.49 MSRP: $61.64You Save: $22.15 (36%)Ships in 1-3 Business DaysProduct Specifications- Other Name: Motor Assembly - Seat Adjuster
- Manufacturer Note: RH/LH

Lincoln Adjust Motor Part Number: L1MZ-78600E22-A
$117.36 MSRP: $170.83You Save: $53.47 (32%)Ships in 1-3 Business DaysProduct Specifications- Other Name: Motor Assembly - Seat Adjuster

Lincoln Adjust Motor, Center Part Number: 8A8Z-74600E22-A
$42.30 MSRP: $58.51You Save: $16.21 (28%)Ships in 1-2 Business DaysProduct Specifications- Other Name: Motor Assembly - Seat Adjuster; Seat Motor, Center
- Manufacturer Note: RH/LH
- Position: Center

Lincoln Adjust Motor, Rear Part Number: FE9Z-74600E22-A
Product Specifications- Other Name: Motor Assembly - Seat Adjuster; Seat Motor, Rear; Motor
- Position: Rear
- Replaces: AE9Z-74600E22-A


Lincoln Motor Part Number: 2L1Z-14547-EA
Product Specifications- Other Name: Motor Assembly - Seat Adjuster


Lincoln Motor Part Number: 5L1Z-14547-BA
Product Specifications- Other Name: Motor Assembly - Seat Adjuster
- Replaces: 4L1Z-14547-AA


Lincoln Motor, Driver Side Part Number: 3W1Z-14547-C
Product Specifications- Other Name: Motor Assembly - Seat Adjuster
- Manufacturer Note: LH, With memory
- Position: Driver Side


Lincoln Motor, Passenger Side Part Number: 3W1Z-14547-A
Product Specifications- Other Name: Motor Assembly - Seat Adjuster
- Position: Passenger Side


Lincoln Motor Part Number: 2L1Z-14547-CA
Product Specifications- Other Name: Motor Assembly - Seat Adjuster


Lincoln Motor Part Number: 2L1Z-14547-BA
Product Specifications- Other Name: Motor Assembly - Seat Adjuster
| Page 1 of 2 |Next >
1-20 of 23 Results
Lincoln Seat Motor
If you own Lincoln and want to keep it in top shape, choosing OEM Seat Motor is a smart move. They are precisely engineered and follow strict factory standards. They are made in advanced facilities that use cutting edge technology. Each part goes through thorough testing to confirm strength and safety, so you can trust it. FordPartsDeal.com gives you genuine Lincoln Seat Motor at some of the affordable online prices without cutting quality. Every OEM Lincoln part includes the manufacturer's warranty, easy returns, and super-fast delivery. So why wait? Shop now and get your vehicle back to peak condition.
Lincoln Seat Motor allows drivers to move and raise and lower seats including seats without loud adjustment. Lincoln also matches the Seat Motor confidence with plush leather, soft lighting and touch-responsive display screens, and the Quiet Flight approach of the brand eliminates wind roar and tire squeals, allowing occupants to converse with ease. The Co-Pilot360 assist available to owners includes lane keeping, blind spot warnings and automatic high beam systems that intervene before accidents happen. Lincoln positions the Seat Motor as a component of a greater promise at launch events and regular updates, collecting feedback on drivers, launching new software every year and training employees to ensure that knowledge remains fresh keeping loyalty high as ActiveGlide hands-free cruising transforms long highways into relaxing stretches. When the user flips a switch, Lincoln programs the Seat Motor which either slides the chair away or towards the user, lifts or drops a cushion, and pushes lumbar pads outward, which is a reversible electric gear set that glides smoothly and stops precisely where the user wishes it without jerks. Memory cells located on the controller allow Lincoln to store multiple positions of the Seat Motor, meaning that various drivers can press a button and see the chair go back. The automatic exit mode lifts and slides the chair to an easy stepping out position, and robust components reduce noise and remain present even after decades of constant adjustments.
Lincoln Seat Motor Parts and Q&A
- Q: How to Service and Repair a Front Seat Track Motor with a Seat Motor on Lincoln Navigator?A:Users must start front seat track motor service and repair by taking safety measures that include wearing safety glasses because of the pyrotechnic devices represented by safety belt pretensioners. If the SRS system must be disabled for maintenance the servicing technician needs to follow the correct process yet cannot complete the job when the system shows a fault or nonoperation. You need to move the seat into position to expose the fasteners located at seat track-to-floor before removing the 40 percent seat. When working with the forward/reverse motor that has a memory seat feature you must remove the sensor from the motor after disconnecting its memory seat position sensor electrical connector. You need to separate electrical wires then grip power seat drive cables to free them before removing four attaching bolts from the power seat motor. The procedure for rear height motor removal starts with disconnecting the memory seat position sensor electrical connector if present followed by removing the rear height motor electrical connector and then removing the roll pin followed by bolting and nutted removal of the rear height power seat motor. The front height motor extraction requires insurgents to begin by removing the temperature-controlled seat fan motor before disconnecting the memory seat position sensor connector if necessary while separately removing the front height motor connector and roll pins once the disassembly of the front height power seat motor is complete. The installation process requires reversing the removal steps followed by seat reinstallation of the 40 percent part while powering up the SRS.
- Q: How should one service the power seat motor safely and effectively on Lincoln Town Car?A:Safety glasses should be worn during power seat motor servicing because they protect against possible air bag activation injuries while the air bag module connectors should not be touched. Start the maintenance by depowering the supplemental restraint system (SRS). Push the seat cushion in the needed direction while checking if activate the control switch moves the seat to the midpoint of front and rear motors. A new seat track assembly must be installed whenever the seat fails to move. The process to access all seat-to-floor fasteners requires moving the seat horizontally until you can remove seat and seat track. To move the seat track horizontally, disconnect its electrical connector before you provide specified power and ground connections. You should first check if the assembly can be removed at its proper alignment point. However, if movement is not possible you should manually spin the drive tube tube using electrical power. Use markers to note down the positions of both track C-channels for correct alignment when reinstalling. Remove the memory seat module together with its bracket along with wiring by keeping track of their connector positions. Remove the inboard seat track-to-upper support assembly lift link nuts then separate the drive tube from the seat track motor assembly by clamping at the inboard track gear stub shaft and hitting it with a hammer if required. To begin installation disassemble the seat track motor assembly by taking out nuts and bolts that connect it to the seat track and also removing the outboard retainer clip together with support straps. Detach the seat track motor assembly from its position on the upper support assembly while also unmounting any memory position sensors that exist. Installation consists of placing memory position sensors correctly then verifying that the new seat track motor assembly lines up with the original position. Fasten the seat track motor assembly to the upper support assembly while applying multi-purpose grease to the motor pivots and verifying the absence of gaps between the gears. The support straps must be correctly installed before checking that both inboard track C-channel index marks match the plastic-coated slide's index marks then inserting the pinion cage onto the outboard track. Put the outboard track into position while making sure all components have a tight fit against each other and tighten the seat track motor assembly-to-seat track bolts to 12 Nm (9 lb-ft) while nut tightening reaches 14 Nm (10 lb-ft). Verify how the index marks align before removing the bolt which disconnects the SRS seat position sensor magnet assembly and check inboard track alignment. Construct the seat track motor assembly by joining it with the upper support assembly while bringing in the inboard track to allow drive tube and lift link engagement. The second verification of index mark alignment needs to be performed after securing the inboard seat track-to-upper support assembly lift link nuts at 27 Nm (20 lb-ft). Position the SRS seat position sensor magnet assembly and fasten the bolt at 9 Nm (80 lb-in). The final step includes installing the seat track into the vehicle where all mounting holes should fit together without excessive force while memory seat owners should complete their component connection. Reinstall the seat track while replacing it with the seat unit before powering up SRS and performing a memory seat cycle when they exist.