FordParts
My Garage
My Account
Cart
OEM Mercury Sable Evaporator
A/C Evaporator Core- Select Vehicle by Model
- Select Vehicle by VIN
Select Vehicle by Model
orMake
Model
Year
Select Vehicle by VIN
For the most accurate results, select vehicle by your VIN (Vehicle Identification Number).
6 Evaporators found

Mercury Sable Evaporator Core Part Number: AG1Z-19850-B

Mercury Sable Evaporator Core Part Number: AG1Z-19850-A

Mercury Sable Evaporator Core Part Number: 2F1Z-19850-DA
Mercury Sable Evaporator Core Part Number: 2F1Z-19850-A

Mercury Sable Evaporator Core Part Number: 1F1Z-19850-B
Mercury Sable Lower Case Part Number: 1F1Z-19850-A
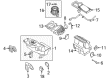
Mercury Sable Evaporator
OEM Evaporator boasts unmatched quality. Each part goes through full quality checks. They adhere to Mercury's official factory standards. These steps remove flaws and inconsistencies. So you can get Evaporator with long life and a perfect fit. Come to our website and find genuine Mercury Sable parts. We keep a wide inventory of OEM Sable parts at the highly affordable prices. It's easy to search, compare, and pick what you need. You'll love the clear info and simple checkout. We offer top-rated customer service, and we reply fast. We also ship promptly to ensure your order arrives on time.
Evaporator is the name given to that rather important assembly beloved to be highly dependable and effective in regulating the climate within the Mercury Sable cabin in several shades of Mercury Sable. This evaporator intensively cools the mentioned heated air using the advanced formation of aluminum fins aiding in the conversion of the refrigerant liquid into vapor. Therefore, apart from cooling the air, the Evaporator removes the moisture from the air making the overall feel, as well as the safety of a car better during driving. Its ability to fit multiple generations of Sable means that the owners can get the optimal out of their Sable regardless of the model year, which supports the Mercury Sable's reliability image. The evaporator is constructed as a series of tubes and fins and is built to withstand the differing temperatures and possible corrosion that may occur leading to leakage and moisture entrapment. This particular durability is needed so that the unwanted smell is not produced, and that fresh air is provided in the cabin. Furthermore, the Evaporator can also be admired in the automobile market because of its greater heat transfer rate and easy replacement or addition to the Sable. High efficiency in combination with safety engaged in the production of the Evaporator proves the brand's orientation on quality and comfortable driving.
Mercury Sable Evaporator Parts and Q&A
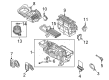
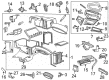
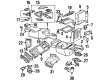
- Q: How is the evaporator core serviced as a core and housing assembly on Mercury Sable?A:The evaporator core servicing consists of replacing all core and housing parts including its components: evaporator core along with internal doors and seals and door linkage. Moving into the new housing requires you to transfer both the Blower Motor assembly with its wheel element together with the Heater Core apparatus including its cover and also the dash panel seals and vacuum actuators. Replacement of a suction accumulator should only be necessary for two main reasons: failed detection from contaminated A/C compressor system or damaged suction accumulator condition. The heater core must be removed first together with the evaporator core housing after which follows heater-to-dash panel seal then air conditioner tubes-to-dash panel seal and air conditioner evaporator drain tube seal. To access the remote climate control module on vehicles that use electronic automatic temperature control staff must disconnect the electrical connector and remove two nuts then disconnect the vacuum harness followed by two screws removal. You should begin by removing the screws followed by the shield before extracting both the temperature Blend Door Actuator and its electrical connector and the screws. The help spring of the A/C evaporator case damper door needs to detach before you remove its lever without bending it either direction. The metal link should be taken off while the vacuum harness needs detaching from its mounting bracket only if the vehicle has manual climate control. The process requires unscrewing and rotating the temperature blend door followed by taking out the heater core and its cover. You must remove blower motor screws and Blower Motor Resistor screws in vehicles which have manual climate control. When working on vehicles with electronic automatic temperature control you must detach the vacuum hose then remove screws before extracting the blower motor and blower motor speed control unit together. Disconnect the vacuum hose from the in-vehicle temperature sensor hose and bracket and air inlet duct before removing their three screws. The two vacuum hoses require labeling before disconnecting them and then removing the screw while lifting and rotating the vacuum control motor before motor removal with detailed note-taking on both vacuum positions and wiring harness locations. When installing follow the opposite process of removal by placing the vacuum and wiring harness according to the instructions then reattach the vacuum hoses then install the shield and screws. Install the air inlet duct followed by the bracket as well as the in-vehicle temperature sensor hose and blower motor assembly before adding the heater core with its cover. The vacuum harness should be mounted to the bracket while you install the metal link followed by slow insertion of the A/C evaporator case damper door lever and assist spring. The process begins by reinstalling the temperature blend door actuator as well as the shield and screws before installing the RCC module with proper connection security. Install the heater core seal and the air conditioning equipment tube-to-dash panel seal before you replace the heater core and evaporator core housing.

Related Mercury Sable Parts
 Mercury Sable A/C Compressor
 Mercury Sable A/C Compressor Clutch
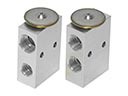 Mercury Sable A/C Expansion Valve
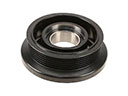 Mercury Sable A/C Idler Pulley
 Mercury Sable A/C Orifice Tube
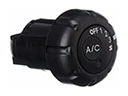 Mercury Sable A/C Switch
 Mercury Sable Ambient Temperature Sensor
 Mercury Sable Blend Door Actuator
 Mercury Sable Blower Control Switches
 Mercury Sable Heater Core
 Mercury Sable HVAC Control Module
 Mercury Sable HVAC Pressure Switch
Browse Mercury Sable Evaporator by Years
2009
2008
2005
2004
2003
2002
2001
2000
1999
1998
1997
1996