FordParts
My Garage
My Account
Cart
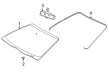
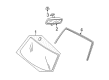
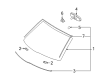
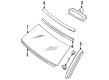
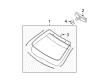
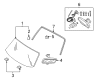
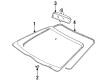
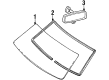
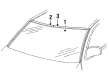
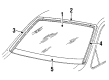
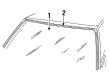
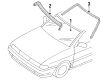
OEM Mercury Windshield
Glass Windshield- Select Vehicle by Model
- Select Vehicle by VIN
Select Vehicle by Model
orMake
Model
Year
Select Vehicle by VIN
For the most accurate results, select vehicle by your VIN (Vehicle Identification Number).
39 Windshields found

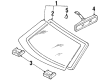
Mercury Windshield, Front Part Number: 2F1Z-5403100-AA
$111.02 MSRP: $151.08You Save: $40.06 (27%)Product Specifications- Other Name: Glass - Windscreen; Windshield, Front
- Manufacturer Note: Green tint - includes glass and rear view mirror bracket, w/center paint patch, w/shade band, BEFORE 12/02/2002
- Position: Front


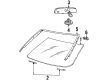
Mercury Windshield, Front Part Number: 6L2Z-7803100-AA
$466.98 MSRP: $732.17You Save: $265.19 (37%)Ships in 1-2 Business DaysProduct Specifications- Other Name: Glass - Windscreen; Windshield, Front
- Manufacturer Note: Both Bottom Wire Pigtails Come PIA To This Windshield
- Position: Front

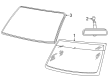
Mercury Windshield, Front Part Number: 5L8Z-7803100-AA
$214.45 MSRP: $314.90You Save: $100.45 (32%)Ships in 1-3 Business DaysProduct Specifications- Other Name: Glass - Windscreen; Windshield, Front
- Position: Front
- Replaces: 3L8Z-7803100-AA

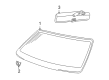
Mercury Windshield, Front Part Number: 8G1Z-5403100-AA
$265.83 MSRP: $390.35You Save: $124.52 (32%)Ships in 1-3 Business DaysProduct Specifications- Other Name: Glass - Windscreen; Windshield, Front
- Position: Front

Mercury Windshield Part Number: F3XY-1203100-A
$156.26 MSRP: $227.45You Save: $71.19 (32%)Ships in 1-3 Business DaysProduct Specifications- Other Name: Glass - Windscreen
- Manufacturer Note: Green tint, w/antenna
Mercury Windshield Part Number: F7CZ-5403100-AE
Product Specifications- Other Name: Glass - Windscreen
- Manufacturer Note: Green tint - includes glass and rear view mirror bracket, w/o gradient shade band

Mercury Windshield Part Number: F4SZ-6303100-B
Product Specifications- Other Name: Glass - Windscreen
- Replaces: F3LY-6303100-A

Mercury Windshield, Front Part Number: F57Z-7803100-A
Product Specifications- Other Name: Glass - Windscreen; Windshield, Front
- Manufacturer Note: Green tint - includes mirror bracket
- Position: Front


Mercury Windshield, Front Part Number: 3C5Z-7803100-AA
$204.99 MSRP: $301.02You Save: $96.03 (32%)Product Specifications- Other Name: Glass - Windscreen; Windshield, Front
- Position: Front

Mercury Windshield, Front Part Number: 3W7Z-5403100-AB
$214.63 MSRP: $315.17You Save: $100.54 (32%)Product Specifications- Other Name: Glass - Windscreen; Windshield, Front
- Position: Front

Mercury Windshield, Front Part Number: AE5Z-5403100-B
$228.00 MSRP: $334.80You Save: $106.80 (32%)Product Specifications- Other Name: Glass - Windscreen; Windshield, Front
- Position: Front
- Replaces: AE5Z-5403100-A

Mercury Windshield, Front Part Number: 8L8Z-7803100-A
$247.57 MSRP: $363.53You Save: $115.96 (32%)Product Specifications- Other Name: Glass - Windscreen; Windshield, Front
- Position: Front

Mercury Windshield, Front Part Number: BE5Z-5403100-C
$250.71 MSRP: $368.15You Save: $117.44 (32%)Product Specifications- Other Name: Glass - Windscreen; Windshield, Front
- Position: Front
- Replaces: BE5Z-5403100-B

Mercury Windshield, Front Part Number: YF1Z-5403100-AA
Product Specifications- Other Name: Glass - Windscreen; Windshield, Front
- Manufacturer Note: Green tint - includes glass, rear view mirror bracket and windshield moulding, w/o center paint patch (covers rear view mirror button)
- Position: Front
Mercury Windshield Part Number: XF5Z-1203100-AA
Product Specifications- Other Name: Glass - Windscreen
- Manufacturer Note: Green tint
Mercury Windshield Part Number: FOSZ-6303100-A
Product Specifications- Other Name: Glass - Windscreen
Mercury Glass Panel Part Number: FOLZ-6303100-A
Product Specifications- Other Name: Glass Assembly Windshield Tinted; Glass; Windshield
Mercury Glass Panel Part Number: FODZ-5403100-B
Product Specifications- Other Name: Glass - Windscreen; Glass; Windshield
- Manufacturer Note: Green tint - inlcudes glass and rear view mirror bracket, w/o heated windshield, FROM 4/90
Mercury Glass Panel Part Number: FOCZ-5803100-A
Product Specifications- Other Name: Glass - Windscreen; Windshield
- Manufacturer Note: Green tint , includes glass and rear view mirror bracket
Mercury Glass Part Number: FOAZ-5403100-A
Product Specifications- Other Name: Glass - Windscreen
- Manufacturer Note: Green tint , includes glass and rear view mirror bracket , w/o heated windshield
| Page 1 of 2 |Next >
1-20 of 39 Results
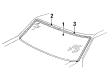
Mercury Windshield
If you own Mercury and want to keep it in top shape, choosing OEM Windshield is a smart move. They are precisely engineered and follow strict factory standards. They are made in advanced facilities that use cutting edge technology. Each part goes through thorough testing to confirm strength and safety, so you can trust it. FordPartsDeal.com gives you genuine Mercury Windshield at some of the affordable online prices without cutting quality. Every OEM Mercury part includes the manufacturer's warranty, easy returns, and super-fast delivery. So why wait? Shop now and get your vehicle back to peak condition.
Mercury Windshield ensures that eyesight is clear and cabin is safe in all driving conditions. Mercury started in 1938 with cars that are tuned to a more comfortable ride and a sharp and memorable style. Buyers appreciated the fact that Mercury struck the right balance between smooth suspension and spacious cabins that reduced road noise. During decades, Mercury released Cougars and Grand Marquis that demonstrated that comfort could be affordable without a lot of money. Mercury created a legacy of value-minded innovation that continues to be relevant even after production in 2011. Praise was sung about how silent the cabins were, the simple controls, and the prices that made upgrades seem affordable. The balanced feel of the as opposed to raw horsepower also provided confidence to young families on long highway journeys. The Windshield is made of two layers of curved glass glued in the middle with a tough plastic core, which makes gravel hits, hail, and changes in pressure insignificant and, at the same time, provides perfect sight lines with no distortion. The Windshield is designed for a collision, where the airbags are contained and use them as prevention against ejection. Laminated construction also implies that the Windshield breaks and does not shatter, so the cleanup is fast and injuries are reduced. Chips are spotted, and a replacement Windshield is installed across the generations of Montego models and gives full structural strength again without ado.
Mercury Windshield Parts and Q&A
- Q: How to service and repair a windshield on Mercury Cougar?A:Service and repair of windshields need equipment such as hot air guns as well as pneumatic knives with offset blades and interior auto glass cut-out knife kits. Start your procedure by disconnecting the battery ground cable when outdoor temperatures fall below 10°C while preparing the Polyurethane (PU) adhesive with heating by placing cartridges on a warm radiator or applying a hot air gun at 25°C for 15 minutes. Begin by removing the cowl panel weather strip from the vehicle then detach its windshield wipers by lifting the arm covers, taking out wiper nuts, washers, and arms followed by cowl grille panel removal before taking off the windshield side and top weather strips along with A-pillar trim and sun visor screws and clip and detach the front of the headliner with a small block as a spacer. Use the pneumatic knife on the windshield with a 28 mm hooked blade and finish the cutting process by using a 60 mm hook blade on the bottom edge. Following this, cut the preliminary adhesive with a round-edged blade from an auto glass cut-out knife. Cutter blades on an interior auto glass cut-out knife should be used to cut through PU adhesive on top and sides while applying EC7784 lubricant or soap water solution (10:1 ratio). You should operate the cutter blade near the connectors during installation of a heated windshield. An auto glass cut-out knife with an eight-inch cutter blade installed on the cutting edge allows you to proceed with the bottom edge cut assisted by another technician who will extract the windshield using suction pads. Before applying the bodywork seal, eliminate excess PU adhesive from the opening while retaining about 1 mm substance at the bodywork's surface. Inspect the pinch weld area for any damage or foreign materials. Correct procedures require warm airflow to eliminate moisture inside the windshield opening as well as the glass bond line before processing the glass and windshield opening and trimmed PU adhesive following adhesive kit protocols. A continuous bead of PU adhesive should be applied 8-10 mm high to the windshield flange where breaks need 20 mm overlap and the initial 100 mm section should be discarded for improved working time. Controlling personnel can help mount the windshield using suction pads while warm air should be applied continuously for 15 minutes when the temperature is below 10°C. The maintenance process requires reinstalling the rear view mirror and headliner and its spacer then the sun visor clip and screws followed by A-pillar trim panels and windshield top and side weather strips and cowl grille panel as well as windshield wipers before reconnecting the battery ground cable.
- Q: How to reseal a windshield on Mercury Mariner?A:The first step to reseal the windshield includes trimming off the LH and RH A-pillar panels together with both windshield side garnish mouldings. Users must remove the front overhead console door to access the two screws while disconnecting any present electrical connector that might be attached. Both sun visors with their clips need removal alongside disconnecting the electrical wires if installed. You should partially lower the front segment of the headliner while supporting it with appropriate materials and afterward detach the cowl panel grille. Apply glass cleaner to wipe all exterior and interior parts of windshield glass surfaces. Use a high-ratio electric or battery-operated caulk gun to cut the urethane adhesive applicator tip to specification for applying a continuous bead without gaps across the surfaces. Disperse the adhesive along the existing urethane adhesive layer which extends across the windshield top surface and interior sides as well as exterior bottom surface. Begin inspecting for air or water leaks only after the urethane adhesive has cured for at least one hour. The adhesive supply can always be adjusted at that time. Fit the cowl panel grille followed by placement of the headliner's front section and readjustment of sun visors on both sides with associated clips before connecting electrical connectors if necessary. The last step is to position the overhead console while using screws to attach it then reconnecting electrical connections if available followed by reinstalling the two windshield side garnish mouldings and the LH and RH A-pillar trim panels.

Related Mercury Parts
 Mercury Air Deflector
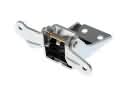 Mercury Door Hinge
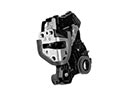 Mercury Door Lock
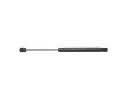 Mercury Lift Support
 Mercury Liftgate Hinge
 Mercury Liftgate Lift Support
 Mercury Rear Door Striker
 Mercury Tailgate Handle
 Mercury Weather Strip
 Mercury Windshield Washer Nozzle
 Mercury Wiper Blade
 Mercury Wiper Linkage