My Garage
Cart
Make sure this part fits

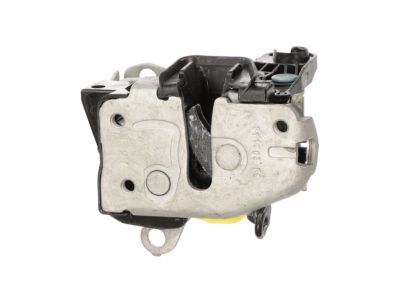
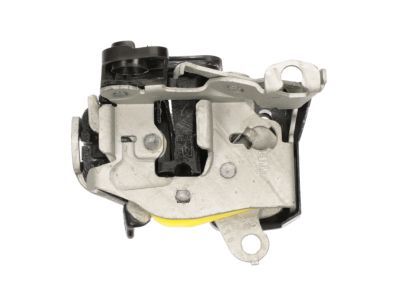
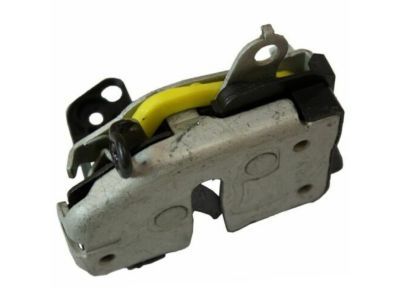
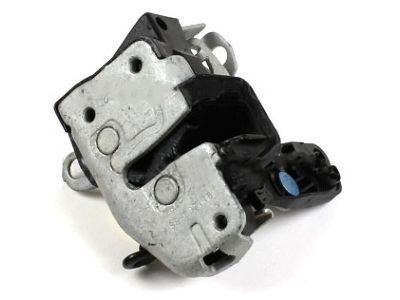
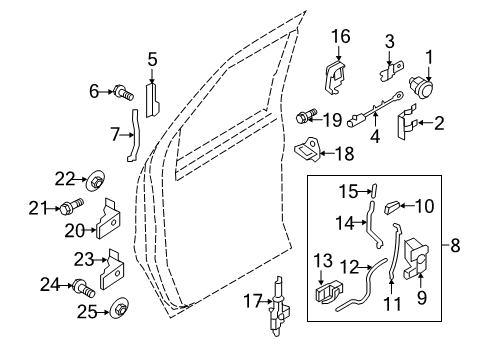
Ford 6C2Z-1521813-A
Latch Assembly, Front Driver Side

1993-2024 Ford 6C2Z1521813A

Customer Questions & Expert Answers (48)
Ford 6C2Z-1521813-A Latch Assembly, Front Driver Side
  • Part Description
    Latch; Door Latch Assembly, Front Left, Front Right; Door Lock
  • Base No.
    21813
  • Position
    Front Driver Side
  • Replaces
    4C2Z-1521813-AA
  • Manufacturer
    Ford
Make sure this part fits
$113.65 MSRP: $165.43
You Save: $51.78 (32%)
Ships in 1 Business Day
1
ADD TO CART
  • Vehicle Fitment

    Year Make Model Trim Engine
    2003-2014 Ford E-150Base, Chateau, XL, XLT6 Cyl 4.2 L GAS, 8 Cyl 4.6 L FLEX, 8 Cyl 4.6 L GAS, 8 Cyl 5.4 L CNG, 8 Cyl 5.4 L FLEX, 8 Cyl 5.4 L GAS, 8 Cyl 5.4 L LPG
    2003-2005 Ford E-150 Club WagonChateau, XL, XLT6 Cyl 4.2 L GAS, 8 Cyl 4.6 L GAS, 8 Cyl 5.4 L GAS
    1996-2002 Ford E-150 EconolineBase, XL6 Cyl 4.2 L GAS, 6 Cyl 4.9 L GAS, 8 Cyl 4.6 L GAS, 8 Cyl 5.0 L GAS, 8 Cyl 5.4 L BI-FUEL, 8 Cyl 5.4 L GAS, 8 Cyl 5.8 L GAS
    1996-2002 Ford E-150 Econoline Club WagonChateau, Custom, XL, XLT6 Cyl 4.2 L GAS, 6 Cyl 4.9 L GAS, 8 Cyl 4.6 L GAS, 8 Cyl 5.0 L GAS, 8 Cyl 5.4 L BI-FUEL, 8 Cyl 5.4 L GAS, 8 Cyl 5.8 L GAS
    2003-2014 Ford E-250Base6 Cyl 4.2 L GAS, 8 Cyl 4.6 L FLEX, 8 Cyl 4.6 L GAS, 8 Cyl 5.4 L CNG, 8 Cyl 5.4 L FLEX, 8 Cyl 5.4 L GAS, 8 Cyl 5.4 L LPG
    1996-2002 Ford E-250 EconolineBase, XL6 Cyl 4.2 L GAS, 6 Cyl 4.9 L BI-FUEL, 6 Cyl 4.9 L GAS, 8 Cyl 5.4 L BI-FUEL, 8 Cyl 5.4 L CNG, 8 Cyl 5.4 L GAS, 8 Cyl 5.8 L GAS
    2003-2005 Ford E-350 Club WagonChateau, XL, XLT10 Cyl 6.8 L GAS, 8 Cyl 5.4 L CNG, 8 Cyl 5.4 L GAS, 8 Cyl 6.0 L DIESEL, 8 Cyl 7.3 L DIESEL
    1996-1998 Ford E-350 EconolineBase, XL10 Cyl 6.8 L GAS, 6 Cyl 4.9 L GAS, 8 Cyl 5.4 L BI-FUEL, 8 Cyl 5.4 L CNG, 8 Cyl 5.4 L GAS, 8 Cyl 5.8 L GAS, 8 Cyl 7.3 L DIESEL, 8 Cyl 7.5 L GAS
    1996-2002 Ford E-350 Econoline Club WagonChateau, Chateau HD, Custom, XL, XL HD, XLT, XLT HD10 Cyl 6.8 L GAS, 6 Cyl 4.9 L BI-FUEL, 6 Cyl 4.9 L GAS, 8 Cyl 5.4 L BI-FUEL, 8 Cyl 5.4 L CNG, 8 Cyl 5.4 L GAS, 8 Cyl 5.8 L GAS, 8 Cyl 7.3 L DIESEL, 8 Cyl 7.5 L GAS
    2021-2024, 1999-2019 Ford E-350 Super DutyBase, Chateau, XL, XLT10 Cyl 6.8 L CNG, 10 Cyl 6.8 L GAS, 10 Cyl 6.8 L LPG, 8 Cyl 5.4 L BI-FUEL, 8 Cyl 5.4 L CNG, 8 Cyl 5.4 L FLEX, 8 Cyl 5.4 L GAS, 8 Cyl 5.4 L LPG, 8 Cyl 6.0 L DIESEL, 8 Cyl 6.2 L FLEX, 8 Cyl 7.3 L DIESEL, 8 Cyl 7.3 L GAS
    View More
    Warning: California's Proposition 65
  • Customer Questions & Expert Answers

    Q:
    Is 6C2Z-1521813-A the part I need for my vehicle? Posted by FordPartsDeal Specialist
    A:
    Select Your Vehicle model to verify if part number 6C2Z-1521813-A fits your car.
    Posted by FordPartsDeal Specialist
    Q:
    How to Address Issues with the Door Latch Assembly on a Ford Mustang? Posted by Customer
    A:
    Service and repair of the front door latch requires a start by taking out the door trim panel. Start the process by opening the clips which frees the actuating rods and then use a screwdriver to unlock the lock cylinder actuating rod. The service procedure starts by disconnecting both the door ajar switch along with the actuator electrical connectors after removing the door latch screws. The process starts by taking off the water shield until you can free the interior door handle actuating cable and finish by uninstalling the door latch. To mount the door follow the steps of reverse installation order.
    Posted by FordPartsDeal Specialist
    Q:
    How to Service and Repair the Front Door Latch Assembly on Ford Expedition? Posted by Customer
    A:
    A full-up position of the door glass is required before front door trim panel removal for service or repair of the latch mechanism. Start by moving the watershield to the side and followed by disconnection of the lock cylinder rod along with the exterior door handle actuating rod if present. First step is to discard bolts after you remove them from the front door latch as you put the latch aside. The procedure requires disconnecting electrical connectors while you release the interior door handle cable to remove the front door latch. This allows placement of the cable cover aside and liberation of both conduit and interior door handle cable. Installation of the latch requires following the removal steps backward while transferring necessary components before lubricating it with multi-purpose grease.
    Posted by FordPartsDeal Specialist
    Q:
    How to service and repair the front Door Latch Assembly on Ford Freestar? Posted by Customer
    A:
    The service and repair process for the front door latch starts with removing its trim panel. The service requires removing the front door latch bolts while tightening them to 12 Nm when putting everything back. The service process starts with disconnecting both the exterior front door handle actuating rod and the door lock cylinder rod. The technician needs to place the front door latch in position for viewing the door lock actuator along with the door ajar switch before they cut the electrical connections from each component. The interior door handle actuating cable needs removal from the front door latch before the latch is taken out. The installation process ends with the same steps in reverse order of removal.
    Posted by FordPartsDeal Specialist
    Q:
    How to service and repair the front Door Latch Assembly on Ford Mustang? Posted by Customer
    A:
    A technician should begin the front door latch repair by taking out the door trim panel. The release of actuating rods begins with clip opening followed by screwdriver usage to free the lock cylinder actuating rod. You should first disconnect the door ajar switch along with actuator electrical connectors before removing screws that keep the door latch in place. The service and repair process starts by removing the water shield after which you should release the interior door handle actuating cable and end with unfastening the door latch. Installation of the unit will consist of performing the removal steps in reverse order.
    Posted by FordPartsDeal Specialist
    Q:
    How to service and repair the front Door Latch Assembly on Ford Thunderbird? Posted by Customer
    A:
    Service and repair of the front door latch begins by lifting the window all the way up followed by disconnecting the battery ground cable. Begin by taking out the door trim panel together with the water shield. Separate the exterior door handle actuating rod by unclipping its the rod retention piece followed by disconnecting the latch rod. Start by removing the electrical connectors before unfastening any door lock cylinder actuating rod that might be present. First remove the door latch screws before you detach the door latch thus disconnecting its actuating cable. Execute the installation of the new latch following the backward method of removal and lubricate it with multi-purpose grease spray.
    Posted by FordPartsDeal Specialist
    Q:
    How to Service and Repair the Front Door Latch Assembly on Lincoln Navigator? Posted by Customer
    A:
    The service procedure for front door latches starts with a door glass position that allows complete access while you remove the front door trim panel. The watershield needs position to one side before disconnecting any lock cylinder rods and exterior door handle actuating rods which may be present. Detach the bolts binding the front door latch and keep it with the discarded bolts. After disconnecting electrical wires you must detach the inner door handle cable to extract the front door latch and set the cable cover and conduit and its attached cable to the side. Apply multi-purpose grease for lubrication to the latch before reinstallation then perform the reverse order as the removal procedure.
    Posted by FordPartsDeal Specialist
    Q:
    How to Service and Repair the Front Door Latch Assembly on Mercury Monterey? Posted by Customer
    A:
    Service and repair operations for the front door latch start with unscrewing the front door trim panel. Remove the front door latch bolts one by one before final installation at 9 Nm (80 lb-in). Disconnect the rods that function the exterior front door handle along with any connected door lock cylinders. You must position the front door latch to connect with both the door lock actuator and door ajar switch electrical connectors and then detach these connections. The installation requires removal of the front door latch by disconnecting the interior door handle actuating cable from the front door latch. The installation ends by performing the reverse steps used for removal.
    Posted by FordPartsDeal Specialist
    Q:
    What steps are needed for side hinged or rear doors for the 2003 Ford E-250? Posted by Customer
    A:
    Remove the retaining nuts, inside handle, and bezel. If equipped, drill out the power door lock actuator rivet.
    Posted by FordPartsDeal Specialist
    See expert answers on similar Door Latch Assembly
    Q:
    What should be done for the upper latch for the 2008 Ford E-150? Posted by Customer
    A:
    Release the upper latch cable locator from the door and remove the three upper door latch screws, ensuring to tighten them to 12 Nm (9 lb-ft) upon installation.
    Posted by FordPartsDeal Specialist
    See expert answers on similar Door Latch Assembly
    Q:
    What should be done for the front door after removing the trim panel for the 2001 Ford E-250 Econoline? Posted by Customer
    A:
    Take out the latch remote control.
    Posted by FordPartsDeal Specialist
    See expert answers on similar Door Latch Assembly
    Q:
    What components should be removed as an assembly for side hinged and rear doors for the 2003 Ford E-150? Posted by Customer
    A:
    Remove the door latch, door latch remote control and cable(s), lock cylinder rod, push-button rod, and power door lock actuator.
    Posted by FordPartsDeal Specialist
    See expert answers on similar Door Latch Assembly
    Q:
    How should the installation be done for the 2001 Ford E-250 Econoline? Posted by Customer
    A:
    Reverse the removal procedure.
    Posted by FordPartsDeal Specialist
    See expert answers on similar Door Latch Assembly
    Q:
    What steps are needed for side hinged or rear doors for the 2001 Ford E-150 Econoline? Posted by Customer
    A:
    Take off the retaining nuts, inside handle, and bezel. If equipped, drill out the power door lock actuator rivet.
    Posted by FordPartsDeal Specialist
    See expert answers on similar Door Latch Assembly
    Q:
    What is the first step to service and repair the rear door latch for the 2000 Ford E-150 Econoline? Posted by Customer
    A:
    Begin by removing the door trim panel and watershield.
    Posted by FordPartsDeal Specialist
    See expert answers on similar Door Latch Assembly
    Q:
    What is the next step after disconnecting the cable for the 2005 Ford E-250? Posted by Customer
    A:
    Remove the bolt and nut along with the sliding door lower latch itself.
    Posted by FordPartsDeal Specialist
    See expert answers on similar Door Latch Assembly
    Q:
    What rods need to be disconnected for the 2009 Ford E-150? Posted by Customer
    A:
    Disconnect the door lock cylinder actuating rod and the exterior door handle actuating rod.
    Posted by FordPartsDeal Specialist
    See expert answers on similar Door Latch Assembly
    Q:
    What should be done after removing the actuator rivet for the 2000 Ford E-150 Econoline? Posted by Customer
    A:
    Remove the remaining bolts and disconnect both latch cables.
    Posted by FordPartsDeal Specialist
    See expert answers on similar Door Latch Assembly
    Q:
    What should be noted regarding some for the 2006 Ford E-150? Posted by Customer
    A:
    Some vehicles may have insulating foam in the door frame, and a fishing line may be necessary to assist in installing the new latch and cable assembly through the foam.
    Posted by FordPartsDeal Specialist
    See expert answers on similar Door Latch Assembly
    Q:
    What should be ensured when installing the new latch for the 2009 Ford E-250? Posted by Customer
    A:
    Tighten the bolt to 12 Nm (106 lb-in).
    Posted by FordPartsDeal Specialist
    See expert answers on similar Door Latch Assembly
    Q:
    What should be done for the front door specifically for the 2002 Ford E-150 Econoline? Posted by Customer
    A:
    Take out the latch remote control.
    Posted by FordPartsDeal Specialist
    See expert answers on similar Door Latch Assembly
    Q:
    What should be done for all doors before removing the latch assembly for the 2009 Ford E-250? Posted by Customer
    A:
    Remove the door latch remote control screw and the 3 door latch screws.
    Posted by FordPartsDeal Specialist
    See expert answers on similar Door Latch Assembly
    Q:
    What should be done after removing the screws for the 2007 Ford E-250? Posted by Customer
    A:
    Disconnect the cable from the lower sliding door latch.
    Posted by FordPartsDeal Specialist
    See expert answers on similar Door Latch Assembly
    Q:
    What needs to be disconnected before removing the rear sliding door latch for the 2006 Ford E-250? Posted by Customer
    A:
    Disconnect the actuating cable.
    Posted by FordPartsDeal Specialist
    See expert answers on similar Door Latch Assembly
    Q:
    What steps are required for side hinged or rear doors for the 2002 Ford E-250 Econoline? Posted by Customer
    A:
    Remove the retaining nuts, inside handle, and bezel. If equipped, drill out the power door lock actuator rivet.
    Posted by FordPartsDeal Specialist
    See expert answers on similar Door Latch Assembly
    Q:
    What should be done after removing the screws for the 2004 Ford E-250? Posted by Customer
    A:
    Disconnect the cable from the sliding door lower latch.
    Posted by FordPartsDeal Specialist
    See expert answers on similar Door Latch Assembly
    Q:
    What should be done after tightening the bolt for the 2008 Ford E-250? Posted by Customer
    A:
    Reverse the removal procedure to complete the installation.
    Posted by FordPartsDeal Specialist
    See expert answers on similar Door Latch Assembly
    Q:
    How do you release the actuation cable clip for the 2007 Ford E-150? Posted by Customer
    A:
    Push the bottom keeper upward and slide the clip toward the outside of the door, then disconnect the cable from the interior door handle.
    Posted by FordPartsDeal Specialist
    See expert answers on similar Door Latch Assembly
    Q:
    What should you do for the lower latch on the side door for the 2005 Ford E-150? Posted by Customer
    A:
    Remove the bolts and the lower door latch.
    Posted by FordPartsDeal Specialist
    See expert answers on similar Door Latch Assembly
    Q:
    What components should be removed as an assembly for side hinged and rear doors for the 2000 Ford E-250 Econoline? Posted by Customer
    A:
    Remove the door latch, door latch remote control and cable(s), lock cylinder rod, push-button rod, and power door lock actuator.
    Posted by FordPartsDeal Specialist
    See expert answers on similar Door Latch Assembly
    Q:
    What should be noted regarding some during this process for the 2009 Ford E-150? Posted by Customer
    A:
    Some vehicles may have insulating foam in the door frame, and a fishing line may be necessary to assist in installing the new latch and cable assembly through the foam.
    Posted by FordPartsDeal Specialist
    See expert answers on similar Door Latch Assembly
    Q:
    What is the next step after removing the upper latch for the 2004 Ford E-150? Posted by Customer
    A:
    Proceed to remove the upper latch and cable assembly.
    Posted by FordPartsDeal Specialist
    See expert answers on similar Door Latch Assembly
    Q:
    What is the first step in the repair process for the 2004 Ford Expedition? Posted by Customer
    A:
    Remove the rear door trim panel and position the watershield aside.
    Posted by FordPartsDeal Specialist
    See expert answers on similar Door Latch Assembly
    Q:
    What should you do after removing the three door latch bolts for the 2005 Ford Mustang? Posted by Customer
    A:
    Ensure to tighten them to 12 Nm (9 lb-ft) upon installation.
    Posted by FordPartsDeal Specialist
    See expert answers on similar Door Latch Assembly
    Q:
    What needs to be disconnected next for the 2006 Ford Mustang? Posted by Customer
    A:
    Disconnect the two wiring harness electrical connectors.
    Posted by FordPartsDeal Specialist
    See expert answers on similar Door Latch Assembly
    Q:
    What is the next step after disconnecting the electrical connectors for the 2001 Ford Mustang? Posted by Customer
    A:
    Remove the water shield.
    Posted by FordPartsDeal Specialist
    See expert answers on similar Door Latch Assembly
    Q:
    What is the first step to service and repair the front door latch for the 2007 Ford Freestar? Posted by Customer
    A:
    Begin by removing the front door trim panel.
    Posted by FordPartsDeal Specialist
    See expert answers on similar Door Latch Assembly
    Q:
    What position should the door handle and front door handle rod be in before closing the clips for the 2006 Ford Expedition? Posted by Customer
    A:
    Ensure the door handle and the front door handle rod are in a relaxed position with the front door handle rod fully raised.
    Posted by FordPartsDeal Specialist
    See expert answers on similar Door Latch Assembly
    Q:
    How do you release the actuating rods for the 2003 Ford Mustang? Posted by Customer
    A:
    Open the clips to release the actuating rods.
    Posted by FordPartsDeal Specialist
    See expert answers on similar Door Latch Assembly
    Q:
    What should be removed next for the 2000 Ford Windstar? Posted by Customer
    A:
    Proceed to remove the rods, the door ajar switch, and the actuator.
    Posted by FordPartsDeal Specialist
    See expert answers on similar Door Latch Assembly
    Q:
    What is the torque specification for the screws upon reinstallation for the 2005 Ford Thunderbird? Posted by Customer
    A:
    Tighten them to 12 Nm (9 lb-ft).
    Posted by FordPartsDeal Specialist
    See expert answers on similar Door Latch Assembly
    Q:
    What is the first step to service and repair the front door latch for the 2001 Ford Windstar? Posted by Customer
    A:
    Begin by removing the front door trim panel and positioning the watershield aside.
    Posted by FordPartsDeal Specialist
    See expert answers on similar Door Latch Assembly
    Q:
    What is the first step to service and repair the sliding door latch for the 2001 Ford Windstar? Posted by Customer
    A:
    Begin by removing the sliding door trim panel.
    Posted by FordPartsDeal Specialist
    See expert answers on similar Door Latch Assembly
    Q:
    How do you disconnect the exterior door handle actuating rod for the 2007 Ford Mustang? Posted by Customer
    A:
    Push upward on the rod while installing it into the retaining clip.
    Posted by FordPartsDeal Specialist
    See expert answers on similar Door Latch Assembly
    Q:
    What is the first step to service and repair the rear door latch for the 2005 Lincoln Navigator? Posted by Customer
    A:
    Ensure the rear door window glass is fully raised.
    Posted by FordPartsDeal Specialist
    See expert answers on similar Door Latch Assembly
    Q:
    How do you disconnect the interior sliding door handle cable for the 2002 Ford Windstar? Posted by Customer
    A:
    Release the clip and then disconnect the cable and conduit.
    Posted by FordPartsDeal Specialist
    See expert answers on similar Door Latch Assembly
    Q:
    What should be done after raising the rear door window glass for the 2006 Lincoln Navigator? Posted by Customer
    A:
    Remove the rear door trim panel and position the watershield aside.
    Posted by FordPartsDeal Specialist
    See expert answers on similar Door Latch Assembly
    Q:
    What should you do with the electrical connectors for the 2003 Ford Windstar? Posted by Customer
    A:
    Disconnect the electrical connectors and remove the sliding door latch screws.
    Posted by FordPartsDeal Specialist
    See expert answers on similar Door Latch Assembly
    If you have any questions about this product, please don't hesitate to ask us. We will be happy to help you!

OEM Ford Latch Assembly, Front Driver Side 6C2Z-1521813-A Designed for Proper Fit and Performance

The Ford part 6C2Z-1521813-A Latch Assembly, Front Driver Side as a genuine Ford Door Latch Assembly component delivers both authenticity and reliability. This item carries a warranty from the manufacturer which guarantees 12-month, 12,000-mile of use. The Ford 6C2Z-1521813-A Latch Assembly, Front Driver Side is used with Ford Mustang, Expedition, Taurus vehicles and Mercury Monterey, Sable models and Lincoln Navigator, Mark VIII models. The original Ford part will bear the manufacturer part number: 6C2Z-1521813-A and where it is made at Ford. It has been specifically developed to fit the Front Driver Side and has the code: 21813.
This component has dimensions of 5.1 x 4.5 x 3.0 inches and its weight is approximately 1.10 Pounds. The part 6C2Z1521813A is available in New condition while meeting the standards of the product rating. The Latch; Door Latch Assembly, Front Left, Front Right; Door Lock belongs to the Direct Replacement category to guarantee it is suitable for its specific vehicle applications. This part 6C2Z-1521813-A can be known as Lock; Door Latch Assembly, and it replaces 4C2Z-1521813-AA. The inventory reference for this item is SKU: 6C2Z-1521813-A. The Ford manufacturer issues a factory warranty for this component which ensures dependable operation and peak performance. You can find delivery and returns information on our Shipping Policy and Return Policy pages.
Original equipment manufacturer parts are of the top standards and their performance is outstanding and top notch. This is explained by the fact that they follow the official manufacturing techniques of Ford, use of premium material and meets high standards of quality. Our site is worth visiting, in case you need high-quality and affordable OEM Ford components. We promise the optimal priced Ford parts on a wide range. You can relax that all OEM products you buy from us include a manufacturer warranty and will be covered by our simple and easy-to-use return policy, so you will not worry about buying a part.