My Garage
Cart
Make sure this part fits

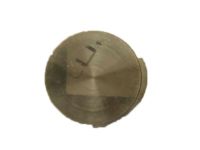
Ford XW4Z-6700-AA
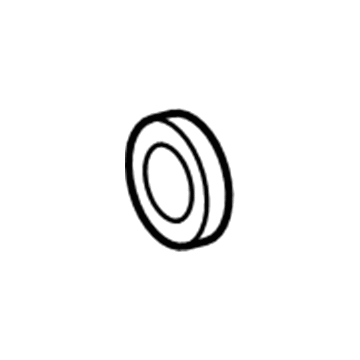
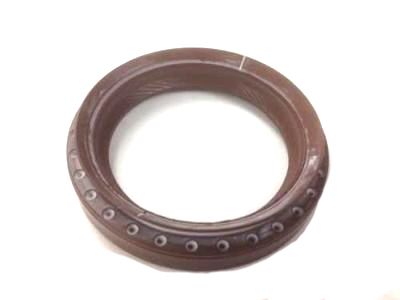
Oil Seal, Front

1999-2024 Ford XW4Z6700AA

Customer Questions & Expert Answers (21)
Ford XW4Z-6700-AA Oil Seal, Front
  • Part Description
    Seal Assembly - Crankshaft Oil - Front; Engine Crankshaft Seal, Front; Timing Cover Gasket; Timing Cover Seal
  • Base No.
    6700
  • Position
    Front
  • Replaces
    XW4Z-6700-A
  • Manufacturer
    Ford
Make sure this part fits
$10.89 MSRP: $15.45
You Save: $4.56 (30%)
1
ADD TO CART
  • Related Parts
  • Product Specifications
  • Vehicle Fitment
  • Customer Questions & Expert Answers
  • Product Specifications

    BrandGenuine Ford
    Base No.6700
    Manufacturer Part NumberXW4Z-6700-AA
    Part DescriptionSeal Assembly - Crankshaft Oil - Front; Engine Crankshaft Seal, Front; Timing Cover Gasket; Timing Cover Seal
    Other NamesCrankshaft Seal; Front Crank Seal; Timing Cover Oil Seal; Engine Crankshaft Seal
    Item Dimensions5.3 x 5.1 x 5.3 inches
    Item Weight5.20 Pounds
    PositionFront
    ConditionNew
    Fitment TypeDirect Replacement
    ReplacesXW4Z-6700-A
    ManufacturerFord
    SKUXW4Z-6700-AA
    WarrantyThis genuine Ford part is guaranteed by Ford's factory warranty.
    Shipping & ReturnShipping Policy Return Policy
    Warning: California's Proposition 65
  • Vehicle Fitment

    Year Make Model Trim Engine
    2003-2014 Ford E-150Base, Chateau, XL, XLT8 Cyl 4.6 L GAS, 8 Cyl 5.4 L CNG, 8 Cyl 5.4 L FLEX, 8 Cyl 5.4 L GAS, 8 Cyl 5.4 L LPG
    2003-2005 Ford E-150 Club WagonChateau, XL, XLT8 Cyl 4.6 L GAS, 8 Cyl 5.4 L GAS
    1999-2002 Ford E-150 EconolineBase, XL8 Cyl 4.6 L GAS, 8 Cyl 5.4 L GAS
    1999-2002 Ford E-150 Econoline Club WagonChateau, Custom, XL, XLT8 Cyl 4.6 L GAS, 8 Cyl 5.4 L GAS
    2003-2014 Ford E-250Base8 Cyl 4.6 L GAS, 8 Cyl 5.4 L CNG, 8 Cyl 5.4 L FLEX, 8 Cyl 5.4 L GAS, 8 Cyl 5.4 L LPG
    1999-2002 Ford E-250 EconolineBase, XL8 Cyl 5.4 L BI-FUEL, 8 Cyl 5.4 L CNG, 8 Cyl 5.4 L GAS
    2003-2005 Ford E-350 Club WagonChateau, XL, XLT10 Cyl 6.8 L GAS, 8 Cyl 5.4 L CNG, 8 Cyl 5.4 L GAS
    1999-2002 Ford E-350 Econoline Club WagonChateau, Custom, XL, XLT10 Cyl 6.8 L GAS, 8 Cyl 5.4 L BI-FUEL, 8 Cyl 5.4 L CNG, 8 Cyl 5.4 L GAS
    1999-2019 Ford E-350 Super DutyBase, Chateau, XL, XLT10 Cyl 6.8 L CNG, 10 Cyl 6.8 L GAS, 10 Cyl 6.8 L LPG, 8 Cyl 5.4 L BI-FUEL, 8 Cyl 5.4 L CNG, 8 Cyl 5.4 L FLEX, 8 Cyl 5.4 L GAS, 8 Cyl 5.4 L LPG
    2007-2018 Ford EdgeLimited, SE, SEL, SEL Plus, Sport, Titanium6 Cyl 3.5 L GAS, 6 Cyl 3.7 L GAS
    View More
  • Customer Questions & Expert Answers

    Q:
    Do you think this XW4Z-6700-AA will fit my car? Posted by FordPartsDeal Specialist
    A:
    Select Your Vehicle model to verify if part number XW4Z-6700-AA fits your car.
    Posted by FordPartsDeal Specialist
    Q:
    How to service and repair the front crankshaft seal on Ford E-250? Posted by Customer
    A:
    A correct procedure for servicing and repairing the front crankshaft seal starts by placing the vehicle in NEUTRAL gear and hoisting it. After removing the cooling fan and fan shroud follow with clockwise movement of the tensioner to detach the accessory drive belt from the crankshaft pulley. Using the crankshaft pulley bolt after its initial application leads to engine problems due to its torque-to-yield characteristic which forbids multiple uses. A Strap Wrench should be used to take out the crankshaft pulley bolt with its attached washer which must be discarded. To separate these two components one must first dismount the crankshaft pulley with Crankshaft Vibration Damper Remover then remove the old crankshaft front seal with Crankshaft Front Oil Seal Remover. When installing new crankshaft front seal users should apply clean engine oil to both the engine front cover and the inside portion of the new seal. The installation of the new crankshaft front seal requires using three tools including the Crankshaft Front Oil Seal Installer, Front Cover Oil Seal Installer and Crankshaft Vibration Damper Installer. Any delay larger than four minutes in sealing requires immediate removal of the sealant and specialized cleaning of the area with silicone gasket remover and metal surface prep before the area dries for the length of time it takes to become dry or four minutes, whichever duration is longer, to stop oil leaks. Affix silicone gasket along with sealant inside the Woodruff key slot of the crankshaft pulley. The Crankshaft Vibration Damper Installer should be used for installing the crankshaft pulley. To install the crankshaft pulley bolt on 4.6L (2V) engines you need a new bolt and washer before executing the step-by-step torque sequence starting with 120 Nm (89 lb-ft) then freeing by one full turn until reaching 50 Nm (37 lb-ft) then proceed with an additional 90 degrees tighten. The first stage crankshaft pulley bolt torquing procedure for 5.4L (2V) engines requires a bolt tightening force of 90 Nm (66 lb-ft). Secure the crankshaft pulley and rotate the tensioner clockwise before installing the accessory drive belt on the crankshaft pulley and replacing the engine cooling fan along with its shroud.
    Posted by FordPartsDeal Specialist
    Q:
    How to service the front crankshaft seal on Ford Edge? Posted by Customer
    A:
    Service operations on the front crankshaft seal should begin by positioning the vehicle in NEUTRAL gear with the assistance of a hoist. Separate the crankshaft pulley before pulling out and discarding the crankshaft front seal by using an Oil Seal Remover. The application of metal surface preparation needs to occur before moving forward with cleaning the sealing areas. Clean engine oil must be applied before installing the engine front cover by pouring it into the front seal bore of the crankshaft. The correct tools for installing the new crankshaft front seal are the Front Crankshaft Seal Installer and Crankshaft Vibration Damper Installer. Finally, reinstall the crankshaft pulley.
    Posted by FordPartsDeal Specialist
    Q:
    How to service and repair the front crankshaft seal on Ford Expedition? Posted by Customer
    A:
    Procedure for front crankshaft seal repair starts with hoisting the vehicle at NEUTRAL position. Start by removing the cooling fan after which you must rotate the tensioner clockwise to slide off the accessory drive belt from the crankshaft pulley. The bolt holding the crankshaft pulley and its washer must be taken off before discarding the bolt itself. The Crankshaft Front Oil Seal Remover removes the seal after you have used the 3-Jaw Puller to discard the crankshaft pulley. The installer should apply clean engine oil to both the front cover of the engine and the interior surface of the new crankshaft seal. When installing the new crankshaft front seal within the engine front cover, use the Crankshaft Front Oil Seal Installer and Crankshaft Vibration Damper Installer together with the Front Cover Oil Seal Installer. The removal of the sealant within 4 minutes requires a cleaning process with metal surface prep and silicone gasket remover until the area is dry for either 4 minutes or the longest time without wetness to stop future oil leakage. Install the crankshaft pulley by fitting it to the Woodruff key slot with silicone gasket and sealant through the use of the Crankshaft Vibration Damper Installer. Start by using the new crankshaft pulley bolt along with washer before tightening it in four steps: begin at 90 Nm (66 lb-ft) and continue to 50 Nm (37 lb-ft), then turn another 90 degrees in the final step. Use the tensioner to rotate clockwise toward the crankshaft pulley when installing the accessory drive belt. As the final step install the cooling fan.
    Posted by FordPartsDeal Specialist
    Q:
    How to service the front crankshaft seal on Ford F-150? Posted by Customer
    A:
    The procedure to service the front crankshaft seal starts with removing the crankshaft pulley. The service process requires using a Crankshaft Front Seal Remover to remove the crankshaft front seal. Clean engine oil should be used to lubricate both the engine front cover and the inside edge of the crankshaft front seal. The Crankshaft Vibration Damper Installer must be combined with the Front Cover Seal Installer to use the Crankshaft Front Seal Installer for correct installation of the new crankshaft front seal. Finally, reinstall the crankshaft pulley.
    Posted by FordPartsDeal Specialist
    Q:
    How to service and repair the front crankshaft seal on Ford F-350 Super Duty? Posted by Customer
    A:
    Service and repair of the front crankshaft seal must begin with the vehicle in NEUTRAL position on a hoist. Push the position retaining tabs to turn the lower cooling fan shroud until its retainer tab locks into place. The tensioner should be rotated clockwise to remove the accessory drive belt so the technician must also discard the crankshaft pulley bolt and washer. Service professionals should first employ the Crankshaft Vibration Damper Remover to remove the crankshaft pulley and then use the Crankshaft Front Oil Seal Remover to take off the crankshaft front seal. The new crankshaft front seal requires clean engine oil lubrication on its inner lip and the engine front cover during installation. The Crankshaft Vibration Damper Installer together with Front Cover Oil Seal Installer and Crankshaft Front Oil Seal Installer enables you to correctly install the new seal. Failure to secure the silicone gasket within 4 minutes requires the replacement of the sealant and cleaning the sealing area with silicone gasket remover and Motorcraft metal surface prep. The area must be completely dry or remain wet for 4 minutes depending on which requirement takes longer in order to prevent future oil leakage. Place silicone gasket and sealant on the Woodruff key slot of the crankshaft pulley before using the Crankshaft Vibration Damper Installer to mount the pulley. The crankshaft pulley bolt requires installation of an new washer and bolt using this sequence: Stage 1 to 90 Nm (66 lb-ft), Stage 2 loosen 360 degrees, Stage 3 to 50 Nm (37 lb-ft) and Stage 4 to tighten the bolt another 90 degrees. The accessory drive belt installation requires rotating the tensioner clockwise before pressing the position retaining tab so the lower cooling fan shroud can drop downward until the retainer tab secures into position.
    Posted by FordPartsDeal Specialist
    Q:
    How to service the front crankshaft seal on Ford Mustang? Posted by Customer
    A:
    Service of the front crankshaft seal starts by eliminating the crankshaft pulley. The Crankshaft Front Oil Seal Remover will extract and dispose of the existing crankshaft front seal. Before installing the new front seal the surface needs engine oil application. The Front Cover Aligner and Crankshaft Vibration Damper Installer should be used for correct installation of the new crankshaft front seal. Finally, reinstall the crankshaft pulley.
    Posted by FordPartsDeal Specialist
    Q:
    How to service the front crankshaft seal on Ford Taurus? Posted by Customer
    A:
    Service operations on the front crankshaft seal should begin by positioning the vehicle in NEUTRAL gear with the assistance of a hoist. Separate the crankshaft pulley before pulling out and discarding the crankshaft front seal by using an Oil Seal Remover. The application of metal surface preparation needs to occur before moving forward with cleaning the sealing areas. Clean engine oil must be applied before installing the engine front cover by pouring it into the front seal bore of the crankshaft. The correct tools for installing the new crankshaft front seal are the Front Crankshaft Seal Installer and Crankshaft Vibration Damper Installer. Finally, reinstall the crankshaft pulley.
    Posted by FordPartsDeal Specialist
    Q:
    How to service the front crankshaft seal on Ford Taurus X? Posted by Customer
    A:
    Service operations on the front crankshaft seal should begin by positioning the vehicle in NEUTRAL gear with the assistance of a hoist. Separate the crankshaft pulley before pulling out and discarding the crankshaft front seal by using an Oil Seal Remover. The application of metal surface preparation needs to occur before moving forward with cleaning the sealing areas. Clean engine oil must be applied before installing the engine front cover by pouring it into the front seal bore of the crankshaft. The correct tools for installing the new crankshaft front seal are the Front Crankshaft Seal Installer and Crankshaft Vibration Damper Installer. Finally, reinstall the crankshaft pulley.
    Posted by FordPartsDeal Specialist
    Q:
    How to Service and Repair the Main Bearing Crankshaft Seal on Lincoln MKS? Posted by Customer
    A:
    A proper crankshaft main bearing seal service and repair requires initial removal of the oil pan followed by careful cleaning procedures to avoid contamination of passages that might cause engine damage. A Heavy Duty Floor Crane combined with a Spreader Bar enables you to detach the engine from its stand. First remove the Crankshaft Position sensor electrical connector while also unscrewing the bolt which holds the CKP sensor. The Crankshaft Rear Oil Seal Remover along with a Slide Hammer works to pull out the rear crankshaft seal before discarding it. Secure the crankshaft rear seal retainer using eight bolts before installing two M6 oil pan bolts into the threaded holes of the retainer (with finger-tightness) until the retainer seal can be removed. Apply rotational force one turn by one turn to the bolts until the retainer seal lets go and then remove the crankshaft rear seal retainer. Cleaning of the crankshaft rear seal retainer plate requires a 3M(TM) Roloc(R) Bristle Disk (2-in white, part number 07528) running at a speed of 15,000 rpm to wipe it down properly while removing all foreign materials. Engine cavities must receive protection from contamination by using clean lint-free shop towels while the technician removes them skillfully to stop accidental debris from entering the engine. Trustworthy sealing areas of the cylinder block need preparation through silicone removal of huge deposits followed by silicone gasket remover application and setting duration before cleaning. Additional application of the product might be needed to treat any remaining traces. Finish the surface preparation process through metal treatment to remove residual oil and coolant but avoid producing shine since some staining is natural.
    Posted by FordPartsDeal Specialist
    Q:
    What should be done before installing the new crankshaft rear seal for the 2009 Ford Mustang? Posted by Customer
    A:
    Clean the crankshaft rear sealing surface with extra-fine emery cloth or extra-fine 0000 steel wool and metal surface prep, then lubricate the crankshaft rear oil seal with clean engine oil.
    Posted by FordPartsDeal Specialist
    See expert answers on similar Crankshaft Seal
    Q:
    What should be done before installing the new crankshaft rear seal for the 2009 Ford E-250? Posted by Customer
    A:
    Lubricate the inner lip of the new crankshaft rear seal with clean engine oil.
    Posted by FordPartsDeal Specialist
    See expert answers on similar Crankshaft Seal
    Q:
    What is the torque specification for tightening the six bolts for the 2009 Ford E-150? Posted by Customer
    A:
    Tighten the six bolts to 10 Nm (89 lb-in) in the specified sequence.
    Posted by FordPartsDeal Specialist
    See expert answers on similar Crankshaft Seal
    Q:
    What is the final step after installing the new components for the 2009 Ford F-150? Posted by Customer
    A:
    Reinstall the engine-to-transmission spacer plate and the flexplate.
    Posted by FordPartsDeal Specialist
    See expert answers on similar Crankshaft Seal
    Q:
    What tools are used to install the new crankshaft oil slinger for the 2009 Ford F-250 Super Duty? Posted by Customer
    A:
    Use the Crankshaft Rear Oil Seal Installers and the Crankshaft Rear Oil Slinger Installer.
    Posted by FordPartsDeal Specialist
    See expert answers on similar Crankshaft Seal
    Q:
    What needs to be removed after extracting the crankshaft rear seal for the 2009 Ford F-150? Posted by Customer
    A:
    Remove the six bolts securing the crankshaft rear seal retainer plate.
    Posted by FordPartsDeal Specialist
    See expert answers on similar Crankshaft Seal
    Q:
    What tools are needed to remove the crankshaft oil slinger for the 2009 Ford F-350 Super Duty? Posted by Customer
    A:
    Utilize the Slide Hammer along with the Crankshaft Rear Oil Slinger Remover.
    Posted by FordPartsDeal Specialist
    See expert answers on similar Crankshaft Seal
    Q:
    How is the new crankshaft rear seal positioned for installation for the 2009 Ford Flex? Posted by Customer
    A:
    Position the Rear Main Seal Installer onto the end of the crankshaft and slide a new crankshaft rear seal onto the tool.
    Posted by FordPartsDeal Specialist
    See expert answers on similar Crankshaft Seal
    Q:
    What should be done with the Crankshaft Position (CKP) sensor for the 2009 Lincoln MKX? Posted by Customer
    A:
    Disconnect the CKP sensor electrical connector and remove the CKP sensor bolt.
    Posted by FordPartsDeal Specialist
    See expert answers on similar Crankshaft Seal
    Q:
    What tool should be used to clean the sealing surfaces for the 2009 Lincoln Navigator? Posted by Customer
    A:
    Use a plastic scraping tool to eliminate old sealant.
    Posted by FordPartsDeal Specialist
    See expert answers on similar Crankshaft Seal
    Q:
    What tools are needed to remove the crankshaft oil slinger for the 2009 Lincoln Navigator? Posted by Customer
    A:
    Utilize the Slide Hammer along with the Crankshaft Rear Oil Slinger Remover.
    Posted by FordPartsDeal Specialist
    See expert answers on similar Crankshaft Seal
    If you have any questions about this product, please don't hesitate to ask us. We will be happy to help you!

OEM Ford XW4Z-6700-AA, Excellent Performance and Perfect Fitment

To ensure reliability, purchase Ford part # XW4Z-6700-AA Oil Seal, Front. It is sometimes referred to as Ford Crankshaft Seal. For those Ford owners who aspire to maintain their vehicles in optimal shape, opting for OEM parts is a wise choice. Precisely engineered, these components adhere to stringent factory guidelines and are produced in state-of-the-art facilities using cutting-edge technologies. Moreover, they are subjected to thorough testing to certify their resilience and safety, thereby making them a dependable option for Ford owners.

FordPartsDeal.com is a leading supplier of genuine Ford parts such as Ford XW4Z6700AA Oil Seal, Front. A vast selection of genuine Ford parts is available on our website, all offered at discounted prices. Every OEM Ford part is covered by the manufacturer's warranty, which also applies to our hassle-free return policy. Enjoy fast delivery service, ensuring you get your parts when you need them. Your shopping experience here is guaranteed to be pleasurable. For detailed Ford parts information, click here.
Choose FordPartsDeal for discounted prices, exceptional service and fast delivery