My Garage
Cart
Make sure this part fits

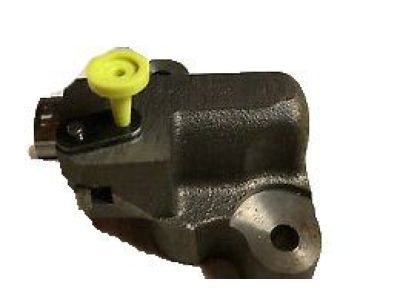
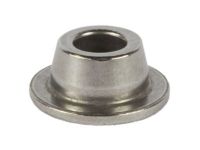
Ford 7T4Z-6K254-BA
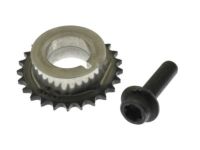
Tensioner, Driver Side

2007-2019 Ford 7T4Z6K254BA

Customer Questions & Expert Answers (8)
Ford 7T4Z-6K254-BA Tensioner, Driver Side
  • Part Description
    Timing Belt Tensioner; Timing Belt Kit
  • Base No.
    6K254
  • Position
    Driver Side
  • Manufacturer
    Ford
Make sure this part fits
$39.69 MSRP: $56.78
You Save: $17.09 (31%)
Ships in 1 Business Day
1
ADD TO CART
  • Related Parts
  • Product Specifications
  • Vehicle Fitment
  • Customer Questions & Expert Answers
  • Product Specifications

    BrandGenuine Ford
    Base No.6K254
    Manufacturer Part Number7T4Z-6K254-BA
    Part DescriptionTiming Belt Tensioner; Timing Belt Kit
    Manufacturer NoteSecondary
    Item Dimensions3.4 x 3.1 x 2.7 inches
    Item Weight0.60 Pounds
    PositionDriver Side
    ConditionNew
    Fitment TypeDirect Replacement
    ManufacturerFord
    SKU7T4Z-6K254-BA
    WarrantyThis genuine Ford part is guaranteed by Ford's factory warranty.
    Shipping & ReturnShipping Policy Return Policy
    Warning: California's Proposition 65
  • Vehicle Fitment

    Year Make Model Trim Engine
    2007-2010 Ford EdgeLimited, SE, SEL, SEL Plus, Sport6 Cyl 3.5 L GAS
    2013-2019 Ford ExplorerPlatinum, Sport6 Cyl 3.5 L GAS
    2009-2019 Ford FlexLimited, SE, SEL, Titanium6 Cyl 3.5 L GAS
    2010-2012 Ford FusionSport6 Cyl 3.5 L GAS
    2013-2019 Ford Police Interceptor SedanBase6 Cyl 3.5 L GAS
    2014-2019 Ford Police Interceptor UtilityBase6 Cyl 3.5 L GAS
    2008-2019 Ford TaurusLimited, SE, SEL, SHO6 Cyl 3.5 L GAS
    2008-2009 Ford Taurus XEddie Bauer, Limited, SEL6 Cyl 3.5 L GAS
    2009-2016 Lincoln MKSBase, EcoBoost6 Cyl 3.5 L GAS, 6 Cyl 3.7 L GAS
    2010-2019 Lincoln MKTBase, EcoBoost, Reserve6 Cyl 3.5 L GAS, 6 Cyl 3.7 L GAS
    View More
  • Customer Questions & Expert Answers

    Q:
    Can you verify if 7T4Z-6K254-BA is the right one for my car? Posted by FordPartsDeal Specialist
    A:
    Select Your Vehicle model to verify if part number 7T4Z-6K254-BA fits your car.
    Posted by FordPartsDeal Specialist
    Q:
    How to service and repair the timing chain tensioner on Ford Edge? Posted by Customer
    A:
    The timing chain tensioner service and repair procedure should begin with removal of the engine front cover while also keeping the area clean to prevent foreign materials from entering the oil or coolant passages. The engineer should turn the crankshaft counterclockwise until both Variable Camshaft Timing (VCT) assemblies show their timing marks. The Camshaft Holding Tool must be applied to hold both LH and RH camshafts at Top Dead Center (TDC). Untighten and discard the three bolts securing the RH VCT housing before doing the same with the LH VCT housing bolts while also discarding the VCT housing seals. The work procedure now requires removal of two bolts from the primary timing chain tensioner and its arm preceding the removal of two lower LH primary timing chain guide bolts together with the primary chain and crankshaft sprocket. Take out the two bolts from the upper location of the LH primary timing chain guide. After compressing the LH secondary timing chain tensioner professionals should place a lockpin to keep it in that position. After discarding the LH VCT assembly bolt and the LH exhaust camshaft sprocket bolt you must remove the LH VCT assembly together with the secondary timing chain and the LH exhaust camshaft sprocket as an assembly. Tilt the Camshaft Holding Tool to reach the most distant bolt of the LH secondary timing chain tensioner then remove the two tensioner bolts. You should install the lockpin and repeat the compression method for the RH secondary timing chain tensioner while discarding both the RH VCT assembly bolt and the RH exhaust camshaft sprocket bolt before removing the RH VCT assembly and RH secondary timing chain and RH exhaust camshaft sprocket as a complete assembly. Tilt the Holding Tool to remove the rearmost secondary tensioner bolt while taking out the two bolts from the RH secondary chain tensioner followed by the two bolts from the RH primary guide. The installation process begins by tightening the two bolts of RH primary timing chain guide to 10 Nm (89 lb-in). Tighten the two bolts of the RH secondary timing chain tensioner to 10 Nm (89 lb-in). Position the RH VCT assembly and RH exhaust camshaft sprocket with the secondary timing chain next to each other while keeping the colored links aligned with the timing marks before setting the RH secondary timing components onto the camshafts. By using the original Mercedes-Benz washers apply new VCT and exhaust camshaft bolts through four tightening stages starting at 40 Nm (30 lb-ft) before loosening one turn and ending with 90-degree tightening at 10 Nm (89 lb-in). Install the LH secondary timing chain tensioner after unwinding its lockpin. Secure the tensioner bolts to 10 Nm (89 lb-in). The LH VCT assembly should be joined with the exhaust camshaft sprocket and secondary timing chain while lining up colored links which match the timing marks before placing the LH secondary timing assembly onto the camshafts. You should install the new bolts of VCT and exhaust camshaft alongside original washers then tighten them with the same four-step procedure you followed previously. To continue the process remove the lockpin from the LH secondary timing chain tensioner while simultaneously installing the crankshaft timing chain sprocket. Position the primary timing chain according to the colored links which must match the timing marks located on VCT assemblies and the crankshaft sprocket. Fasten both upper and lower LH primary timing chain guides with two bolts secured at 10 Nm (89 lb-in). Install the primary timing chain tensioner arm before resetting the tensioner by turning its lever counterclockwise into a soft-jaw vise while compressing the plunger to align the holes between lever and housing then secure it with a lockpin. The removal of slack from the timing chain requires a minimal crankshaft rotation before you can install the primary tensioner along with its 10 Nm (89 lb-in) bolt tightening while also removing the lockpin. A correct alignment of timing marks needs verification before installing new VCT seals and engaging VCT housing dowels with the cylinder head. The correct bolt torque should be applied to the VCT housings at 10 Nm (89 lb-in) in the specific bolt sequence for both the LH and RH VCT housings. Installation of the engine front cover represents the last operation.
    Posted by FordPartsDeal Specialist
    Q:
    How to service and repair the timing chain tensioner on Ford Flex? Posted by Customer
    A:
    The first step requires engine front cover removal while using proper cleanliness techniques to stop any material from entering either oil or coolant passages. A clockwise rotation of crankshaft will position the Variable Camshaft Timing (VCT) components to show their alignment marks. Secure both left-hand and right-hand camshafts at their Top Dead Center position by using the Camshaft Holding Tool. Proceed by removing each of the three bolts from the RH VCT housing followed by the three bolts from the LH VCT housing so you can discard the VCT housing seals. Proceed by taking out first the two bolts from the primary timing chain tensioner and its tensioner arm before extracting the lower LH primary timing chain guide and the primary timing chain and the crankshaft timing chain sprocket. Install a lockpin in the collapsed position on the LH secondary timing chain tensioner after compressing it. The LH VCT assembly bolt and LH exhaust camshaft sprocket bolt should be discarded while you extract the LH VCT assembly along with secondary timing chain and LH exhaust camshaft sprocket as one-piece assembly. You need to use the Camshaft Holding Tool to reach the last secondary timing chain tensioner bolt before removing its two bolts and the LH secondary timing chain tensioner bolts. Installation of a lockpin and compressing allows the removal of an assembly containing the RH VCT assembly, secondary timing chain, and RH exhaust camshaft sprocket after the disposal of both the RH VCT assembly bolt and the RH exhaust camshaft sprocket bolt. The installer needs to remove both bolts from the right-hand secondary timing chain tensioner while also taking out the two bolts from the right-hand primary timing chain guide. When installing begin with the RH primary timing chain guide and fasten its two bolts to 10 Nm (89 lb-in). Insert the RH secondary timing chain tensioner with the Camshaft Holding Tool tilted before torquing its bolts to 10 Nm (89 lb-in). The RH VCT assembly should be assembled together with the RH exhaust camshaft sprocket and RH secondary timing chain while the colored links should match the timing marks before positioning on the camshafts. Use new bolts to secure the VCT assemblies and exhaust camshafts by first applying 40 Nm (30 lb-ft), followed by turning the bolt once before applying 10 Nm (89 lb-in), and finally tightening it by 90 degrees. Install the RH secondary timing chain tensioner by removing its lockpin and tight its bolts to 10 Nm (89 lb-in). Position the LH VCT assembly with its LH exhaust camshaft sprocket and LH secondary timing chain beside the camshafts by fitting the colored links to the timing marks. New bolts for VCT assemblies and exhaust camshafts require tightening at the same four stages as the previous steps. The installation procedure starts with removing the lockpin from the LH secondary timing chain tensioner and then inserting the crankshaft timing chain sprocket and the primary timing chain which must have colored links situated at the proper timing marks on the VCT assemblies and crankshaft sprocket. Fits the LH primary timing chain guides at their specified locations and tightens the bolts to 10 Nm (89 lb-in). The procedure to set the primary timing chain tensioner involves positioning the arm then rotating its lever against the counter-clockwise direction followed by plunger compression through a soft-jawed vise until holes align correctly for lockpin installation. The crankshaft needs a slight rotation first to eliminate slack before the primary tensioner gets installed properly and its bolts get tightened to a value of 10 Nm (89 lb-in) followed by removal of the lockpin. Confirm that all timing marks display proper alignment while installing new VCT housing seals and verifying that VCT housing dowels should be fully inserted into the cylinder head before tightening each bolt to 10 Nm (89 lb-in) according to specified installation order for both LH and RH VCT housings. Install the engine front cover in the last step of the procedure.
    Posted by FordPartsDeal Specialist
    Q:
    How to service and repair the timing chain tensioner on Mercury Sable? Posted by Customer
    A:
    The first step requires engine front cover removal while using proper cleanliness techniques to stop any material from entering either oil or coolant passages. A clockwise rotation of crankshaft will position the Variable Camshaft Timing (VCT) components to show their alignment marks. Secure both left-hand and right-hand camshafts at their Top Dead Center position by using the Camshaft Holding Tool. Proceed by removing each of the three bolts from the RH VCT housing followed by the three bolts from the LH VCT housing so you can discard the VCT housing seals. Proceed by taking out first the two bolts from the primary timing chain tensioner and its tensioner arm before extracting the lower LH primary timing chain guide and the primary timing chain and the crankshaft timing chain sprocket. Install a lockpin in the collapsed position on the LH secondary timing chain tensioner after compressing it. The LH VCT assembly bolt and LH exhaust camshaft sprocket bolt should be discarded while you extract the LH VCT assembly along with secondary timing chain and LH exhaust camshaft sprocket as one-piece assembly. You need to use the Camshaft Holding Tool to reach the last secondary timing chain tensioner bolt before removing its two bolts and the LH secondary timing chain tensioner bolts. Installation of a lockpin and compressing allows the removal of an assembly containing the RH VCT assembly, secondary timing chain, and RH exhaust camshaft sprocket after the disposal of both the RH VCT assembly bolt and the RH exhaust camshaft sprocket bolt. The installer needs to remove both bolts from the right-hand secondary timing chain tensioner while also taking out the two bolts from the right-hand primary timing chain guide. When installing begin with the RH primary timing chain guide and fasten its two bolts to 10 Nm (89 lb-in). Insert the RH secondary timing chain tensioner with the Camshaft Holding Tool tilted before torquing its bolts to 10 Nm (89 lb-in). The RH VCT assembly should be assembled together with the RH exhaust camshaft sprocket and RH secondary timing chain while the colored links should match the timing marks before positioning on the camshafts. Use new bolts to secure the VCT assemblies and exhaust camshafts by first applying 40 Nm (30 lb-ft), followed by turning the bolt once before applying 10 Nm (89 lb-in), and finally tightening it by 90 degrees. Install the RH secondary timing chain tensioner by removing its lockpin and tight its bolts to 10 Nm (89 lb-in). Position the LH VCT assembly with its LH exhaust camshaft sprocket and LH secondary timing chain beside the camshafts by fitting the colored links to the timing marks. New bolts for VCT assemblies and exhaust camshafts require tightening at the same four stages as the previous steps. The installation procedure starts with removing the lockpin from the LH secondary timing chain tensioner and then inserting the crankshaft timing chain sprocket and the primary timing chain which must have colored links situated at the proper timing marks on the VCT assemblies and crankshaft sprocket. Fits the LH primary timing chain guides at their specified locations and tightens the bolts to 10 Nm (89 lb-in). The procedure to set the primary timing chain tensioner involves positioning the arm then rotating its lever against the counter-clockwise direction followed by plunger compression through a soft-jawed vise until holes align correctly for lockpin installation. The crankshaft needs a slight rotation first to eliminate slack before the primary tensioner gets installed properly and its bolts get tightened to a value of 10 Nm (89 lb-in) followed by removal of the lockpin. Confirm that all timing marks display proper alignment while installing new VCT housing seals and verifying that VCT housing dowels should be fully inserted into the cylinder head before tightening each bolt to 10 Nm (89 lb-in) according to specified installation order for both LH and RH VCT housings. Install the engine front cover in the last step of the procedure.
    Posted by FordPartsDeal Specialist
    Q:
    What should be done after securing the camshafts for the 2009 Lincoln MKS? Posted by Customer
    A:
    Remove the three bolts from the RH VCT housing, followed by the three bolts from the LH VCT housing, discarding the VCT housing seals.
    Posted by FordPartsDeal Specialist
    See expert answers on similar Timing Chain Tensioner
    Q:
    How should the VCT and exhaust camshaft bolts be tightened for the 2009 Lincoln MKX? Posted by Customer
    A:
    Tighten in four stages: first to 40 Nm (30 lb-ft), then loosen one full turn, followed by 10 Nm (89 lb-in), and finally tighten 90 degrees.
    Posted by FordPartsDeal Specialist
    See expert answers on similar Timing Chain Tensioner
    Q:
    What should be done after removing the secondary timing chain tensioners for the 2009 Ford Taurus? Posted by Customer
    A:
    Discard the LH and RH VCT assembly bolts and the LH and RH exhaust camshaft sprocket bolts, then remove the respective VCT assemblies, secondary timing chains, and exhaust camshaft sprockets as assemblies.
    Posted by FordPartsDeal Specialist
    See expert answers on similar Timing Chain Tensioner
    Q:
    What is the final step in the process for the 2009 Ford Taurus X? Posted by Customer
    A:
    Reinstall the engine front cover.
    Posted by FordPartsDeal Specialist
    See expert answers on similar Timing Chain Tensioner
    If you have any questions about this product, please don't hesitate to ask us. We will be happy to help you!

OEM Ford 7T4Z-6K254-BA, Excellent Performance and Perfect Fitment

To ensure reliability, purchase Ford part # 7T4Z-6K254-BA Tensioner, Driver Side. It is sometimes referred to as Ford Timing Chain Tensioner. For those Ford owners who aspire to maintain their vehicles in optimal shape, opting for OEM parts is a wise choice. Precisely engineered, these components adhere to stringent factory guidelines and are produced in state-of-the-art facilities using cutting-edge technologies. Moreover, they are subjected to thorough testing to certify their resilience and safety, thereby making them a dependable option for Ford owners.

FordPartsDeal.com is a leading supplier of genuine Ford parts such as Ford 7T4Z6K254BA Tensioner, Driver Side. A vast selection of genuine Ford parts is available on our website, all offered at discounted prices. Every OEM Ford part is covered by the manufacturer's warranty, which also applies to our hassle-free return policy. Enjoy fast delivery service, ensuring you get your parts when you need them. Your shopping experience here is guaranteed to be pleasurable. For detailed Ford parts information, click here.
Choose FordPartsDeal for discounted prices, exceptional service and fast delivery