FordParts
My Garage
My Account
Cart
OEM 2005 Lincoln LS Radiator
Cooling Radiator- Select Vehicle by Model
- Select Vehicle by VIN
Select Vehicle by Model
orMake
Model
Year
Select Vehicle by VIN
For the most accurate results, select vehicle by your VIN (Vehicle Identification Number).
1 Radiator found

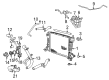
2005 Lincoln LS Radiator Part Number: H2MZ-8005-AA
Product Specifications- Other Name: Radiator Assembly
- Replaces: 6W4Z-8005-AA
- Condition: New
- Fitment Type: Direct Replacement
- SKU: H2MZ-8005-AA
- Warranty: This genuine part is guaranteed by Ford's factory warranty.
2005 Lincoln LS Radiator
If you're seeking quality and affordability, look no further than our extensive inventory of genuine 2005 Lincoln LS Radiator available at FordPartsDeal.com. You can confidently purchase our OEM 2005 Lincoln LS Radiator as they are supported by the manufacturer's warranty and our hassle-free return policy, alongside the benefit of our fast delivery service.
2005 Lincoln LS Radiator Parts Q&A
- Q: How to service and repair the radiator on 2005 Lincoln LS?A: The radiator servicing and repairing process begins with placing the vehicle in neutral position on a hoist while draining the cooling system. Start by taking off the upper radiator sight shield followed by removing the upper and lower radiator hoses then setting them aside. Installation of these parts requires 10 Nm (89 inch lbs.) torque which should be used when re-attaching them. The service process starts with lowering the A/C condenser to reach the A/C condenser to radiator bolts then removing those two retaining bolts before setting the A/C condenser aside. Tighten these bolts during reinstallation to 10 Nm (89 inch lbs.). Fit new upper brackets to the A/C condenser along with the two bolts before tightening these fasteners to 10 Nm (89 inch lbs.). Position the radiator forward if needed to access the bolts before lifting the combination cooler towards the front to remove it from the retaining clips and then untighten the two bolts to set the cooler aside at 10 Nm (89 inch lbs.). Separate the three bolts before letting the radiator shield fall under gravity while releasing its retaining clips from position. Afterward, remove the radiator. Reverse the removal process by fitting the combination cooler into the retaining clips of the radiator and complete the installation by filling and bleeding the cooling system.
Related 2005 Lincoln LS Parts
 2005 Lincoln LS Coolant Reservoir
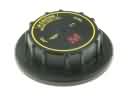 2005 Lincoln LS Radiator Cap
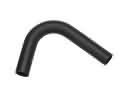 2005 Lincoln LS Radiator Hose
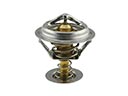 2005 Lincoln LS Thermostat
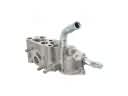 2005 Lincoln LS Thermostat Housing
 2005 Lincoln LS Water Pump
 2005 Lincoln LS Coolant Reservoir Cap
 2005 Lincoln LS Cooling Fan Assembly
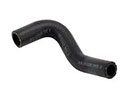 2005 Lincoln LS Cooling Hose
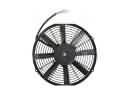 2005 Lincoln LS Engine Cooling Fan
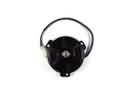 2005 Lincoln LS Fan Motor
 2005 Lincoln LS Thermostat Gasket