FordParts
My Garage
My Account
Cart
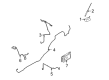
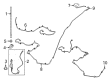
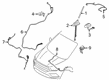
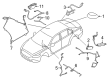
OEM Ford Antenna
Radio Antenna- Select Vehicle by Model
- Select Vehicle by VIN
Select Vehicle by Model
orMake
Model
Year
Select Vehicle by VIN
For the most accurate results, select vehicle by your VIN (Vehicle Identification Number).
94 Antennas found


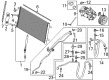
Ford Antenna Mast Part Number: HM5Z-18813-A
$18.21 MSRP: $25.83You Save: $7.62 (30%)Ships in 1-2 Business DaysProduct Specifications- Other Name: Aerial Without Cable; Radio Antenna Mast; Mast
- Manufacturer Note: 10" (254 MM)
- Replaces: AE5Z-18813-A, 7T4Z-18813-B


Ford Antenna Mast Part Number: CK4Z-18A886-A
$29.12 MSRP: $41.30You Save: $12.18 (30%)Ships in 1-2 Business DaysProduct Specifications- Other Name: Rod Assembly - Replacement - Aerial; Radio Antenna Mast


Ford Antenna Mast Part Number: DS7Z-18813-A
$15.02 MSRP: $21.30You Save: $6.28 (30%)Ships in 1 Business DayProduct Specifications- Other Name: Aerial Without Cable; Radio Antenna Mast
- Manufacturer Note: 10" (254 MM)


Ford Antenna Mast Part Number: F1TZ-18A886-A
$25.76 MSRP: $37.50You Save: $11.74 (32%)Ships in 1-2 Business DaysProduct Specifications- Other Name: Rod Assembly - Replacement - Aerial; Radio Antenna Mast; Mast
- Manufacturer Note: Black - w/boot


Ford Gps Antenna Part Number: HR3Z-10E893-ACPTM
$30.74 MSRP: $44.75You Save: $14.01 (32%)Ships in 1-2 Business DaysProduct Specifications- Other Name: Aerial Assembly - GPS; Satellite Radio Antenna; Satellite Ant; Antenna
- Replaces: HR3Z-10E893-ABPTM, HR3Z-10E893-AAPTM


Ford Gps Antenna Part Number: HS7Z-19A390-A
$31.17 MSRP: $45.37You Save: $14.20 (32%)Ships in 1-2 Business DaysProduct Specifications- Other Name: Aerial Assembly; GPS Navigation System Antenna


Ford Antenna Mast Part Number: AL8Z-18813-A
$32.11 MSRP: $45.55You Save: $13.44 (30%)Product Specifications- Other Name: Kit - Aerial
- Replaced by: MCPZ-18813-D


Ford Antenna Base Part Number: GL3Z-18A984-AA
$39.45 MSRP: $57.42You Save: $17.97 (32%)Ships in 1-2 Business DaysProduct Specifications- Other Name: Aerial Assembly; Radio Antenna Base; Base

Ford Antenna Mast Part Number: H1BZ-18A886-A
$13.66 MSRP: $19.72You Save: $6.06 (31%)Ships in 1-2 Business DaysProduct Specifications- Other Name: Rod Assembly - Replacement - Aerial; Radio Antenna Mast
- Manufacturer Note: 8" (203 MM)


Ford Antenna Cable Part Number: HC3Z-18A984-A
$35.91 MSRP: $51.37You Save: $15.46 (31%)Ships in 1 Business DayProduct Specifications- Other Name: Aerial Assembly; Radio Antenna Base; Cable Assembly; Antenna Base; Base
- Replaced by: HC3Z-18A984-B


Ford Base Part Number: XS8Z-18919-AA
$7.11 MSRP: $10.08You Save: $2.97 (30%)Ships in 1-2 Business DaysProduct Specifications- Other Name: Aerial Without Cable; Radio Antenna Base; Bezel
- Manufacturer Note: Includes base


Ford Antenna Mast Part Number: D3AZ-18A886-A
$17.37 MSRP: $24.63You Save: $7.26 (30%)Ships in 1-2 Business DaysProduct Specifications- Other Name: Rod Assembly - Replacement - Aerial; Mast


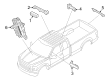
Ford Antenna, Center Part Number: DS7Z-15603-D
$21.18 MSRP: $30.83You Save: $9.65 (32%)Ships in 1-3 Business DaysProduct Specifications- Other Name: Aerial Assembly; Keyless Entry Antenna, Center; Indicator
- Manufacturer Note: Located Behind Rear Seats
- Position: Center


Ford Antenna Mast Part Number: AR3Z-18813-A
$22.58 MSRP: $32.03You Save: $9.45 (30%)Ships in 1-2 Business DaysProduct Specifications- Other Name: Aerial Without Cable; Radio Antenna Mast


Ford Antenna Mast Part Number: 9T1Z-18A886-A
$22.20 MSRP: $31.48You Save: $9.28 (30%)Ships in 1-3 Business DaysProduct Specifications- Other Name: Rod Assembly - Replacement - Aerial; Radio Antenna Mast
- Manufacturer Note: 310MM


Ford Antenna Mast Part Number: 98BZ-18A886-AA
$29.89 MSRP: $42.40You Save: $12.51 (30%)Ships in 1-3 Business DaysProduct Specifications- Other Name: Rod Assembly - Replacement - Aerial; Radio Antenna Mast; Power Mast; Mast
- Manufacturer Note: Screw In Type


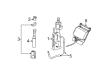
Ford Control Module, Rear Part Number: DS7Z-19D596-A
$22.03 MSRP: $25.00You Save: $2.97 (12%)Ships in 1 Business DayProduct Specifications- Other Name: Anti Theft Flasher; A/C Refrigerant Line Seal Kit; Keyless Entry Antennas (Center, Front, Rear)
- Position: Rear


Ford Antenna Mast Part Number: F3AZ-18A886-A
Product Specifications- Other Name: Rod Assembly - Replacement - Aerial; Mast
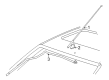
- Manufacturer Note: Power radio antenna,includes mast & installation sketch,stainless steel


Ford Aerial Assembly Part Number: JS7Z-15603-A
$30.84 MSRP: $35.00You Save: $4.16 (12%)

Ford Antenna Mast Part Number: F6DZ-18A886-AB
Product Specifications- Other Name: Rod Assembly - Replacement - Aerial; Radio Antenna Mast
- Manufacturer Note: Radio antenna mast assembly, with power antenna
| Page 1 of 5 |Next >
1-20 of 94 Results
Ford Antenna
If you own Ford and want to keep it in top shape, choosing OEM Antenna is a smart move. They are precisely engineered and follow strict factory standards. They are made in advanced facilities that use cutting edge technology. Each part goes through thorough testing to confirm strength and safety, so you can trust it. FordPartsDeal.com gives you genuine Ford Antenna at some of the affordable online prices without cutting quality. Every OEM Ford part includes the manufacturer's warranty, easy returns, and super-fast delivery. So why wait? Shop now and get your vehicle back to peak condition.
Ford Antenna turns weak airwave whispers into strong, steady signals for every drive. Ford started in 1903 and shook up manufacturing a decade later with moving assembly line. Ford gives power and thrift a second combination with its turbocharged EcoBoost engines that drink fuel but hit hard. Ford continues to have hands on the wheel and stare ahead with SYNC voice control that spins playlists and maps when commanded. Ford covers drivers with Co-Pilot360 technology that bangs the brakes in case there is danger and pushes the wheel to the road again. Its battery-powered models sneeze tailpipes and no-carbon-haze pickups are launched. The Antenna designed to fit all models of the line translates electrical pulse into clean radio and data packets and shrugs off the low-resistance provided by a smart double omnidirectional or focused element that scans the airwaves seeking signals, sharpening the directions of the vehicles and keeping soundtracks and data streams alive on the highway and the back road. Antenna strength also enhances wireless communication, that is, passengers can easily talk even when the terrain is waving and turning. Design choices of the Antenna cut off interference, thus leaving the connected safety systems with the data they require at the appropriate time. Antenna is easily installed and compatible with all body styles and owners can drive without fiddling.
Ford Antenna Parts and Q&A
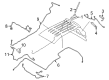
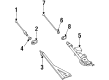
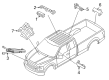
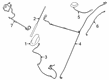
- Q: How to Address Antenna Issues on a Ford E-150 Econoline?A:Begin antenna repair by taking out the radio antenna mast from the antenna base type that stays fixed and follow the procedure for the 3-step telescoping type antenna base. The antenna base becomes accessible when you remove its base cap followed by loosening the screws to eventually elevate the base and separate the radio antenna lead in cable. The fender splash shield requires removal first by unscrewing it and removing the pushpin. Start by placing both the radio antenna lead in cable and grommet through the passenger compartment and proceed by unmounting the instrument panel finish panel and cowl side trim panel. Use a screwdriver to disconnect the radio chassis while removing its retainer from the wiring harness as well as from the wiring harness trough. Obtain the radio antenna lead in cable. Remove the radio antenna lead in cable as the last step. Follow the exact opposite order of removal steps to install the component.
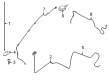
- Q: How to service and repair the power antenna on Ford Taurus?A:As a first step service and repair procedures of the power antenna require audio unit removal. The first step is to remove the antenna mast nut with the stanchion while also unfastening the inside vehicle nut and bolt. Lower the power antenna from behind the quarter panel before disconnecting the pin-type retainer securing the lead-in cable to the antenna. Following the disconnect of the power antenna electrical connector and lead-in cable you can remove the assembly. Reverse all steps already used during removal to install the power antenna system.


Related Ford Parts
 Ford Key Fob
 Ford Body Control Module
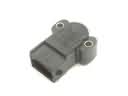 Ford Throttle Position Sensor
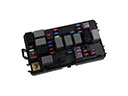 Ford Fuse
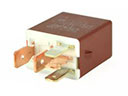 Ford Fuel Pump Relay
 Ford Headlight Switch
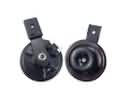 Ford Horn
 Ford Parking Assist Sensor
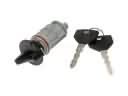 Ford Ignition Lock Assembly
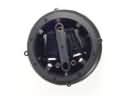 Ford Mirror Actuator
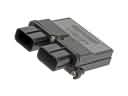 Ford Occupant Detection Sensor
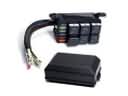 Ford Relay Block
Browse Ford Antenna by Models
Ranger Bronco Mustang Explorer Focus Fusion F-150 Maverick EXP Escape Edge Expedition Fiesta Taurus Thunderbird Flex Transit Connect Bronco Sport Crown Victoria Probe Bronco II EcoSport Escort F-250 Aerostar C-Max Contour Country Squire E-150 Econoline F-350 Five Hundred Freestyle LTD Mustang Mach-E Police Interceptor Utility Taurus X Tempo F-350 Super Duty LTD Crown Victoria Police Interceptor Sedan E-150 E-150 Econoline Club Wagon E-250 E-250 Econoline E-350 Econoline E-350 Econoline Club Wagon E-350 Super Duty E-Transit F-150 Lightning F-250 HD F-250 Super Duty Police Responder Hybrid Special Service Police Sedan SSV Plug-In Hybrid Transit-150 Transit-250 Transit-350 Transit-350 HD