FordParts
My Garage
My Account
Cart
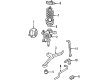
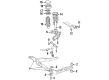
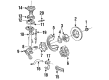
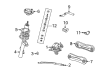
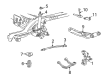
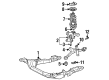
OEM Ford Taurus Control Arm
Suspension Arm- Select Vehicle by Model
- Select Vehicle by VIN
Select Vehicle by Model
orMake
Model
Year
Select Vehicle by VIN
For the most accurate results, select vehicle by your VIN (Vehicle Identification Number).
29 Control Arms found


Ford Taurus Lower Control Arm, Front Passenger Side Part Number: FA5Z-3078-A
$254.04 MSRP: $421.82You Save: $167.78 (40%)Ships in 1 Business Day


Ford Taurus Lower Control Arm, Front Passenger Side Part Number: BA5Z-3078-A
$246.88 MSRP: $436.36You Save: $189.48 (44%)


Ford Taurus Track Bar, Black, Rear Part Number: AA8Z-5500-A
$63.37 MSRP: $161.82You Save: $98.45 (61%)Ships in 1-3 Business Days

Ford Taurus Lateral Link, Black, Rear Part Number: DG1Z-5A972-J
$133.92 MSRP: $225.45You Save: $91.53 (41%)Ships in 1-2 Business Days

Ford Taurus Track Bar, Black, Rear Part Number: AA5Z-5500-A
$159.12 MSRP: $261.82You Save: $102.70 (40%)Ships in 1-3 Business Days
Ford Taurus Lower Control Arm, Front Driver Side Part Number: BA5Z-3079-A
$262.80 MSRP: $436.36You Save: $173.56 (40%)Ships in 1-2 Business Days

Ford Taurus Lower Control Arm, Front Driver Side Part Number: 3F1Z-3079-AA
$68.90 MSRP: $95.32You Save: $26.42 (28%)Ships in 1-2 Business Days

Ford Taurus Lower Control Arm, Front Passenger Side Part Number: 3F1Z-3078-AA
$149.78 MSRP: $207.21You Save: $57.43 (28%)Ships in 1-2 Business Days
Ford Taurus Lower Control Arm, Front Driver Side Part Number: FA5Z-3079-A
$254.04 MSRP: $421.82You Save: $167.78 (40%)Ships in 1-2 Business Days
Ford Taurus Lower Control Arm, Front Driver Side Part Number: 8G1Z-3079-M
$339.45 MSRP: $563.64You Save: $224.19 (40%)Ships in 1-2 Business DaysFord Taurus Lateral Link, Black, Rear Part Number: DE9Z-5A972-K
$112.25 MSRP: $181.09You Save: $68.84 (39%)Ships in 1-3 Business Days
Ford Taurus Upper Control Arm, Rear Driver Side Part Number: DB5Z-5A804-D
$182.87 MSRP: $303.64You Save: $120.77 (40%)Ships in 1 Business DayFord Taurus Upper Control Arm, Rear Passenger Side Part Number: DB5Z-5A804-C
$161.45 MSRP: $235.00You Save: $73.55 (32%)Ships in 1-2 Business Days


Ford Taurus Control Arm, Front Passenger Side Part Number: F4DZ-3078-A


Ford Taurus Control Arm, Rear Part Number: E6DZ5500D


Ford Taurus Control Arm, Rear Driver Side Part Number: 1F1Z-5500-FL

| Page 1 of 2 |Next >
1-20 of 29 Results
Ford Taurus Control Arm
OEM Control Arm boasts unmatched quality. Each part goes through full quality checks. They adhere to Ford's official factory standards. These steps remove flaws and inconsistencies. So you can get Control Arm with long life and a perfect fit. Come to our website and find genuine Ford Taurus parts. We keep a wide inventory of OEM Taurus parts at the highly affordable prices. It's easy to search, compare, and pick what you need. You'll love the clear info and simple checkout. We offer top-rated customer service, and we reply fast. We also ship promptly to ensure your order arrives on time.
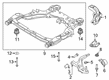
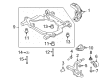
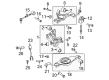
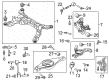
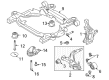
All major systems of automotives are held by the Control Arm in Ford Taurus models; it links the frame to the wheels while accommodating shocks and springs. These arms swiveled in relation to the condition of the surface as it assist the wheels to rotate in a fashion that makes them move up and down. These Control Arms come in different shapes and material the most common being; stamped steel, cast iron and aluminum to increase its strength and stamina. They have bushing at the points that connect to the frame and ball joint at those areas that connect to the knuckle or axle. Arms for controlling are crucial parts of automobiles since they enable appropriate position of wheels, sound handling, wear of tires, and overall optimum performance of automobiles.
Ford Taurus Control Arm Parts and Q&A
- Q: How to service and repair the lower control arms on a four-door on Ford Taurus?A:To access the lower control arm system drive the four-door vehicle into a horizontal position and measure the center-hub distance to the fender lip after unfastening the wheel cover or hub cap. Take out the entire wheel unit from its position. For the front lower control arms stop threading the bolt and unlatch the Parking Brake Cable alongside the rear anti-lock brake sensor wiring harness if your vehicle has it. Take out the lower control arm from the Spindle by removing the nut and washer then the flag bolt. Toss the nut and flag bolt away after completion. Unscrew the front lower control arm flag bolt and nut while taking out the adjusting cam for disposal. Separate the rear lower control arm by removing its attaching nut and flag bolt then discarding these parts. You must bolt both lower control arms to their proper position based on several conditions. First, set the arms stamped "BOITOM" lower face up towards you. The flange on the rear lower should point toward the front of the vehicle, and the flange on the front lower should point toward the back. Place the rear lower suspension arm into position while adding its two new components but avoid tightening the hardware. Place the front lower control arm and adjusting cam into their positions while adding brand new hardware including a flag bolt and nut. Keep the hardware loose at this moment. Put the adjusting cam in its center position and fit the suspension arm before adding a new bolt, washer and nut. Place the lift under the suspension to lift it until the hub center matches the fender at its factory setting. Install the jack stand to lift the suspension. After that, tighten the nut before lowering the suspension to remove the jack stand. Connect the front lower control arm by reattaching both the parking brake cable and the rear brake anti-lock sensor wiring harness before installing the bolt. After putting the tire and wheel on check all wheel alignment and if needed make position changes.

Related Ford Taurus Parts
 Ford Taurus Sway Bar Link
 Ford Taurus Coil Spring Insulator
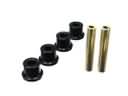 Ford Taurus Crossmember Bushing
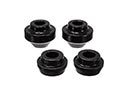 Ford Taurus Radius Arm Bushing
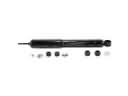 Ford Taurus Shock Absorber
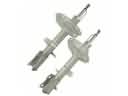 Ford Taurus Strut Housing
 Ford Taurus Suspension Strut Rod
 Ford Taurus Sway Bar Bushing
 Ford Taurus Sway Bars
 Ford Taurus Track Bar
 Ford Taurus Trailing Arm
 Ford Taurus Wheel Seal
Browse Ford Taurus Control Arm by Years
2019
2018
2017
2016
2015
2014
2013
2012
2011
2010
2009
2008
2007
2006
2005
2004
2003
2002
2001
2000
1999
1998
1997
1996
1995
1994
1993
1992
1991
1990
1989
1988
1987
1986