My Garage
Cart
Make sure this part fits

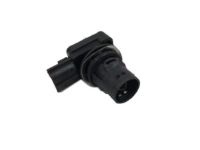
Ford F6DZ-9D653-BA
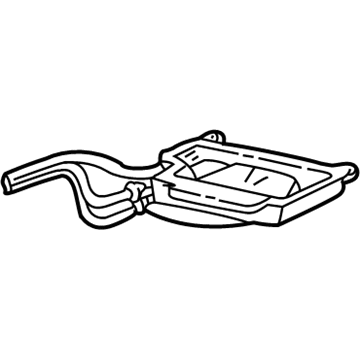
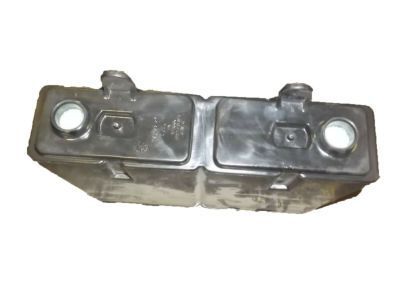
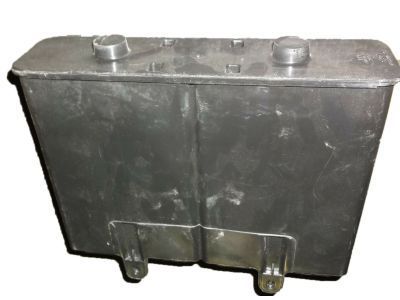
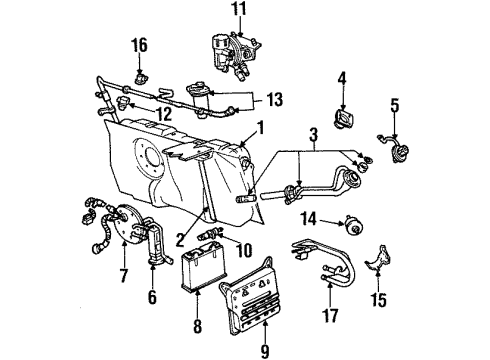
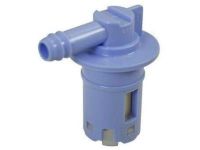
Vapor Canister

1996-2006 Ford F6DZ9D653BA

Customer Questions & Expert Answers (28)
Ford F6DZ-9D653-BA Vapor Canister
  • Part Description
    Reservoir Assembly; Vapor Canister Purge Solenoid
  • Base No.
    9D653
  • Manufacturer
    Ford
Make sure this part fits
$163.54 MSRP: $269.09
You Save: $105.55 (40%)
Ships in 1-2 Business Days
1
ADD TO CART
  • Related Parts
  • Product Specifications
  • Vehicle Fitment
  • Customer Questions & Expert Answers
  • Product Specifications

    BrandGenuine Ford
    Base No.9D653
    Manufacturer Part NumberF6DZ-9D653-BA
    Part DescriptionReservoir Assembly; Vapor Canister Purge Solenoid
    Item Dimensions3.7 x 12.3 x 11.1 inches
    Item Weight3.70 Pounds
    ConditionNew
    Fitment TypeDirect Replacement
    ManufacturerFord
    SKUF6DZ-9D653-BA
    WarrantyThis genuine Ford part is guaranteed by Ford's factory warranty.
    Shipping & ReturnShipping Policy Return Policy
    Warning: California's Proposition 65
  • Vehicle Fitment

    Year Make Model Trim Engine
    1998-2000 Ford ContourBase, GL, LX, SE, SVT4 Cyl 2.0 L BI-FUEL, 4 Cyl 2.0 L GAS, 6 Cyl 2.5 L GAS
    1998-2004 Ford Crown VictoriaBase, LWB, LX, LX Sport, Police Interceptor, S8 Cyl 4.6 L CNG, 8 Cyl 4.6 L GAS
    2001-2004 Ford EscapeLimited, XLS, XLT4 Cyl 2.0 L GAS, 6 Cyl 3.0 L GAS
    1996-2003 Ford TaurusG, GL, LX, SE, SE Comfort, SEL, SES, SHO, SVG6 Cyl 3.0 L FLEX, 6 Cyl 3.0 L GAS, 8 Cyl 3.4 L GAS
    2002-2005 Ford Thunderbird50th Anniversary Edition, Base, James Bond Edition, Neiman Marcus, Pacific Coast Roadster8 Cyl 3.9 L GAS
    2001-2003 Ford WindstarBase, Limited, LX, SE, SE Sport, SEL6 Cyl 3.8 L GAS
    1998-2002 Lincoln ContinentalBase8 Cyl 4.6 L GAS
    2000-2006 Lincoln LSAppearance, Base, LSE, Luxury, Premium, Sport, Ultimate6 Cyl 3.0 L GAS, 8 Cyl 3.9 L GAS
    1998-2005 Lincoln Town CarCartier, Cartier L, Executive, Executive L, Executive Protection Series, Protection Series, Signature, Signature L, Signature Limited, Ultimate, Ultimate L8 Cyl 4.6 L GAS
    1999-2002 Mercury CougarBase, S, V64 Cyl 2.0 L GAS, 6 Cyl 2.5 L GAS
    View More
  • Customer Questions & Expert Answers

    Q:
    Can you verify if F6DZ-9D653-BA is the right one for my car? Posted by FordPartsDeal Specialist
    A:
    Select Your Vehicle model to verify if part number F6DZ-9D653-BA fits your car.
    Posted by FordPartsDeal Specialist
    Q:
    How to Service and Repair the Vapor Canister on Ford Crown Victoria? Posted by Customer
    A:
    Your first task in servicing or repairing the Evaporative Emission Control Canister should be disconnecting the battery to prevent fuel vapor explosions or fires. The vehicle requires support during service then workers must disassemble the canister vent solenoid hose assembly and the fuel vapor hose assembly. Uninstall the Evaporative Emissions (EVAP) canister through the process of removing its bolts then its/installation nuts. Remove the canister vent solenoid from the EVAP canister by disconnecting the fuel vapor hose assembly elbow at the EVAP canister. The installation process starts by performing the reverse steps from removal of the EVAP canister. The system leak test and evaporative emission repair verification drive cycle must be done to prove proper system function.
    Posted by FordPartsDeal Specialist
    Q:
    How to Service and Repair the Vapor Canister on Ford Contour? Posted by Customer
    A:
    The first step to repair or service the evaporative emission control canister requires disconnecting the battery negative cable. First raise the vehicle while supporting it then remove the canister vent solenoid valve from its retaining clips. The rear retaining bolts of the evaporative emission canister bracket can be released followed by removing the front retaining bolt. Lower the assembly partially before disconnecting both the electrical vent solenoid connector and vapor tube connector from the canister. Deepen the disconnecting process of both the canister and bracket assembly until you also separate the vent solenoid from its canister connection. Lastly move away the bracket from the carbon canister by using a prying tool then remove the entire canister unit. Execute the opposite steps used for removal to carry out installation.
    Posted by FordPartsDeal Specialist
    Q:
    How to Service and Repair the Vapor Canister on Ford Escape? Posted by Customer
    A:
    Safe servicing and repairing of the evaporative emission control canister requires the disconnection of the battery to reduce risks of electrical sparking near fuel vapor-containing areas. Support the vehicle safely before you detach the EVAP canister outlet tube with the addition of disconnecting the canister vent solenoid electrical connector and remote canister vent hose. The next step is removing the EVAP canister bracket assembly which allows access to the remote canister vent hose and dust separator and canister vent solenoid. The EVAP Canister installation requires removing the outlet tube followed by the canister. Installation happens by repeating the uninstallation process then conduct both leak testing and the drive-cycle verification for evaporative emissions before closing up the system. All O-ring seals need lubrication with MERPOL(R) O-Ring Seal Lubricant which fulfills Ford specification ESE-M99B144-B or an equivalent product.
    Posted by FordPartsDeal Specialist
    Q:
    How to Service and Repair the Vapor Canister on Ford Thunderbird? Posted by Customer
    A:
    Begin servicing the evaporative emission control canister only after positioning the vehicle on a hoist with NEUTRAL gear selection. The disconnected battery ground cable serves to minimize electrical sparks because these sparks could create flammable conditions in fuel vapors. Start the evaporative emissions (EVAP) canister service process by taking out the rear subframe and cutting off the vapor tube and its two electrical connectors. The next step requires you to remove the four bolts from the EVAP canister bracket assembly before separating the canister with bracket assembly while re-tightening the bolts to 10 Nm (89 lb-in) during reinstallation. Check the three fuel vapor tubes of the EVAP canisters for damaged O-ring seals. New O-ring seals should be lubricated with clean engine oil before they are reinstalled. After removing the rivet you can proceed with the EVAP canisters installation by following the reversal of the removal steps. The repair verification cycle for evaporative emissions along with a leak test must be performed before the system can be declared fully operational.
    Posted by FordPartsDeal Specialist
    Q:
    How to Service and Repair the Vapor Canister on Lincoln LS? Posted by Customer
    A:
    The battery ground cable disconnect serves as the first step when working with the evaporative emission control canister because it minimizes dangerous electrical spark potentials that could ignite fuel vapors. Beginning with a vehicle lift to gain clearance, users should lower the rear subframe to get to the evaporative emission canister assembly. The service process requires disconnecting hoses and connectors while removing four bolts that secure the bracket canister assembly. When the rivet is removed from the system you should retrieve the EVAP canister. Install the evaporative emission canister assembly by following removal step reversal and check for leaks before installation. A verification drive cycle for evaporative emission repair needs to be executed after installation. The O-ring seals must be lubricated with MERPOL(R) when installing them.
    Posted by FordPartsDeal Specialist
    Q:
    How to Service and Repair the Vapor Canister on Ford Taurus? Posted by Customer
    A:
    Start all evaporative emission control canister servicing and repair by disconnecting the battery ground cable to limit electrical sparks which could ignite fuel vapors leading to dangerous fire and explosion. The service technician must first raise the vehicle while providing support before proceeding to disconnect the evaporative canister tube as well as the Evaporative Emission (EVAP) canister purge outlet tube from its corresponding tubes. Higher flammability makes it essential to stay away from all smoking activities and open flame usage during this operation. The first step involves disconnecting EVAP canister vent solenoid electrical connector before extracting the EVAP canister with its bracket assembly by unfastening the securing nuts. You will disconnect the solenoid to the EVAP canister bracket while removing the inlet and outlet tubes of the EVAP canister. Starting the installation by undoing removal steps and performing a leak test then execute the evaporative emission repair verification drive cycle. The installation of the MERPOL(R) O-Ring seal lubricant which fulfills Ford specification ESE-M99B144-B or equivalent is essential for lubricating O-ring seals.
    Posted by FordPartsDeal Specialist
    Q:
    How to Service the Vapor Canister on Mercury Cougar? Posted by Customer
    A:
    The service of the evaporative emission control canister starts with disconnecting the battery cable ground before vehicle lifting. The first step involves taking away the ventilation hose from its retaining clips followed by loosening the rear bolts of the evaporative emission canister carrier. Unbolt the front connector of the carrier before lowering the canister alongside the carrier component partially. Disconnect the vent solenoid electrical connector from the canister while also removing the vapor tube connector from the same point. The complete installation process starts with taking out the assembly of evaporative emission canister carrier before disconnecting the vent solenoid from the canister to remove it. Finish the operation by moving the carrier from the canister. To install the system follow the steps of removal in reverse order.
    Posted by FordPartsDeal Specialist
    Q:
    How to service the Vapor Canister on Lincoln Town Car? Posted by Customer
    A:
    The first step of servicing an evaporative emission control canister requires disconnecting the battery ground cable to prevent fuel vapor explosions or fires from happening. The process begins with vehicle support and proceeds with separating both the canister vent solenoid hose assembly and the fuel vapor hose assembly. Begin the EVAP canister service by removing both bracket and assembly bolting hardware. The EVAP canister requires removal of its canister vent solenoid by disconnecting the fuel vapor hose assembly from its elbow at the canister. The reverse process of uninstallation steps becomes necessary for assembling the EVAP canister. A leak test of the system should be performed followed by the evaporative emission repair verification drive cycle to verify correct system operation.
    Posted by FordPartsDeal Specialist
    Q:
    How to Service and Repair the Vapor Canister on Lincoln Town Car? Posted by Customer
    A:
    A prerequisite for repairing the Evaporative Emission Control Canister is to disconnect the battery because fuel vapor presents an explosion or fire hazard. First elevate the vehicle before disconnecting both the canister vent solenoid hose assembly and the fuel vapor hose assembly. The Evaporative Emissions (EVAP) canister with bracket must be taken out by removing all present bolts and nuts. The service sequence starts with disconnecting the EVAP canister fuel vapor hose assembly elbow before removal of the canister vent solenoid from the EVAP canister followed by EVAP canister removal. In the installation phase the technician should follow all the removal steps in reverse order while performing a system leak test followed by the evaporative emission repair verification drive cycle for complete functionality verification.
    Posted by FordPartsDeal Specialist
    Q:
    How to Service and Repair the Vapor Canister on Lincoln Continental? Posted by Customer
    A:
    The first step for service and repair of the evaporative emission control canister is to lift and support the vehicle. Start by removing the anti-vibration clip which leads to disconnecting both the evaporative canister tube and the EVAP canister purge outlet tube from the evaporative emission tubes. Service of the evaporative emissions canister starts by removing the vehicle's bolts, nuts and bracket assembly before disconnection of the solenoid and its connector and hose. Unscrew the canister vent solenoid followed by its elbow and take out the evaporative emission tube while making sure to check and replace the O-ring if needed through a twisting and pulling motion. The last step of the installation involves detaching the evaporative emissions canisters from the evaporative emission canister bracket. Installation of the evaporative emissions canister assembly must involve leak-testing the assembly before its placement. Use MERPOL(R) O-ring Seal Lubricant following Ford specification ESE-M99B144-B or an alternative product for lubricating the O-ring seals. The installation process calls for reversing the removal steps while performing a leak test after completion. The running loss monitor verification cycle related to evaporative emissions must be executed following repair.
    Posted by FordPartsDeal Specialist
    Q:
    How to Ensure Proper Functioning of the Vapor Canister in a Mercury Grand Marquis? Posted by Customer
    A:
    A battery disconnect should be the first step when servicing the Evaporative Emission Control Canister to prevent explosions or fires caused by fuel vapor accumulation. Lift up the vehicle while sustaining it before taking apart both the canister vent solenoid hose assembly and the fuel vapor hose assembly. Remove the Evaporative Emissions (EVAP) canister with bracket assembly through the process of unbolted components and unthreaded nuts. The EVAP canister service requires disconnecting the fuel vapor hose assembly elbow at the canister followed by extracting the canister vent solenoid from its position on the canister before extracting the EVAP canister. Reinstall the parts in the reverse order of removal while conducting a system leak test before performing the evaporative emission repair verification drive cycle.
    Posted by FordPartsDeal Specialist
    Q:
    How to Service and Repair the Vapor Canister on Mercury Grand Marquis? Posted by Customer
    A:
    Disconnection of the battery serves as the first step in servicing the Evaporative Emission Control Canister because it reduces the chance of fuel vapor-related explosions or fires. First support and raise the vehicle while disconnecting the electrical connector. After disconnecting power you must separate both the canister vent solenoid hose assembly and the fuel vapor hose assembly. The Evaporative (EVAP) Emissions canister assembly should be removed alongside its bracket by unfastening all bolts and nuts. Disconnect the fuel vapor hose assembly elbow from the EVAP canister before you take out the canister vent solenoid from the same location. Install the new component by following the backward steps of disassembly then do a system leak inspection before proceeding. The drive cycle for evaporative emission repair verification must be performed fully to check system functionality.
    Posted by FordPartsDeal Specialist
    Q:
    How to Ensure Proper Functioning of the Vapor Canister in a Lincoln Continental? Posted by Customer
    A:
    Start by supporting the vehicle before commencing any service job on the evaporative emission control canister. Unfasten the anti-vibration clip followed by removing the evaporative canister tube and the EVAP canister purge outlet tube from the evaporative emission tubes. The vehicle's evaporative emissions canister with bracket assembly needs removal of its bolts and nuts before the team disassembles the canister vent solenoid and its connector and hose. The installation requires removal of the canister vent solenoid and its elbow as well as extraction of the evaporative emission tube through a twisting and pulling motion for proper removal. Detach evaporative emissions canisters off the evaporative emission canister bracket in the last step of the procedure. Start by following the reverse order of the removal steps while inspecting the evaporative emissions canister assembly for leaks before installing it. Apply MERPOL(R) O-Ring Seal Lubricant or an alternative substance which fulfills Ford specification ESE-M99B144-B to the O-ring seals. The necessary drive cycle and leak tests must occur after you finish installing the system.
    Posted by FordPartsDeal Specialist
    Q:
    How to Service and Repair the Vapor Canister on Mercury Mystique? Posted by Customer
    A:
    The first step to repair or service the evaporative emission control canister requires disconnecting the battery negative cable. First raise the vehicle while supporting it then remove the canister vent solenoid valve from its retaining clips. The rear retaining bolts of the evaporative emission canister bracket can be released followed by removing the front retaining bolt. Lower the assembly partially before disconnecting both the electrical vent solenoid connector and vapor tube connector from the canister. Deepen the disconnecting process of both the canister and bracket assembly until you also separate the vent solenoid from its canister connection. Lastly move away the bracket from the carbon canister by using a prying tool then remove the entire canister unit. Execute the opposite steps used for removal to carry out installation.
    Posted by FordPartsDeal Specialist
    Q:
    How to Maintain the Vapor Canister and What Steps Are Involved for a Mercury Cougar? Posted by Customer
    A:
    Service operations on the evaporative emission control canister start with disconnecting the battery ground cable. Proceed by raising and providing support to the vehicle. The ventilation hose requires removal from its retaining clips then back bolts of the evaporative emission canister carrier need loosening. Proceed by detaching the front bolt of the canister carrier while lowering the canister together with its carrier assembly halfway. Proceed by disconnecting the vent solenoid electrical connector and vapor tube connector attached to the canister. The technician should disconnect the canister and carrier assembly and afterward detach the vent solenoid from the canister and then remove it. To finish the process unlink the canister by removing the carrier away from it. The reverse sequence should be used for installing the parts.
    Posted by FordPartsDeal Specialist
    Q:
    What tests should be carried out after installation for the 2003 Ford Escape? Posted by Customer
    A:
    Carry out a leak test and the evaporative emission repair verification drive cycle.
    Posted by FordPartsDeal Specialist
    See expert answers on similar Vapor Canister
    Q:
    What is the next step after disconnecting the necessary components for the 2004 Ford Escape? Posted by Customer
    A:
    Remove the EVAP canister bracket assembly, followed by the remote canister vent hose, dust separator, and canister vent solenoid.
    Posted by FordPartsDeal Specialist
    See expert answers on similar Vapor Canister
    Q:
    What should be done after disconnecting the battery for the 2002 Ford Escape? Posted by Customer
    A:
    Raise and support the vehicle.
    Posted by FordPartsDeal Specialist
    See expert answers on similar Vapor Canister
    Q:
    What is essential to do with the O-ring seals for the 2001 Lincoln LS? Posted by Customer
    A:
    Lubricate the O-ring seals with MERPOL(R) or an equivalent that meets Ford specifications ESE-M99B144-B.
    Posted by FordPartsDeal Specialist
    See expert answers on similar Vapor Canister
    Q:
    How do you detach the EVAP canister from its bracket for the 2005 Lincoln LS? Posted by Customer
    A:
    Remove the four bolts securing the EVAP canister and bracket assembly, then take out the assembly.
    Posted by FordPartsDeal Specialist
    See expert answers on similar Vapor Canister
    Q:
    What is the first step to service and repair the evaporative emission control canister for the 2006 Lincoln LS? Posted by Customer
    A:
    Ensure the vehicle is in NEUTRAL and positioned on a hoist.
    Posted by FordPartsDeal Specialist
    See expert answers on similar Vapor Canister
    Q:
    What additional step should be performed after installation for the 2000 Lincoln LS? Posted by Customer
    A:
    Perform the evaporative emission repair verification drive cycle.
    Posted by FordPartsDeal Specialist
    See expert answers on similar Vapor Canister
    Q:
    What is the first step to service and repair the Evaporative Emission Control Canister for the 2000 Lincoln Town Car? Posted by Customer
    A:
    Disconnect the battery to minimize the risk of explosion or fire due to fuel vapor presence.
    Posted by FordPartsDeal Specialist
    See expert answers on similar Vapor Canister
    Q:
    How do you install the new canister for the 2005 Lincoln Town Car? Posted by Customer
    A:
    Reverse the removal steps.
    Posted by FordPartsDeal Specialist
    See expert answers on similar Vapor Canister
    Q:
    What components need to be disconnected from the evaporative emission tubes for the 2000 Mercury Sable? Posted by Customer
    A:
    The evaporative canister tube and the evaporative emission (EVAP) canister purge outlet tube.
    Posted by FordPartsDeal Specialist
    See expert answers on similar Vapor Canister
    Q:
    How do you finally remove the canister for the 2002 Mercury Cougar? Posted by Customer
    A:
    Take the carrier away from the canister.
    Posted by FordPartsDeal Specialist
    See expert answers on similar Vapor Canister
    Q:
    What should be disconnected next after the tubes for the 2002 Mercury Sable? Posted by Customer
    A:
    The canister vent solenoid electrical connector.
    Posted by FordPartsDeal Specialist
    See expert answers on similar Vapor Canister
    If you have any questions about this product, please don't hesitate to ask us. We will be happy to help you!

OEM Ford F6DZ-9D653-BA, Excellent Performance and Perfect Fitment

To ensure reliability, purchase Ford part # F6DZ-9D653-BA Vapor Canister. It is sometimes referred to as Ford Vapor Canister. For those Ford owners who aspire to maintain their vehicles in optimal shape, opting for OEM parts is a wise choice. Precisely engineered, these components adhere to stringent factory guidelines and are produced in state-of-the-art facilities using cutting-edge technologies. Moreover, they are subjected to thorough testing to certify their resilience and safety, thereby making them a dependable option for Ford owners.

FordPartsDeal.com is a leading supplier of genuine Ford parts such as Ford F6DZ9D653BA Vapor Canister. A vast selection of genuine Ford parts is available on our website, all offered at discounted prices. Every OEM Ford part is covered by the manufacturer's warranty, which also applies to our hassle-free return policy. Enjoy fast delivery service, ensuring you get your parts when you need them. Your shopping experience here is guaranteed to be pleasurable. For detailed Ford parts information, click here.
Choose FordPartsDeal for discounted prices, exceptional service and fast delivery