My Garage
Cart
Make sure this part fits

Ford XL1Z-6L266-AA
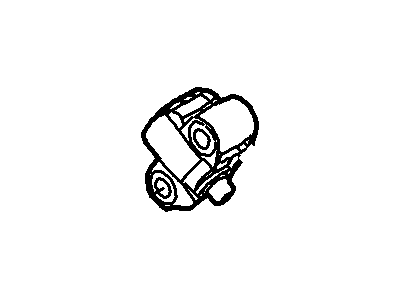
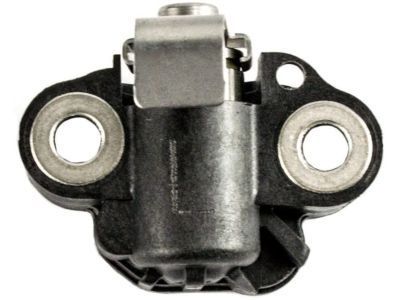
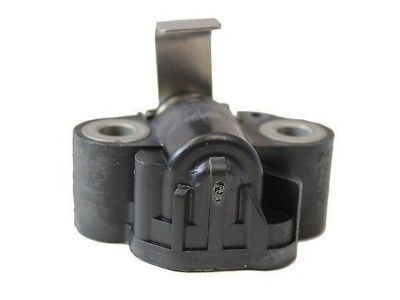
Tensioner, Driver Side

2004-2019 Ford XL1Z6L266AA

Customer Questions & Expert Answers (20)
Ford XL1Z-6L266-AA Tensioner, Driver Side
  • Part Description
    Tensioner - Timing Chain; Balance Shaft Tensioner; Timing Belt Tensioner; Timing Belt Kit; Belt Tensioner
  • Base No.
    6L266
  • Position
    Driver Side
  • Manufacturer
    Ford
Make sure this part fits
$42.66 MSRP: $61.03
You Save: $18.37 (31%)
1
ADD TO CART
  • Related Parts
  • Product Specifications
  • Vehicle Fitment
  • Customer Questions & Expert Answers
  • Product Specifications

    BrandGenuine Ford
    Base No.6L266
    Manufacturer Part NumberXL1Z-6L266-AA
    Part DescriptionTensioner - Timing Chain; Balance Shaft Tensioner; Timing Belt Tensioner; Timing Belt Kit; Belt Tensioner
    Item Weight0.60 Pounds
    PositionDriver Side
    ConditionNew
    Fitment TypeDirect Replacement
    ManufacturerFord
    SKUXL1Z-6L266-AA
    WarrantyThis genuine Ford part is guaranteed by Ford's factory warranty.
    Shipping & ReturnShipping Policy Return Policy
    Warning: California's Proposition 65
  • Vehicle Fitment

    Year Make Model Trim Engine
    2007-2011 Ford Crown VictoriaBase, Fleet, LWB, LX, Police Interceptor8 Cyl 4.6 L FLEX, 8 Cyl 4.6 L GAS
    2008-2014 Ford E-150Base, XL, XLT8 Cyl 4.6 L FLEX, 8 Cyl 4.6 L GAS, 8 Cyl 5.4 L CNG, 8 Cyl 5.4 L FLEX, 8 Cyl 5.4 L GAS, 8 Cyl 5.4 L LPG
    2008-2014 Ford E-250Base8 Cyl 4.6 L FLEX, 8 Cyl 4.6 L GAS, 8 Cyl 5.4 L CNG, 8 Cyl 5.4 L FLEX, 8 Cyl 5.4 L GAS, 8 Cyl 5.4 L LPG
    2008-2019 Ford E-350 Super DutyBase, XL, XLT10 Cyl 6.8 L CNG, 10 Cyl 6.8 L GAS, 10 Cyl 6.8 L LPG, 8 Cyl 5.4 L CNG, 8 Cyl 5.4 L FLEX, 8 Cyl 5.4 L GAS, 8 Cyl 5.4 L LPG
    2007-2014 Ford ExpeditionEddie Bauer, EL Eddie Bauer, EL King Ranch, EL Limited, EL XL, EL XLT, Funkmaster Flex Edition, King Ranch, Limited, XL, XLT8 Cyl 5.4 L FLEX, 8 Cyl 5.4 L GAS
    2006-2010 Ford ExplorerEddie Bauer, Limited, XLT8 Cyl 4.6 L GAS
    2007-2010 Ford Explorer Sport TracLimited, XLT8 Cyl 4.6 L GAS
    2009-2010 Ford F-150FX2, FX4, Harley-Davidson Edition, King Ranch, Lariat, Platinum, STX, SVT Raptor, XL, XLT8 Cyl 4.6 L GAS, 8 Cyl 5.4 L FLEX
    2008-2010 Ford F-250 Super DutyCabela's, FX4, Harley-Davidson Edition, King Ranch, Lariat, XL, XLT10 Cyl 6.8 L GAS, 8 Cyl 5.4 L GAS
    2008-2010 Ford F-350 Super DutyCabela's, FX4, Harley-Davidson Edition, King Ranch, Lariat, XL, XLT10 Cyl 6.8 L GAS, 8 Cyl 5.4 L GAS
    View More
  • Customer Questions & Expert Answers

    Q:
    Do you think this XL1Z-6L266-AA will fit my car? Posted by FordPartsDeal Specialist
    A:
    Select Your Vehicle model to verify if part number XL1Z-6L266-AA fits your car.
    Posted by FordPartsDeal Specialist
    Q:
    How to service and repair the timing chain tensioner on Ford Crown Victoria? Posted by Customer
    A:
    Service and repair of the timing chain tensioner requires performing the work when the engine stops freewheeling to minimize potential valve and piston harm. Service the fire suppression system after turning off its power. The vehicle must remain on a hoist in NEUTRAL gear before removing the engine front cover. Start by removing the crankshaft sensor ring and disconnect the eight ignition coil electrical connectors before proceeding to eliminate ignition coil bolts and coils. The correct use of hand tools allows you to extract the eight spark plugs while cleaning all wells with compressed air. The valve spring compressor spacer needs installation on the camshaft lobe point facing upwards to safeguard valve stem seals. Place marker points on components before using the Valve Spring Compressor to squeeze the valve springs which allows removal of camshaft roller followers. The technician should employ a methodical approach to remove the timing chain tensioning system by starting with the bolts, tensioners and tensioner arms and continuing with the LH and RH timing chains and blunt manipulation of the crankshaft sprocket. Before removing the camshaft gear bolt install the Camshaft Position Aligner. You should use a vise to compress the tensioner plungers of ratcheting timing chain tensioners while maintaining the ratchet mechanism in reverse and securing it with a paper clip. The seal on non-ratcheting tensioners must be evaluated for damage so the tensioner gets replaced if needed. The installation requires compressing tensioner plungers before installing Hydraulic Chain Tensioner Retaining Clips. Position the camshaft sprockets by installing fresh bolts and then tighten them in two procedures: first to 40 Nm (30 lb-ft) followed by an additional 90 degree twist. Using the Crankshaft Holding Tool locate the crankshaft to Top Dead Center (TDC) before fixing the crankshaft sprocket with its flange pointing towards the front. Attach the timing chain guides before tightening both LH and RH bolts to 10 Nm (89 lb-in). The RH camshaft sprocket needs to be positioned at the 11 o'clock mark and the LH sprocket at the 1 o'clock position before you align the colored links of the LH timing chain with the sprocket's timing marks and install the tensioner while tightening it to 25 Nm (18 lb-ft). Discard the retaining clips from tensioners and validate that colored links face the sprocket dots. Position the camshaft lobe vertically up and insert the Valve Spring Compressor Spacer before applying grease to the roller followers and their correct reinstallment. Adjust the eight spark plugs to 18 Nm (159 lb-in) torque then install the ignition coils with identical bolt torque applied at 6 Nm (53 lb-in). Afterwards reconnect all electrical connectors. Last step involves the replacement of the crankshaft sensor ring while keeping the engine front cover and performing fire suppression system reactivation by following all necessary safety precautions.
    Posted by FordPartsDeal Specialist
    Q:
    How to service and repair the timing chain tensioner on Ford F-250 Super Duty? Posted by Customer
    A:
    Start the timing chain tensioner service and repair process by taking out the engine front cover. Tighten the RH camshaft sprocket bolt with hand tools while giving it only one complete turn and then repeat with the LH camshaft sprocket bolt. Write down the positions of balance shaft bearing caps for correct future restoration then loosen and extract 6 bolts and 3 bearing caps and the balance shaft. Start by taking out the crankshaft sensor ring and set the crankshaft keyway at twelve o'clock while placing the first cylinder camshaft exhaust lobe during the exhaust phase. Using a Valve Spring Compressor remove 3 RH cylinder head camshaft roller followers while keeping valve keepers attached to prevent their loss. You should repeat this operation on all four roller followers from the left-hand cylinder head. Reposition the crankshaft at six o'clock before extracting both timing chain tensioners with their arms and the timing chains and crankshaft sprockets. First separate the engine timing chain guides from the camshaft sprockets and after that disconnect the balance shaft drive gear at the LH camshaft. Pull the RH and LH camshaft front bearing caps from the engines before cleaning and inspecting them together with removing the RH and LH camshafts. The identified roller followers must be placed onto both RH and LH cylinder heads while applying clean engine oil for lubrication. Slip the camshafts into position while the camshaft bearing caps should be installed to their designated locations with a light coat of oil. Initial bolt tightening of LH and RH camshaft bearing caps should achieve 8 Nm (71 lb-in) before advancing the bolt angle by 45 degrees. Place the drive gear on the LH camshaft and put on both camshaft sprockets with their bolts. After compressing the tensioner plunger you must install the Hydraulic Chain Tensioner Retaining Clip. Fix the timing chain guides into position before torquing their fasteners to 10 Nm (89 lb-in). First position the camshafts with proper timing markings in view and then turn the crankshaft by counterclockwise rotation to the required angle. Fasten the crankshaft sprocket and timing chains in their proper position with correct timing mark alignment. Fitting each tensioner arm requires torque to 25 Nm (18 lb-ft) before removing its retaining clips. The first stage of bolt tightening for the camshaft sprocket should target 40 Nm (30 lb-ft) torque then add another 90 degrees before the final tightening. After checking that all timing marks are correctly aligned users should install the crankshaft sensor ring. Complete the process by applying lubrication to the balance shaft journals. Then correctly position the balance shaft while installing bearing caps and their bolts and firmly tightening them to 10 Nm (89 lb-in). Reinstall the engine front cover.
    Posted by FordPartsDeal Specialist
    Q:
    How to service and repair the timing chain tensioner on Ford F-350 Super Duty? Posted by Customer
    A:
    Start the timing chain tensioner service and repair process by taking out the engine front cover. Tighten the RH camshaft sprocket bolt with hand tools while giving it only one complete turn and then repeat with the LH camshaft sprocket bolt. Write down the positions of balance shaft bearing caps for correct future restoration then loosen and extract 6 bolts and 3 bearing caps and the balance shaft. Start by taking out the crankshaft sensor ring and set the crankshaft keyway at twelve o'clock while placing the first cylinder camshaft exhaust lobe during the exhaust phase. Using a Valve Spring Compressor remove 3 RH cylinder head camshaft roller followers while keeping valve keepers attached to prevent their loss. You should repeat this operation on all four roller followers from the left-hand cylinder head. Reposition the crankshaft at six o'clock before extracting both timing chain tensioners with their arms and the timing chains and crankshaft sprockets. First separate the engine timing chain guides from the camshaft sprockets and after that disconnect the balance shaft drive gear at the LH camshaft. Pull the RH and LH camshaft front bearing caps from the engines before cleaning and inspecting them together with removing the RH and LH camshafts. The identified roller followers must be placed onto both RH and LH cylinder heads while applying clean engine oil for lubrication. Slip the camshafts into position while the camshaft bearing caps should be installed to their designated locations with a light coat of oil. Initial bolt tightening of LH and RH camshaft bearing caps should achieve 8 Nm (71 lb-in) before advancing the bolt angle by 45 degrees. Place the drive gear on the LH camshaft and put on both camshaft sprockets with their bolts. After compressing the tensioner plunger you must install the Hydraulic Chain Tensioner Retaining Clip. Fix the timing chain guides into position before torquing their fasteners to 10 Nm (89 lb-in). First position the camshafts with proper timing markings in view and then turn the crankshaft by counterclockwise rotation to the required angle. Fasten the crankshaft sprocket and timing chains in their proper position with correct timing mark alignment. Fitting each tensioner arm requires torque to 25 Nm (18 lb-ft) before removing its retaining clips. The first stage of bolt tightening for the camshaft sprocket should target 40 Nm (30 lb-ft) torque then add another 90 degrees before the final tightening. After checking that all timing marks are correctly aligned users should install the crankshaft sensor ring. Complete the process by applying lubrication to the balance shaft journals. Then correctly position the balance shaft while installing bearing caps and their bolts and firmly tightening them to 10 Nm (89 lb-in). Reinstall the engine front cover.
    Posted by FordPartsDeal Specialist
    Q:
    How to service and repair the timing chain tensioner on Lincoln Navigator? Posted by Customer
    A:
    The service process for timing chain tensioner starts by taking off the engine front cover. Detach the crankshaft sensor ring from the crankshaft before positioning the keyway at the 12 o'clock mark while ensuring the No. 1 cylinder camshaft exhaust lobe is on the exhaust stroke. Begin by marking the parts in place to protect the engine before using a Valve Spring Compressor to remove the three camshaft roller followers from the right-hand cylinder head without letting the valve keepers drop. Execute this procedure on the left-hand cylinder head as well. The crankshaft needs rotation until it reaches the 6 o'clock position for examination of tensioner-sealing bead integrity before removing both left-hand and right-hand timing chain tensioners with their corresponding arms. First remove the right-hand timing chain together with the left-hand timing chain alongside the crankshaft sprocket before taking out the timing chain guides. A Cam Phaser Locking Tool allows for safe removal of right-hand and left-hand camshaft phaser and sprocket assemblies which need disposal of their bolts. Marshall the right-hand camshaft bearing cap and the successive bearing caps until their complete removal while paying close attention to clean and assess the oil metering groove along each component. All cylinder heads require removal of both camshafts together with all extra roller followers that remain on the camshafts. You should apply clean engine oil to the camshafts along with bearing caps before placing them in their normal positions and torquing the bolts to 10 Nm (89 lb-in) in a specific installation order. The installation requires positioning the camshaft phaser with sprockets while using new bolts initially being finger-tightened followed by two-stage tightening through use of the Cam Phaser Locking Tool. Install a retaining clip on the tensioner plunger while holding it in the vise compressed and position the crankshaft with its Crankshaft Holding Tool. The installation process requires marking needed timing links on chains before tightening the crankshaft sprocket and timing chain guides to 10 Nm (89 lb-in). Mount the timing chain on the sprocket marks before installing left-hand and right-hand tensioners and torquing them to 25 Nm (18 lb-ft). Verify timeout marks' alignment before reinstalling the crankshaft sensor ring and then use the Valve Spring Compressor to install each camshaft roller follower by first lubricating them. Last in line is the installation of the engine front cover.
    Posted by FordPartsDeal Specialist
    Q:
    What should be done when installing the new tensioner for the 2008 Ford Explorer Sport Trac? Posted by Customer
    A:
    Ensure it is tightened to 44 Nm (32 lb-ft).
    Posted by FordPartsDeal Specialist
    See expert answers on similar Timing Chain Tensioner
    Q:
    What should be used for installation for the 2009 Ford Explorer Sport Trac? Posted by Customer
    A:
    Ensure to use a new hydraulic timing chain tensioner washer.
    Posted by FordPartsDeal Specialist
    See expert answers on similar Timing Chain Tensioner
    Q:
    What should be done during the installation of the hydraulic chain tensioner for the 2006 Ford Explorer? Posted by Customer
    A:
    Ensure to tighten it to 44 Nm (32 ft. lbs.).
    Posted by FordPartsDeal Specialist
    See expert answers on similar Timing Chain Tensioner
    Q:
    How should the crankshaft be positioned for the next steps for the 2009 Ford Expedition? Posted by Customer
    A:
    Use the Crankshaft Holding Tool to position the crankshaft.
    Posted by FordPartsDeal Specialist
    See expert answers on similar Timing Chain Tensioner
    Q:
    What is the next step after removing the roller followers for the 2009 Ford F-150? Posted by Customer
    A:
    Rotate the crankshaft clockwise to the 6 o'clock position, then remove the bolts and the RH and LH timing chain tensioners along with their arms.
    Posted by FordPartsDeal Specialist
    See expert answers on similar Timing Chain Tensioner
    Q:
    What should be done during the installation of the hydraulic timing chain tensioner for the 2009 Ford Explorer Sport Trac? Posted by Customer
    A:
    Ensure to tighten it to 44 Nm (32 lb-ft).
    Posted by FordPartsDeal Specialist
    See expert answers on similar Timing Chain Tensioner
    Q:
    What should be done to the new O-ring seal before installation for the 2006 Ford Mustang? Posted by Customer
    A:
    Lubricate the new O-ring seal with clean engine oil.
    Posted by FordPartsDeal Specialist
    See expert answers on similar Timing Chain Tensioner
    Q:
    What is the torque specification for tightening the new tensioner for the 2006 Ford Mustang? Posted by Customer
    A:
    Tighten the new tensioner to 44 Nm (32 ft. lbs.).
    Posted by FordPartsDeal Specialist
    See expert answers on similar Timing Chain Tensioner
    Q:
    What is the first step to service the hydraulic chain tensioner on the left-hand side for the 2005 Ford Mustang? Posted by Customer
    A:
    Disconnect the battery ground cable.
    Posted by FordPartsDeal Specialist
    See expert answers on similar Timing Chain Tensioner
    Q:
    What should be done with the old O-ring seal for the 2008 Ford Mustang? Posted by Customer
    A:
    The old O-ring seal should be removed and discarded.
    Posted by FordPartsDeal Specialist
    See expert answers on similar Timing Chain Tensioner
    Q:
    How do you complete the process after installing the new tensioner for the 2008 Ford Mustang? Posted by Customer
    A:
    Reverse the removal procedure.
    Posted by FordPartsDeal Specialist
    See expert answers on similar Timing Chain Tensioner
    Q:
    What should be verified after installing the timing chains for the 2009 Lincoln Town Car? Posted by Customer
    A:
    Verify that the colored chain links align with the dots on the sprockets.
    Posted by FordPartsDeal Specialist
    See expert answers on similar Timing Chain Tensioner
    Q:
    What is the final step for reinstalling the camshaft roller followers for the 2009 Mercury Grand Marquis? Posted by Customer
    A:
    Rotate the camshaft to position the lobe up, install the Valve Spring Compressor Spacer, lubricate the camshaft roller followers, and reinstall them in their original locations.
    Posted by FordPartsDeal Specialist
    See expert answers on similar Timing Chain Tensioner
    Q:
    What should be done upon installation of the hydraulic chain tensioner for the 2006 Mercury Mountaineer? Posted by Customer
    A:
    Ensure to tighten it to 44 Nm (32 ft. lbs.).
    Posted by FordPartsDeal Specialist
    See expert answers on similar Timing Chain Tensioner
    Q:
    What should be done to the new O-ring seal before installation for the 2008 Mercury Mountaineer? Posted by Customer
    A:
    It is important to lubricate the new O-ring seal with clean engine oil before installation.
    Posted by FordPartsDeal Specialist
    See expert answers on similar Timing Chain Tensioner
    If you have any questions about this product, please don't hesitate to ask us. We will be happy to help you!

OEM Ford XL1Z-6L266-AA, Excellent Performance and Perfect Fitment

To ensure reliability, purchase Ford part # XL1Z-6L266-AA Tensioner, Driver Side. It is sometimes referred to as Ford Timing Chain Tensioner. For those Ford owners who aspire to maintain their vehicles in optimal shape, opting for OEM parts is a wise choice. Precisely engineered, these components adhere to stringent factory guidelines and are produced in state-of-the-art facilities using cutting-edge technologies. Moreover, they are subjected to thorough testing to certify their resilience and safety, thereby making them a dependable option for Ford owners.

FordPartsDeal.com is a leading supplier of genuine Ford parts such as Ford XL1Z6L266AA Tensioner, Driver Side. A vast selection of genuine Ford parts is available on our website, all offered at discounted prices. Every OEM Ford part is covered by the manufacturer's warranty, which also applies to our hassle-free return policy. Enjoy fast delivery service, ensuring you get your parts when you need them. Your shopping experience here is guaranteed to be pleasurable. For detailed Ford parts information, click here.
Choose FordPartsDeal for discounted prices, exceptional service and fast delivery