FordParts
My Garage
My Account
Cart
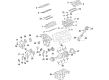
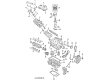
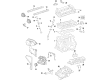
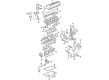
OEM Ford Exhaust Valve
Exhaust Muffler Valve- Select Vehicle by Model
- Select Vehicle by VIN
Select Vehicle by Model
orMake
Model
Year
Select Vehicle by VIN
For the most accurate results, select vehicle by your VIN (Vehicle Identification Number).
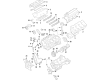
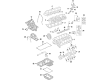
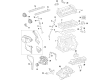
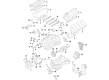
71 Exhaust Valves found


Ford Exhaust Valve Part Number: FT4Z-6505-B
$71.59 MSRP: $110.17You Save: $38.58 (36%)Product Specifications- Other Name: Valve - Exhaust
- Replaces: FT4Z-6505-A


Ford Exhaust Valve Part Number: 2L2Z-6505-AA
$124.55 MSRP: $191.67You Save: $67.12 (36%)Product Specifications- Other Name: Valve - Exhaust


Ford Exhaust Valve Part Number: BM5Z-6505-B
$20.27 MSRP: $30.17You Save: $9.90 (33%)Product Specifications- Other Name: Valve - Exhaust
- Replaces: BM5Z-6505-A


Ford Exhaust Valve Part Number: 5L1Z-6505-B
$15.80 MSRP: $23.00You Save: $7.20 (32%)Ships in 1-3 Business DaysProduct Specifications- Other Name: Valve - Exhaust; Intake Valve; Valves
- Replaces: 5L1Z-6505-BA, 5L1Z-6505-A


Ford Exhaust Valve Part Number: AT4Z-6505-A
$17.06 MSRP: $24.83You Save: $7.77 (32%)Product Specifications- Other Name: Valve - Exhaust
- Replaces: 7T4Z-6505-A


Ford Exhaust Valve Part Number: CC3Z-6505-B
$25.19 MSRP: $36.67You Save: $11.48 (32%)Ships in 1 Business DayProduct Specifications- Other Name: Valve - Exhaust
- Replaces: CC3Z-6505-A, BC3Z-6505-AA


Ford Exhaust Valve Part Number: 1S6Z-6505-A
$30.34 MSRP: $44.17You Save: $13.83 (32%)Ships in 1 Business DayProduct Specifications- Other Name: Valve - Exhaust
- Replaces: BE8Z-6505-B


Ford Valves Part Number: AL3Z-6505-A
$32.06 MSRP: $46.67You Save: $14.61 (32%)Ships in 1-3 Business DaysProduct Specifications- Other Name: Valve - Exhaust; Exhaust Valve; Intake Valve


Ford Exhaust Valve Part Number: 4C3Z-6505-A
$63.55 MSRP: $92.50You Save: $28.95 (32%)Product Specifications- Other Name: Valve - Exhaust; Intake Valve; Valves
- Manufacturer Note: VALVE, EXH
- Replaces: 4C3Z-6505-AA


Ford Valves Part Number: 4G7Z-6505-AA
$77.29 MSRP: $112.50You Save: $35.21 (32%)Ships in 1-3 Business DaysProduct Specifications- Other Name: Valve - Exhaust; Exhaust Valve; Intake Valve


Ford Exhaust Valve Part Number: AA5Z-6505-A
$41.01 MSRP: $58.67You Save: $17.66 (31%)Ships in 1-3 Business DaysProduct Specifications- Other Name: Valve - Exhaust


Ford Exhaust Valve Part Number: BR3Z-6505-A
$12.57 MSRP: $17.83You Save: $5.26 (30%)Ships in 1-3 Business DaysProduct Specifications- Other Name: Valve - Exhaust; Intake Valve; Valves


Ford Exhaust Valve Part Number: 9S4Z-6505-A
$15.51 MSRP: $22.00You Save: $6.49 (30%)Ships in 1-3 Business DaysProduct Specifications- Other Name: Valve - Exhaust
- Manufacturer Note: Ø 30MM
- Replaces: 1S7Z-6505-A, 1S7Z-6505-AA, 3S4Z-6505-AA, 8E5Z-6505-A, 9E5Z-6505-A


Ford Exhaust Valve Part Number: FR3Z-6505-A
$19.62 MSRP: $27.83You Save: $8.21 (30%)Ships in 1-3 Business DaysProduct Specifications- Other Name: Valve - Exhaust


Ford Exhaust Valve Part Number: EJ7Z-6505-A
$23.97 MSRP: $34.00You Save: $10.03 (30%)Ships in 1-2 Business DaysProduct Specifications- Other Name: Valve - Exhaust


Ford Exhaust Valve Part Number: AG9Z-6505-A
$31.37 MSRP: $44.50You Save: $13.13 (30%)Ships in 1-3 Business DaysProduct Specifications- Other Name: Valve - Exhaust


Ford Exhaust Valve Part Number: 3C3Z-6505-AA
$34.12 MSRP: $47.30You Save: $13.18 (28%)Ships in 1 Business DayProduct Specifications- Other Name: Valve - Exhaust
- Manufacturer Note: VALVE EXHAUST


Ford Exhaust Valve Part Number: 2M5Z-6505-AA
$49.97 MSRP: $69.13You Save: $19.16 (28%)Ships in 1-2 Business DaysProduct Specifications- Other Name: Valve - Exhaust
- Manufacturer Note: Std., (SVT)


Ford Exhaust Valve Part Number: 8C3Z-6505-A
$20.94 MSRP: $28.29You Save: $7.35 (26%)Ships in 1-3 Business DaysProduct Specifications- Other Name: Valve - Exhaust


Ford Exhaust Valve Part Number: JL3Z-6505-A
$13.04 MSRP: $18.50You Save: $5.46 (30%)Product Specifications- Other Name: Valve - Exhaust
| Page 1 of 4 |Next >
1-20 of 71 Results
Ford Exhaust Valve
If you own Ford and want to keep it in top shape, choosing OEM Exhaust Valve is a smart move. They are precisely engineered and follow strict factory standards. They are made in advanced facilities that use cutting edge technology. Each part goes through thorough testing to confirm strength and safety, so you can trust it. FordPartsDeal.com gives you genuine Ford Exhaust Valve at some of the affordable online prices without cutting quality. Every OEM Ford part includes the manufacturer's warranty, easy returns, and super-fast delivery. So why wait? Shop now and get your vehicle back to peak condition.
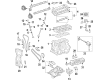
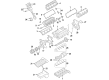
Ford Exhaust Valve is applied to expel the hot combustion gases as quickly as possible so that engines can breathe freely and power delivery is sharp. In 1913, Ford was the first to introduce a moving assembly line, which reduced the time to build and made cars affordable to average drivers. Ford has implemented EcoBoost engines that combine turbo power with economy, demonstrating the brand principles of fun and few fuel stops. The cabins in Ford are also wired with SYNC meaning that teens scream a song command or a map route and the vehicle responds without taking its eyes off the road. Ford supports those rides with Co-Pilot360 helps that use tap cameras and sensors to brake when traffic snaps or press the wheel to remain in a lane. Each cylinder has an Exhaust Valve which only opens when the piston expels burned gases and thus allows fresh air mixture. The Exhaust Valve is made of an alloy of heat-hardened steel and it shuts this blast off as it comes, at red heat, and attempts to bend weaker components and costs seconds of throttle action. When an Exhaust Valve closes it maintains compression at a high level, thus resulting in faster starting, idle steadiness and fewer unburnt petrol spurting out. A damaged Exhaust Valve will allow flames to lengthen over oil and valves to spurt power but a healthy one will cut emissions and protect the catalytic converter against overwork.
Ford Exhaust Valve Parts and Q&A
- Q: What steps should be taken for thorough cleaning and inspection of the Cylinder Head, Exhaust Valve and Intake Valve on the Ford Focus during an engine overhaul?A:When you have cleaned cylinder head and its valves coupled with inspection, you will be in a position to determine how much work should be done to your valves as you embark on overhauling your engine. If the Engine has been overheated really bad one can bet that the cylinder head is warped or pulled and should take time to look for this. First, one should remove old gasket material and sealing compound from the face of the cylinder head, also do the same with the carbon deposits in the combustion chamber and ports, finally, clean the head with a suitable solvent. After that, remove thick layers of carbon on the valves if any, then scrub the valve heads and the stems with power operated wire brush. Inspect the head for cracks, swellings which may indicate leakage of coolant and other signs of damage, and if cracks exist, a new cylinder head should be procured. To check for warpage of the cylinder head gasket surface, using a straight edge and see the extent of distortion with feeler gauges and this is compared with factory set value. To check the condition of valve seats in each combustion chamber and if the seats are heavily pitted, cracked or burned they will have to be replaced or re-cut. If slightly pitted, the following procedure may be adopted: tap the valve heads and seats with fine valve-grinding compound. If the valve guides are worn and the valve is moving from side to side new guides will have to be put in and the clearance in this case should be measured and then compared with values set for it. Valve guides can only be replaced by an engine overhaul specialist, while where the valve seats are to be re-cut this has to be done only after the guides have been replaced. These include pitting, burning, cracks and general wear on the head of the valves, as well as scoring and wear ridges on the valve stem; any valve with such characteristics must be replaced. If the valve looks okay then use the micrometer to check at least 3 points on the length of the valve stem; if there is a variation then that is wear in the valve and must be replaced. If valves are serviceable, they should be turned into their reference seats to assure metallurgically correct surface contact to increase the tightness of the seal necessary to prevent the leakage of gases as absorbs do not work on valves insufficiently seated; the more restrained the valve motion, the higher the leakage; lightly pitted or re-cut seats should be ground with superior quality fine grinding compound to avoid random surface impurities; badly burned or deeply pitted seats Valve grinding is done by dropping the cylinder head upside down on a bench by applying valve-grinding compound on the seat face and by using the suction grinding tool to grind this valve head to the seat in semi-rotating action to obtain the uninterrupted, smooth ring of light g Grey matt finish on both the valve and the seat. After grinding, it is necessary to remove all particles of the grinding compound with an appropriate cleaner before the assembled parts will be fitted again. Check and inspect the condition of the valve springs; check the free length of the springs with that on newly manufactured valve springs; replace the valve springs if any of the springs are damaged, distorted or have lost the tension. Inspect retainers and keepers for conditions of wear and cracks and replace such components as may exhibit signs of brittleness that may compound when the engine is in operation; noting that the valve spring lower seat stem oil seals should also be replaced any time they have been displaced. Last of all, inspect the cam followers.
- Q: How to check and adjust the exhaust valve and intake valve clearances on 1993-2011 Ford Ranger?A:Valve clearance on this engine has no manufacturer recommended service intervals but can be checked when the milage is high or there is excessive noise. To check, first, take off the valve cover and turn the crank slowly until the Number 1 cylinder is on the top dead center of the compression stroke where the intake and exhaust cam lobes are at the top of the lift. Having had the lash adjusted, use a feeler gauge to measure the cam lobe base to tappet clearance and record the thickness for all four valves of cylinder no 1. Then, rotate the crankshaft 180 degrees clockwise for the purpose of adjustment of the valve clearances for the cylinder number three and for the cylinders number four and two correspondingly. Any other clearances have to be brought back into tolerance and one should make a log of which valves has to be adjusted. As for checking valve clearances, it is easy However, in order to adjust valves, it is somewhat more complicated and must be done with the help of a micrometer. If any changes are to be made, probably tappets of different thicknesses will be required, and therefore measurement of the tappets is important to ensure that one gets the right one. They dictated how thick the tappet to be; if the clearance was small, a thin tappet has to be made and if the clearance was big, a thick tappet is required. Subtract the wear from the new tappets then go to the dealership to purchase the right replacement tappets. Place the engine at Top Dead Centre, then take out the valve cover, engine front cover, timing chain, the two camshaft sprockets and both the camshafts. Unbolt one tappet at one time to avoid confusion, and measured the thickness of one face of the tappet. It is advisable to apply oil during the installation of the new replacement tappets, and then reassemble the engine in reverse manner, and ensure the following; oil the cam lobes and journals, check valve clearance, tighten the bolts as recommended in the manufacturers' manual, check all the electrical and hose connections so that there will not be any problem. Last but not the least, start the engine and look for leaks.


Related Ford Parts
 Ford Oil Filter
 Ford Engine Cover
 Ford Cam Gear
 Ford Oil Drain Plug Gasket
 Ford Oil Pump
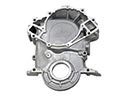 Ford Timing Cover
 Ford Crankshaft Seal
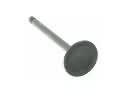 Ford Intake Valve
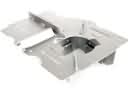 Ford Oil Pan Baffle
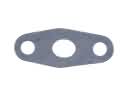 Ford Oil Pump Gasket
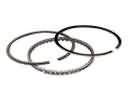 Ford Piston Ring Set
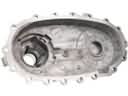 Ford Transfer Case Cover
Browse Ford Exhaust Valve by Models
Ranger Bronco Mustang Explorer Focus Fusion F-150 Maverick EXP Escape Edge Excursion Expedition Fiesta Taurus Thunderbird Flex Transit Connect Bronco Sport Explorer Sport Trac Crown Victoria Probe Bronco II EcoSport Escort F-250 Aerostar Aspire C-Max Contour E-150 Econoline F-350 Five Hundred Freestar Freestyle LTD Police Interceptor Utility Taurus X Tempo Windstar F-350 Super Duty Police Interceptor Sedan E-150 E-150 Econoline Club Wagon E-250 E-250 Econoline E-250 Econoline Club Wagon E-350 Econoline E-350 Econoline Club Wagon E-350 Super Duty F-150 Heritage F-250 HD F-250 Super Duty Special Service Police Sedan Transit-150 Transit-250 Transit-350 Transit-350 HD