FordParts
My Garage
My Account
Cart
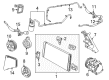
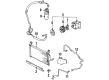
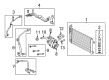
OEM Mercury A/C Accumulator
Accumulator- Select Vehicle by Model
- Select Vehicle by VIN
Select Vehicle by Model
orMake
Model
Year
Select Vehicle by VIN
For the most accurate results, select vehicle by your VIN (Vehicle Identification Number).
54 A/C Accumulators found


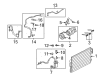
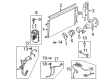
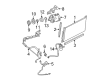
Mercury Dehydrator Part Number: BL8Z-19C836-B
$76.89 MSRP: $129.09You Save: $52.20 (41%)Ships in 1 Business DayProduct Specifications- Other Name: Accumulator Assembly - Air Conditioning; A/C Accumulator; Drier Desiccant Element; A/C Receiver Drier; Drier; Accumulator
- Replaces: 9L8Z-19C836-A, BL8Z-19C836-A, YF-37142, YF-3463


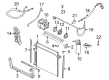
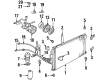
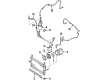
Mercury Dehydrator Part Number: XL2Z-19C836-AC
$63.87 MSRP: $105.09You Save: $41.22 (40%)Product Specifications- Other Name: Accumulator Assembly - Air Conditioning; Drier Desiccant Element; A/C Receiver Drier; A/C Accumulator; Drier; Accumulator
- Replaces: F87Z-19C836-AA


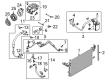
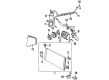
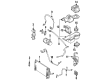
Mercury Dehydrator Part Number: BG1Z-19959-B
$74.92 MSRP: $123.27You Save: $48.35 (40%)Ships in 1-2 Business DaysProduct Specifications- Other Name: Dehydrator Assembly; A/C Receiver Drier; Drier Desiccant Element; A/C Accumulator; Accumulator; Drier
- Replaces: 8G1Z-19C836-B, 8A5Z-19959-A, AG1Z-19959-A, BG1Z-19959-A, 8G1Z-19C836-A, 8A5Z-19959-B, YL-197, YL-206, YL-195, YL-202, YL-193


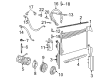
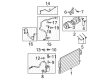
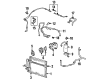
Mercury Dehydrator Part Number: 8W7Z-19C836-A
$77.02 MSRP: $126.73You Save: $49.71 (40%)Ships in 1-2 Business DaysProduct Specifications- Other Name: Accumulator Assembly - Air Conditioning; A/C Accumulator; Drier Desiccant Element; A/C Receiver Drier; Drier; Accumulator
- Replaces: 6W7Z-19C836-A


Mercury Dehydrator Part Number: 9M6Z-19959-A
$55.91 MSRP: $77.35You Save: $21.44 (28%)Ships in 1-2 Business DaysProduct Specifications- Other Name: Dehydrator Assembly; A/C Receiver Drier; Drier Desiccant Element; A/C Accumulator; Drier
- Replaces: 8M6Z-19959-B, 8M6Z-19959-A


Mercury Suction Hose Part Number: YW1Z-19C836-AA
$129.78 MSRP: $179.54You Save: $49.76 (28%)Ships in 1-2 Business DaysProduct Specifications- Other Name: Accumulator Assembly - Air Intake; A/C Refrigerant Hose; Drier Element; A/C Receiver Drier; A/C Accumulator; Hose
- Replaces: XW7Z-19C836-AA


Mercury Drier Part Number: XF1Z-19C836-AA
$200.73 MSRP: $277.69You Save: $76.96 (28%)Ships in 1-2 Business DaysProduct Specifications- Other Name: Accumulator Assembly - Air Intake; A/C Accumulator; Drier Desiccant Element; A/C Receiver Drier
- Manufacturer Note: Tank, switch and hose asy., w/integral A/C


Mercury Dehydrator Part Number: 8L8Z-19C836-C
$86.62 MSRP: $119.82You Save: $33.20 (28%)Ships in 1-2 Business DaysProduct Specifications- Other Name: Accumulator Assembly - Air Conditioning; A/C Receiver Drier; Drier Desiccant Element; A/C Accumulator; Drier; Accumulator
- Replaces: 8L8Z-19C836-B, 8L8Z-19C836-A


Mercury Dehydrator Part Number: 7F9Z-19C836-BA
$60.18 MSRP: $83.25You Save: $23.07 (28%)Ships in 1-2 Business DaysProduct Specifications- Other Name: Kit; A/C Receiver Drier; Drier Desiccant Element; A/C Accumulator; Accumulator; Drier
- Replaces: 5F9Z-19959-BA, 6F9Z-19959-BA

Mercury Dehydrator Part Number: F8CZ-19C836-AA
$15.05 MSRP: $20.82You Save: $5.77 (28%)Ships in 1-2 Business DaysProduct Specifications- Other Name: Accumulator Assembly - Air Intake; Drier Desiccant Element; A/C Receiver Drier; A/C Accumulator
- Manufacturer Note: Tank only, for switch refer to 19E561, 2 door

Mercury Dehydrator Part Number: F5CZ-19C836-AA
$17.87 MSRP: $24.72You Save: $6.85 (28%)Ships in 1-2 Business DaysProduct Specifications- Other Name: Accumulator Assembly - Air Intake; A/C Receiver Drier; A/C Accumulator
- Manufacturer Note: Tank only, for switch refer to 19E561 , w/integral A/C

Mercury Dehydrator Part Number: F8RZ-19C836-EA
$20.93 MSRP: $28.96You Save: $8.03 (28%)Ships in 1-2 Business DaysProduct Specifications- Other Name: Accumulator Assembly - Air Intake; Drier Desiccant Element; A/C Receiver Drier; A/C Accumulator
- Manufacturer Note: Tank only, for switch refer to 19E561 , w/integral A/C

Mercury Accumulator Part Number: 6F2Z-19C836-AB
$66.88 MSRP: $92.52You Save: $25.64 (28%)Ships in 1-2 Business DaysProduct Specifications- Other Name: Accumulator Assembly - Air Conditioning; A/C Accumulator; A/C Receiver Drier
- Replaces: 6F2Z-19C836-AA, YF-3155

Mercury Dehydrator Part Number: F5TZ-19C836-A
$154.82 MSRP: $214.18You Save: $59.36 (28%)Ships in 1-2 Business DaysProduct Specifications- Other Name: Accumulator Assembly - Air Conditioning; Drier Desiccant Element; A/C Receiver Drier; A/C Accumulator; Drier; Accumulator
- Manufacturer Note: Tank only, w/integral A/C
Mercury Dehydrator Part Number: 7F9Z-19C836-AA
$65.67 MSRP: $90.85You Save: $25.18 (28%)Ships in 1-2 Business DaysProduct Specifications- Other Name: Kit; A/C Receiver Drier; Drier Desiccant Element; A/C Accumulator; Accumulator; Drier
- Replaces: 6F9Z-19959-CA

Mercury Accumulator Part Number: 6M6Z-19C836-AB
$84.45 MSRP: $116.82You Save: $32.37 (28%)Ships in 1-2 Business DaysProduct Specifications- Other Name: Accumulator Assembly - Air Conditioning; A/C Accumulator; A/C Receiver Drier
- Replaces: 6M6Z-19C836-AA, 5M6Z-19C836-AA, YF-3131

Mercury Suction Hose Part Number: F8AZ-19C836-AA
Product Specifications- Other Name: Accumulator Assembly - Air Intake; A/C Refrigerant Hose; Drier Element; A/C Receiver Drier; A/C Accumulator; Hose


Mercury Drier Part Number: 5F1Z-19C836-AB
Product Specifications- Other Name: Accumulator Assembly - Air Conditioning; A/C Accumulator; Drier Desiccant Element; A/C Receiver Drier; Accumulator
- Replaces: 2F1Z-19C836-AA, 4F1Z-19C836-AA, 4F1Z-19C836-AB, 5F1Z-19C836-AA, YF-2975, YF-3099, YF-37394
Mercury Dehydrator Part Number: XS4Z-19C836-AA
Product Specifications- Other Name: Accumulator Assembly - Air Conditioning; A/C Receiver Drier; A/C Accumulator; Accumulator
- Manufacturer Note: Accumulator and switch asy. , 4 door

Mercury Dehydrator Part Number: AE5Z-19C836-A
Product Specifications- Other Name: Accumulator Assembly - Air Conditioning; A/C Receiver Drier; Drier Desiccant Element; A/C Accumulator; Drier
| Page 1 of 3 |Next >
1-20 of 54 Results
Mercury A/C Accumulator
If you own Mercury and want to keep it in top shape, choosing OEM A/C Accumulator is a smart move. They are precisely engineered and follow strict factory standards. They are made in advanced facilities that use cutting edge technology. Each part goes through thorough testing to confirm strength and safety, so you can trust it. FordPartsDeal.com gives you genuine Mercury A/C Accumulator at some of the affordable online prices without cutting quality. Every OEM Mercury part includes the manufacturer's warranty, easy returns, and super-fast delivery. So why wait? Shop now and get your vehicle back to peak condition.
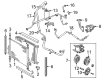
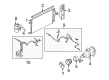
Mercury A/C Accumulator keeps moisture and debris away and allows the refrigerant to circulate freely to maintain the cabin air ice-cold. Mercury rolled into 1939 showrooms with midsize cars that combined a smooth ride, spacious interior, and styling so bold in its manner that it did not have to bust the budgets. Mercury continued to perfect that formula with Cougars and Grand Marquis, heavy insulation, smoother steering, and comfortable highway stability that made long journeys easy. Comfort, style, and value were the ingredients that Mercury implemented over the ten years, and when it came to getting shoppers to purchase its products, it was fine to make a few concessions without forfeiting comfort, style, or value. Mercury up to its model year 2011 expanded on seats, noise suppression, and comfort technology to fulfill that initial vow of carefree driving. A/C Accumulator is placed between the condenser and expansion valve, which is a kind of security guard that ensures that the refrigerant in the form of liquid is not able to strike the compressor. The A/C Accumulator also has a desiccant that removes water out of vapor, thus allowing corrosion, ice, and sludge to never form a foothold in the narrow passages. A/C Accumulator is equipped with a simple metal can and filter screen, that is, replacement is fast and system pressure is maintained constant to ensure consistent cooling in summer. A/C Accumulator provides the same protection to all the refrigerant configurations in the line, making A/C life count and savings on repair expenses per mile.
Mercury A/C Accumulator Parts and Q&A
- Q: How to service the A/C Accumulator for the 2.5L and 3.0L (4V) engines on Mercury Mariner?A:Start the A/C accumulator service process of 2.5L and 3.0L (4V) engines by performing refrigerant recovery. The front bumper cover must be removed first when servicing the A/C accumulator. The condenser outlet fitting can then be disconnected by removing its nut to discard the O-ring seal and gasket seal while tightening the new fitting to 15 Nm (133 lb-in) during installation. After disconnecting the A/C pressure transducer electrical connector, perform the outlet fitting nut removal on the A/C accumulator while keeping the new fitting tightened to 15 Nm (133 lb-in). After detaching the evaporator outlet line from the A/C accumulator bracket clip, you must take out the two A/C accumulator nuts and install new ones at 8 Nm (71 lb-in) torque during assembly. Use new gasket seals with O-ring seals when reinstalling the A/C accumulator afterwards while lubricating the refrigerant system with clean PAG oil at the correct quantity. The last operation includes evacuating, then leak testing, and finally charging with refrigerant to the system. Hiring a new A/C accumulator unit must be limited to cases when physical signs show that the A/C compressor failed or the A/C accumulator sustained leaks or physical damage or absorbed moisture after a complete loss combined with extended atmospheric pressure exposure. The technician must avoid installing a new A/C accumulator when any residual pressure remains in the refrigeration system. Repairs can be done to A/C accumulator fitting studs by themselves when these components show physical signs of damage.
- Q: How to Service the A/C Accumulator in the HVAC System on Mercury Grand Marquis?A:Service of the suction accumulator in the HVAC system starts by placing the vehicle into neutral position on a hoist. When equipped with a fire suppression system you should disable it then evacuate the refrigerant from the system. First disconnect the suction accumulator outlet fitting and throw away its O-ring seals before removing the inlet fitting with its spare O-ring seals. The service of the suction accumulator requires disconnecting both the A/C cycling switch electrical connector and removing the three suction accumulator bolts while torquing them to 15 Nm (11 lb-ft) before reinstallation. Safely detach the suction accumulator then the fire suppression system needs a power up only if installed. Reinstall the system by following removal steps in reverse while replacing all O-ring seals and adding clean PAG oil at the required amount to the refrigerant system. Evacuation and leakage testing of the refrigerant system should be followed by charging the system.


Related Mercury Parts
 Mercury Blend Door Actuator
 Mercury A/C Compressor Cut-Out Switches
 Mercury A/C Orifice Tube
 Mercury A/C Switch
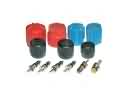 Mercury A/C System Valve Core
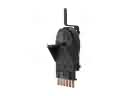 Mercury Blower Control Switches
 Mercury Blower Motor
 Mercury Blower Motor Resistor
 Mercury Cabin Air Filter
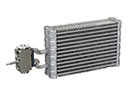 Mercury Evaporator
 Mercury Heater Core
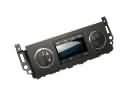 Mercury HVAC Control Module