FordParts
My Garage
My Account
Cart
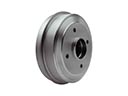
OEM Mercury Brake Pads
Disc Brake Pad Set- Select Vehicle by Model
- Select Vehicle by VIN
Select Vehicle by Model
orMake
Model
Year
Select Vehicle by VIN
For the most accurate results, select vehicle by your VIN (Vehicle Identification Number).
47 Brake Pads found


Mercury Brake Pads, Front Part Number: 5U2Z-2V001-M
$45.79 MSRP: $66.65You Save: $20.86 (32%)Ships in 1-3 Business DaysProduct Specifications- Other Name: Kit - Brake Lining; Disc Brake Pad Set, Front; Disc Brake Pad Kit; Disc Brake Pad Set; Front Pads
- Position: Front
- Replaces: 5U2Z-2V001-G, 5L8Z-2001-AA, 6L8Z-2001-A, BR-1047-B, BRF-1047-A


Mercury Brake Pads, Front Part Number: 8M6Z-2001-A
$68.61 MSRP: $109.17You Save: $40.56 (38%)Ships in 1-2 Business DaysProduct Specifications- Other Name: Kit - Brake Lining; Disc Brake Pad Set, Front; Disc Brake Pad Kit; Front Pads; Disc Brake Pad Set
- Manufacturer Note: Warranty Eligible
- Position: Front


Mercury Brake Pads, Front Part Number: 5U2Z-2V001-J
$44.51 MSRP: $66.65You Save: $22.14 (34%)Ships in 1-2 Business DaysProduct Specifications- Other Name: Kit - Brake Lining; Disc Brake Pad Set, Front; Front Pads
- Position: Front
- Replaces: 5U2Z-2V001-D, 8G1Z-2001-B, BRF-1403, BR-1070


Mercury Brake Pads, Rear Part Number: 4U2Z-2V200-CA
$44.51 MSRP: $66.65You Save: $22.14 (34%)Ships in 1 Business DayProduct Specifications- Other Name: Kit - Brake Shoe And Lining; Disc Brake Pad Set, Rear; Rear Pads
- Position: Rear
- Replaces: 4W1Z-2200-AA, 6W1Z-2200-AA, BRF-1040


Mercury Brake Pads, Front Part Number: 2U2Z-2V001-YA
$44.51 MSRP: $66.65You Save: $22.14 (34%)Ships in 1-2 Business DaysProduct Specifications- Other Name: Kit - Brake Lining; Disc Brake Pad Set, Front; Front Pads; Pad
- Manufacturer Note: Ford Retail Spec
- Position: Front
- Replaces: 1L2Z-2001-BA, 1L2Z-2001-AA, 2L2Z-2001-BA, 7L2Z-2001-A, BRF-833-B


Mercury Brake Pads Part Number: AM6Z-2001-A
$95.03 MSRP: $143.33You Save: $48.30 (34%)Product Specifications- Other Name: Kit - Brake Lining; Disc Brake Pad Kit; Disc Brake Pad Set; Front Pads
- Manufacturer Note: Warranty Eligible


Mercury Brake Pads, Rear Part Number: 6U2Z-2V200-B
$45.79 MSRP: $66.65You Save: $20.86 (32%)Ships in 1 Business DayProduct Specifications- Other Name: Kit - Brake Lining; Disc Brake Pad Set, Rear; Rear Pads
- Manufacturer Note: Ford Retail Spec
- Position: Rear
- Replaces: 6E5Z-2200-C, 9E5Z-2200-A, 6E5Z-2200-B, BE5Z-2200-A, BRF-24


Mercury Brake Pads, Front Part Number: 6U2Z-2V001-F
$45.79 MSRP: $66.65You Save: $20.86 (32%)Ships in 1-2 Business DaysProduct Specifications- Other Name: Kit - Brake Lining; Disc Brake Pad Set, Front; Front Pads
- Position: Front
- Replaces: 6E5Z-2001-B, 6U2Z-2V001-D, 7E5Z-2001-A, 9E5Z-2001-A, 6E5Z-2001-C, BR-1164-B, BRF-1164


Mercury Brake Pads, Rear Part Number: 5U2Z-2V200-D
$45.79 MSRP: $66.65You Save: $20.86 (32%)Ships in 1 Business DayProduct Specifications- Other Name: Kit - Brake Shoe And Lining; Disc Brake Pad Set, Rear; Rear Pads; Disc Brake Pad Set
- Manufacturer Note: Ford Retail Spec
- Position: Rear
- Replaces: 5F9Z-2200-B, 7F9Z-2200-A, BRF-1071


Mercury Brake Pads Part Number: 1U2Z-2V200-SA
$30.64 MSRP: $42.39You Save: $11.75 (28%)Ships in 1-2 Business DaysProduct Specifications- Other Name: Kit - Brake Shoe And Lining; Disc Brake Pad Set; Rear Pads
- Replaces: XU2Z-2V200-XA

Mercury Brake Pads, Front Part Number: CU2Z-2V001-H
$44.51 MSRP: $66.65You Save: $22.14 (34%)Ships in 1-2 Business DaysProduct Specifications- Other Name: Kit - Brake Lining; Disc Brake Pad Set, Front; Disc Brake Pad Kit; Disc Brake Pad Set; Front Pads
- Position: Front
- Replaces: AL8Z-2001-A, BR-1047-C, BRF-1406, CU2Z-2V001-D, G2MZ-2V001-P


Mercury Brake Pads, Rear Part Number: 5U2Z-2V200-J
$44.51 MSRP: $66.65You Save: $22.14 (34%)Ships in 1-3 Business DaysProduct Specifications- Other Name: Pad - Brake; Disc Brake Pad Set, Rear; Rear Pads
- Position: Rear
- Replaces: BR-1055, 5L8Z-2200-AA, 5U2Z-2V200-G, 6L8Z-2200-B, BRF-1055

Mercury Brake Pads, Front Part Number: 4U2Z-2V001-A
$44.51 MSRP: $66.65You Save: $22.14 (34%)Ships in 1-2 Business DaysProduct Specifications- Other Name: Kit - Brake Lining; Disc Brake Pad Set, Front; Front Pads
- Position: Front
- Replaces: 3W1Z-2001-AA, 4U2Z-2V001-BA, BR-931-B, BRF-931-A, 6W1Z-2001-A, G2MZ-2V001-Z

Mercury Brake Pads, Front Part Number: 1U2Z-2V001-TA
$44.51 MSRP: $66.65You Save: $22.14 (34%)Ships in 1-2 Business DaysProduct Specifications- Other Name: Pad; Disc Brake Pad Set, Front; Front Pads
- Manufacturer Note: excludes electric
- Position: Front
- Replaces: 1L2Z-2001-CA, 2L5Z-2001-AA, BRF-652, XL2Z-2B121-BA, XL2Z-2001-BA, XL2Z-2B120-BA, XU2Z-2V001-ARA

Mercury Brake Pads, Front Part Number: 1U2Z-2V001-JA
$44.51 MSRP: $66.65You Save: $22.14 (34%)Ships in 1-2 Business DaysProduct Specifications- Other Name: Pad; Disc Brake Pad Set, Front; Front Pads
- Position: Front
- Replaces: 2F1Z-2001-AA, 3F1Z-2001-BA, 5F1Z-2001-AA, 4F1Z-2B121-AA, BRF-1387, XU2Z-2V001-BEA


Mercury Brake Pads, Front Part Number: 1U2Z-2V001-BB
$44.51 MSRP: $66.65You Save: $22.14 (34%)Ships in 1-2 Business DaysProduct Specifications- Other Name: Kit - Brake Lining; Disc Brake Pad Set, Front; Front Pads
- Position: Front
- Replaces: BRF-1396, 4L8Z-2001-AA, 1U2Z-2V001-BA, 6L8Z-2001-BA, BR-11439, BRF-1400, YL8Z-2001-BA
Mercury Brake Pads, Front Part Number: BU2Z-2V001-C
$45.07 MSRP: $66.65You Save: $21.58 (33%)Ships in 1-2 Business DaysProduct Specifications- Other Name: Kit - Brake Lining; Disc Brake Pad Set, Front; Front Pads
- Position: Front
- Replaces: 4L5Z-2001-AA, BRF-1394, 1L5Z-2001-BB, 3L5Z-2001-AA, 4L2Z-2001-BA, 3L2Z-2001-AA, 6L5Z-2001-A, BRF-833, BRF-1399, 6L5Z-2001-B, BRF-1479, BL5Z-2001-A, BR-833-B, BU2Z-2V001-B

Mercury Brake Pads, Rear Part Number: 8L2Z-2V200-B
$45.79 MSRP: $66.65You Save: $20.86 (32%)Ships in 1-2 Business DaysProduct Specifications- Other Name: Pad - Brake; Disc Brake Pad Set, Rear; Rear Pads
- Position: Rear
- Replaces: 3L2Z-2200-BA, BR-1109-B, 1L2Z-2200-AA, 6L2Z-2200-B, 7L2Z-2200-A, 8L2Z-2200-A, 8L2Z-2200-AB, BRF-1109, BRF-881, 8L2Z-2V200-A


Mercury Brake Pads, Rear Part Number: 1U2Z-2V200-PA
Product Specifications- Other Name: Kit - Brake Shoe And Lining; Disc Brake Pad Set, Rear; Disc Brake Pad Set; Rear Pads
- Manufacturer Note: Rear disc
- Position: Rear
- Replaces: XU2Z-2V200-YA


Mercury Brake Pads, Front Part Number: 1U2Z-2V001-LA
Product Specifications- Other Name: Pad; Disc Brake Pad Set, Front; Disc Brake Pad Set; Front Pads
- Manufacturer Note: except Police & SHO
- Position: Front
- Replaces: BRF-1412, F4DZ-2001-A, XU2Z-2V001-BGA, YF1Z-2001-AA
| Page 1 of 3 |Next >
1-20 of 47 Results
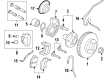
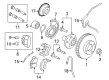
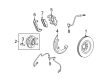
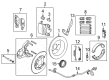
Mercury Brake Pads
If you own Mercury and want to keep it in top shape, choosing OEM Brake Pads is a smart move. They are precisely engineered and follow strict factory standards. They are made in advanced facilities that use cutting edge technology. Each part goes through thorough testing to confirm strength and safety, so you can trust it. FordPartsDeal.com gives you genuine Mercury Brake Pads at some of the affordable online prices without cutting quality. Every OEM Mercury part includes the manufacturer's warranty, easy returns, and super-fast delivery. So why wait? Shop now and get your vehicle back to peak condition.
Mercury Brake Pads cling and cut quickly and maintain each stop relaxed and straight. Mercury began life in the late 1930s with cars that made everyday rides a dream with silky plush suspensions, generous wheelbases, and family and luggage-wide cabins. Mercury established a name for having a balance between high style and low cost tags that allowed drivers to experience the luxury of a calm ride without the luxury price tag but still be able to rely on the drive train to perform on poor roads. Mercury interiors silenced road noise, potholes were absorbed by thick seat cushions, and the user-friendly dash allowed all switches to be easily reached in relaxed positions during long distance haulage. Mercury continued to develop, launching more substantial frames, less noisy glass, and softer seats decade after decade, until the badge finally retired in 2011, only to reverberate in the minds of fans. Brake Pads squeeze friction material around turning discs and transform movement into heat and remove speed before the wheels can slip, thus the car remains predictable in the rain, traffic, or during an uphill sprint. Brake Pads have nonmetallic, semi-metallic, or ceramic lining, each of which trades off bite, dust, noise, and lifespan depending on the driving habit. The brake pad features wear indicators in the form of squeal tabs which scream long before the braking force falls into danger zones. The Brake Pads are mounted with clips, springs, and shims that are tightened by torque, as loose hardware robs feel and encourages chatter.
Mercury Brake Pads Parts and Q&A
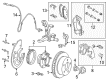
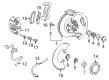
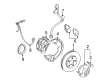
- Q: How to service the front brake pads on Mercury Cougar?A:First service the front brake pads by unscrewing wheel nuts then raising and supporting the vehicle before wheel removal. The service begins when you remove a brake pad retaining clip after disconnecting a brake pad wear sensor electrical connector. Securing the caliper aside will prevent flexible brake hose damage while you remove bolt covers to detach the caliper by unfastening the bolts. The next procedure requires removal of brake pads starting with the inner component and moving to the outer component. Installation requires a complete piston stroke on the brake caliper with proper cleaning of brake disc faces before installing the inner brake pad followed by the outer brake pad. Attach the caliper with its bolts and place the bolt covers back. Complete the installation by installing the pad retaining clip if you have a brake pad wear sensor electrical connector.
- Q: How to service and repair the front brake pads on Mercury Mariner?A:The service and repair process for front brake pads starts with using specific manufacturer-approved clean brake fluid which avoids previously drained fluid to stop conditions of contamination and damage. You can collect brake fluid with a suitable suction tool to take out enough fluid to make the master cylinder reservoir fill up to half of its capacity. The next step involves taking off the wheel combined with the tire. It is essential to handle the brake pad anti-rattle spring with care when removal is required because tools should be avoided to prevent damage and removal begins with center force application for left-hand side until the lower spring portion pulls outward. The same spring release procedure should be applied to the upper section for right-hand side operations. Secure the caliper away from the brake hose before removing both guide pin bushing caps and two brake caliper guide pin bolts by using mechanic wire for support. Rotate away the brake pads to evaluate their condition while deciding on new replacements based on findings. A proper tool should be used for compressing the brake caliper piston through the boot while inspecting the brake disc for repair or new disc selection. During installation the technician should clean and inspect the brake caliper anchor plate before applying a specified lubricating material onto the four brake pad contact locations. The brake flexible hose must not be twisted while you position the brake pads on the caliper before setting the caliper onto the anchor plate. Attach the two brake caliper guide pin bolts and bushing caps while securing them with 50 Nm (37 lb-ft) torque. You should put the brake pad anti-rattle spring tab into the brake caliper cavity before twisting it to position (left side upper and right side lower) then lower and inward press to achieve a latch. Check that the spring is properly latched through pulling before adding clean specified brake fluid into the master cylinder reservoir. After that reinstall the wheel and tire to perform a brake test for normal functionality.