FordParts
My Garage
My Account
Cart
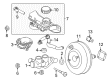
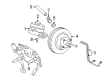
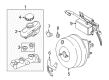
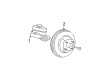
OEM Mercury Brake Master Cylinder
- Select Vehicle by Model
- Select Vehicle by VIN
Select Vehicle by Model
orMake
Model
Year
Select Vehicle by VIN
For the most accurate results, select vehicle by your VIN (Vehicle Identification Number).
56 Brake Master Cylinders found


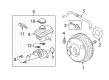
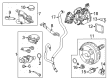
Mercury Master Cylinder Part Number: 8L8Z-2140-A
$137.16 MSRP: $230.91You Save: $93.75 (41%)Product Specifications- Other Name: Kit - Master Cylinder Repair; Brake Master Cylinder


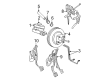
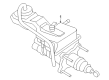
Mercury Master Cylinder Part Number: 8L2Z-2140-B
$134.81 MSRP: $221.82You Save: $87.01 (40%)Product Specifications- Other Name: Kit - Master Cylinder Repair; Brake Master Cylinder; Brake Reservoir; Master Cylinder Assembly
- Manufacturer Note: Service Kit
- Replaces: 6L2Z-2140-B

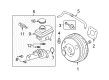
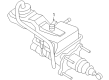
Mercury Master Cylinder Part Number: 9L8Z-2140-A
$147.65 MSRP: $242.95You Save: $95.30 (40%)Product Specifications- Other Name: Kit - Master Cylinder Repair; Brake Master Cylinder


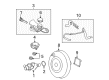
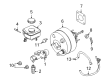
Mercury Master Cylinder Part Number: 9E5Z-2140-C
$150.28 MSRP: $247.27You Save: $96.99 (40%)Ships in 1-2 Business DaysProduct Specifications- Other Name: Cylinder Assembly - Master; Brake Master Cylinder
- Replaces: 6E5Z-2140-BA


Mercury Master Cylinder Part Number: AE5Z-2140-A
$185.06 MSRP: $307.27You Save: $122.21 (40%)Ships in 1-2 Business DaysProduct Specifications- Other Name: Cylinder Assembly - Master; Brake Master Cylinder

Mercury Master Cylinder Part Number: 4L2Z-2140-BA
$142.55 MSRP: $234.55You Save: $92.00 (40%)Ships in 1-3 Business DaysProduct Specifications- Other Name: Kit - Master Cylinder Repair; Brake Master Cylinder
- Replaces: 2L2Z-2140-AB
Mercury Master Cylinder Part Number: 9E5Z-2140-A
$143.14 MSRP: $235.53You Save: $92.39 (40%)Ships in 1-3 Business DaysProduct Specifications- Other Name: Cylinder Assembly - Master; Brake Master Cylinder

Mercury Cylinder Assembly - Master Part Number: AW1Z-2140-A
$172.38 MSRP: $283.64You Save: $111.26 (40%)Ships in 1-2 Business DaysProduct Specifications- Other Name: CYLINDER ASY - MASTER
- Replaces: 6W1Z-2140-BA, BRMC-62, 1W1Z-2140-BA

Mercury Master Cylinder Part Number: 9L2Z-2004-A
$293.46 MSRP: $487.27You Save: $193.81 (40%)Ships in 1-2 Business DaysProduct Specifications- Other Name: Kit - Master Cylinder Repair; Brake Master Cylinder
- Replaces: F57Z-2140-B, F67Z-2140-JA

Mercury Master Cylinder Part Number: 9L8Z-2140-C
$114.78 MSRP: $158.78You Save: $44.00 (28%)Ships in 1-2 Business DaysProduct Specifications- Other Name: Kit - Master Cylinder Repair; Brake Master Cylinder

Mercury Master Cylinder Part Number: 6E5Z-2140-E
$113.68 MSRP: $157.26You Save: $43.58 (28%)Ships in 1-2 Business DaysProduct Specifications- Other Name: Cylinder Assembly - Master; Brake Master Cylinder
- Replaces: 6E5Z-2140-D

Mercury Master Cylinder Part Number: 6L8Z-2140-C
$169.13 MSRP: $233.98You Save: $64.85 (28%)Ships in 1-2 Business DaysProduct Specifications- Other Name: Kit - Master Cylinder Repair; Brake Master Cylinder

Mercury Master Cylinder Part Number: F7AZ-2140-AA
Product Specifications- Other Name: Cylinder Assembly - Master; Brake Master Cylinder

Mercury Master Cylinder Part Number: 6W1Z-2140-AA
Product Specifications- Other Name: Cylinder Assembly - Master; Brake Master Cylinder
- Manufacturer Note: w/ Traction Control - less IVD
- Replaces: 1W1Z-2140-AA


Mercury Master Cylinder Part Number: 9M6Z-2140-A
$164.99 MSRP: $262.00You Save: $97.01 (38%)Product Specifications- Other Name: Kit - Master Cylinder Repair; Brake Master Cylinder
- Manufacturer Note: Service Kit


Mercury Master Cylinder Part Number: F5AZ-2140-D
Product Specifications- Other Name: Cylinder Assembly - Master; Brake Master Cylinder


Mercury Master Cylinder Part Number: 9E5Z-2140-B
Product Specifications- Other Name: Kit - Master Cylinder Repair; Brake Master Cylinder


Mercury Master Cylinder Part Number: 8M6Z-2140-A
Product Specifications- Other Name: Cylinder Assembly - Master; Brake Master Cylinder


Mercury Master Cylinder Part Number: 5M6Z-2140-B
Product Specifications- Other Name: Cylinder Assembly - Master; Brake Master Cylinder
- Replaces: 5M6Z-2140-AA


Mercury Master Cylinder Part Number: 2F2Z-2140-AA
Product Specifications- Other Name: Cylinder Assembly - Master; Brake Master Cylinder
- Manufacturer Note: Master cylinder, w/ IVD
| Page 1 of 3 |Next >
1-20 of 56 Results
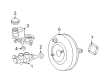
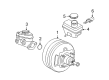
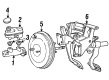
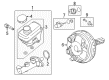
Mercury Brake Master Cylinder
If you own Mercury and want to keep it in top shape, choosing OEM Brake Master Cylinder is a smart move. They are precisely engineered and follow strict factory standards. They are made in advanced facilities that use cutting edge technology. Each part goes through thorough testing to confirm strength and safety, so you can trust it. FordPartsDeal.com gives you genuine Mercury Brake Master Cylinder at some of the affordable online prices without cutting quality. Every OEM Mercury part includes the manufacturer's warranty, easy returns, and super-fast delivery. So why wait? Shop now and get your vehicle back to peak condition.
Mercury Brake Master Cylinder converts the simple pedal pressure to effective hydraulic stopping power each and every time. Mercury was born in 1938 and established a niche with cars that had a combination of sharp styling and casual ride quality in their everyday use. Shops were abuzz with the new cabins introduced by Mercury to dampen down noise and enable the drivers to feel in control on long trips. Mercury continued to make comfort forward through Cougars to Grand Marquis without alienating everyday buyers with the conversation. Mercury had decades to juggle between spirited handling and luxurious suspension, and this proved that road manners and value could go hand in hand with families. The badge remained memorable due to its Roman mythology flair, mid-size proportions, regular technology adjustments, and a continuous effort to render the act of cruising easy. Buyers enjoyed the fact that the cabin controls were light, the highways became quiet, and the long weekends were not followed by sore backs and tiredness. Brake Master Cylinder is placed in front of the vacuum booster where there is fluid that will immediately build pressure when the pedal is dropped. Brake Master Cylinder paths the fluid in two paths, therefore ensuring that failure on one side does not rob all of the stopping power to ensure faith in traffic and steep hills. Brake Master Cylinder is dependent on tight seals and simple piston bore to translate motion to pressure; thus, leaks, air, or wear are instantly required. Brake Master Cylinder also makes it easy to maintain as the reservoir is easily visible to the drivers before the problem escalates.
Mercury Brake Master Cylinder Parts and Q&A
- Q: How to service and repair the brake master cylinder on Mercury Mariner?A:A vehicle repair process for the brake master cylinder starts with using specific manufacturer-recommended clean brake fluid which excludes repeatedly used brake fluid to maintain system purity. Use a suitable vacuum device following the disconnect of the brake fluid threshold warning switch's electrical connection to drain fluid from the reservoir. You need to disconnect and interpose the manual transmission clutch master cylinder feed. New brake installations require the brake fluid reservoir removal prior to disconnecting the two brake tube fittings while plugging both brake tubes and master cylinder ports. New brake master cylinder nuts should be installed before tightening them to 30 Nm (22 lb-ft) while the fittings should reach 23 Nm (17 lb-ft). The procedure for installation consists of removing the brake master cylinder assembly while you should reverse the removal steps by bleeding the master cylinder together with the clutch master cylinder if your vehicle has one. The fluid should be handled with care because it has the potential to harm paintwork along with plastic surfaces. Users must promptly wash away any spillage with water. Users must contact 1-800-959-3673 to access emergency medical information about Ford/Motorcraft products while referring to the Material Safety Data Sheet (MSDS) to obtain additional details.
- Q: How to service and repair the brake master cylinder on Mercury Cougar?A:Before servicing or repairing the brake master cylinder take necessary precautions against brake fluid damage to paintwork since any fluid spillage needs immediate cold water cleansing. First detach the electrical connector and then remove the filler cap while also taking off the reservoir cap. Drain the reservoir by using an appropriate vacuum mechanism. The feed hose of the clutch master cylinder needs disconnecting from manual transaxle vehicles. Cap both tube connections while preventing fluid loss or dirt contamination before breaking the connections of the master cylinder brake tubes. Discharging brake booster vacuum starts with taking out the vacuum hose while also removing the fluid reservoir along with the master cylinder assembly. The reservoir needs detachment from the master cylinder by lifting both retaining clips before pulling it off while discarding the 0-ring seals. New 0-ring seals are necessary before installation when the vacuum seal position and mating faces must be clean before performing the removal steps backward. After completing assembly you need to perform a brake system bleeding.


Related Mercury Parts
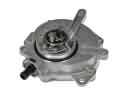 Mercury Vacuum Pump
 Mercury ABS Reluctor Ring
 Mercury ABS Sensor
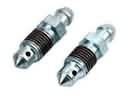 Mercury Brake Bleeder Screw
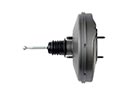 Mercury Brake Booster
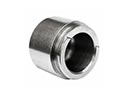 Mercury Brake Caliper Piston
 Mercury Brake Master Cylinder Repair Kit
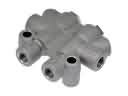 Mercury Brake Proportioning Valve
 Mercury Hydraulic Hose
 Mercury Parking Brake Cable
 Mercury Parking Brake Shoes
 Mercury Wheel Stud