My Garage
Cart
Make sure this part fits

Ford F4AZ-6701-A
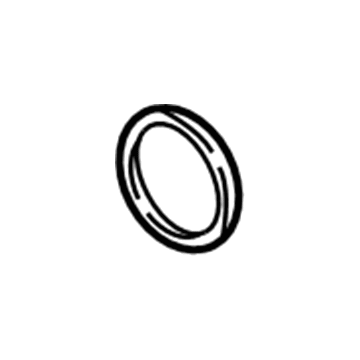
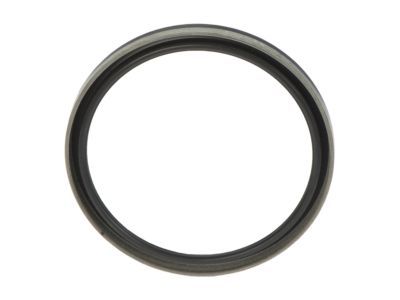
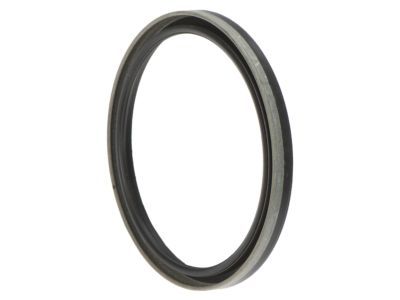
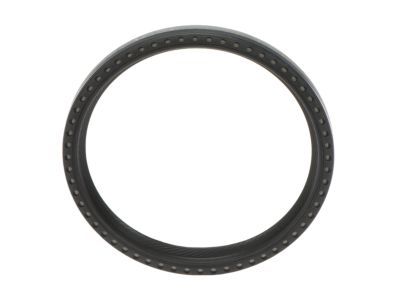
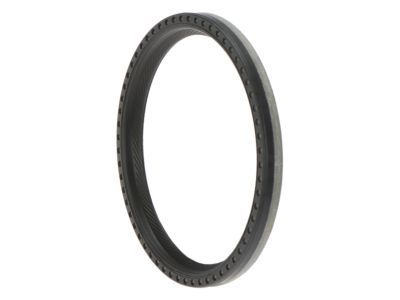
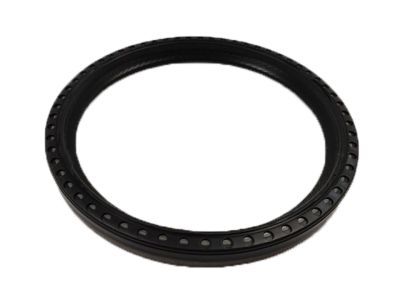
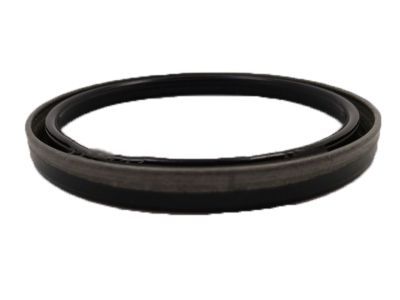
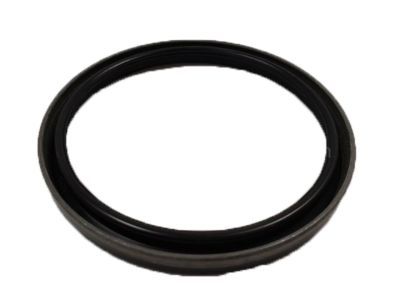
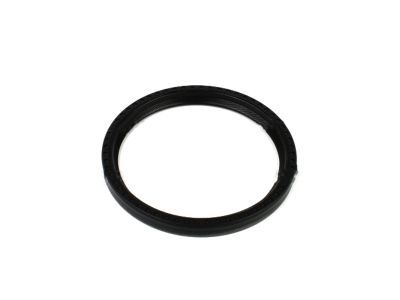
Rear Main Seal

1992-2019 Ford F4AZ6701A

Customer Questions & Expert Answers (31)
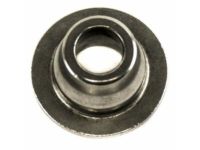
Ford F4AZ-6701-A Rear Main Seal
  • Part Description
    Seal Assembly - Crankshaft Oil; Engine Crankshaft Seal, Rear; Timing Cover Gasket; Timing Cover Seal
  • Base No.
    6701
  • Position
    Rear
  • Replaces
    F3AZ-6701-B
  • Manufacturer
    Ford
Make sure this part fits
$28.61 MSRP: $41.65
You Save: $13.04 (32%)
Ships in 1-2 Business Days
1
ADD TO CART
  • Related Parts
  • Product Specifications
  • Vehicle Fitment
  • Customer Questions & Expert Answers
  • Product Specifications

    BrandGenuine Ford
    Base No.6701
    Manufacturer Part NumberF4AZ-6701-A
    Part DescriptionSeal Assembly - Crankshaft Oil; Engine Crankshaft Seal, Rear; Timing Cover Gasket; Timing Cover Seal
    Other NamesOil Seal; Crankshaft Seal; Rear Seal; Timing Cover Seal; Oil Pan Seal.
    Item Dimensions8.4 x 6.7 x 1.0 inches
    Item Weight0.30 Pounds
    PositionRear
    ConditionNew
    Fitment TypeDirect Replacement
    ReplacesF3AZ-6701-B
    ManufacturerFord
    SKUF4AZ-6701-A
    WarrantyThis genuine Ford part is guaranteed by Ford's factory warranty.
    Shipping & ReturnShipping Policy Return Policy
    Warning: California's Proposition 65
  • Vehicle Fitment

    Year Make Model Trim Engine
    1995-2000 Ford ContourGL, GL Sport, LX, LX Sport, SE, Sport, SVT6 Cyl 2.5 L GAS
    1992-2011 Ford Crown VictoriaBase, Fleet, LWB, LX, LX Sport, Police Interceptor, S, Special Edition, Touring Sedan8 Cyl 4.6 L CNG, 8 Cyl 4.6 L FLEX, 8 Cyl 4.6 L GAS
    2003-2014 Ford E-150Base, Chateau, XL, XLT8 Cyl 4.6 L FLEX, 8 Cyl 4.6 L GAS, 8 Cyl 5.4 L CNG, 8 Cyl 5.4 L FLEX, 8 Cyl 5.4 L GAS, 8 Cyl 5.4 L LPG
    1997-2002 Ford E-150 EconolineBase, XL8 Cyl 4.6 L GAS, 8 Cyl 5.4 L BI-FUEL, 8 Cyl 5.4 L GAS
    1997-2002 Ford E-150 Econoline Club WagonChateau, Custom, XL, XLT8 Cyl 4.6 L GAS, 8 Cyl 5.4 L BI-FUEL, 8 Cyl 5.4 L GAS
    2003-2014 Ford E-250Base8 Cyl 4.6 L FLEX, 8 Cyl 4.6 L GAS, 8 Cyl 5.4 L CNG, 8 Cyl 5.4 L FLEX, 8 Cyl 5.4 L GAS, 8 Cyl 5.4 L LPG
    2002, 1997-1999 Ford E-250 EconolineBase8 Cyl 5.4 L BI-FUEL, 8 Cyl 5.4 L CNG, 8 Cyl 5.4 L GAS
    2005, 2003 Ford E-350 Club WagonChateau, XL, XLT10 Cyl 6.8 L GAS
    1997-1998 Ford E-350 EconolineBase, XL10 Cyl 6.8 L GAS, 8 Cyl 5.4 L BI-FUEL, 8 Cyl 5.4 L CNG, 8 Cyl 5.4 L GAS
    1997-2002 Ford E-350 Econoline Club WagonChateau, Custom, XL, XL HD, XLT, XLT HD10 Cyl 6.8 L GAS, 8 Cyl 5.4 L BI-FUEL, 8 Cyl 5.4 L CNG, 8 Cyl 5.4 L GAS
    View More
  • Customer Questions & Expert Answers

    Q:
    Can you verify if F4AZ-6701-A is the right one for my car? Posted by FordPartsDeal Specialist
    A:
    Select Your Vehicle model to verify if part number F4AZ-6701-A fits your car.
    Posted by FordPartsDeal Specialist
    Q:
    How to service and repair the front crankshaft seal on Ford Crown Victoria? Posted by Customer
    A:
    Service work on the front crankshaft seal begins by eliminating the crankshaft pulley. The Front Cover Seal Remover Tool (part A) should be used to remove the front cover seal (part B). Application requires engine front cover (part A) alongside front oil seal (part B) to get treated with Super Premium SAE 5W-30 Motor Oil (part number XO-5W30-QSP) or an equivalent product meeting Ford specification WSS-M2C153-G. The Crankshaft Seal Replacer/Cover Aligner comes next to position the crankshaft front seal into the engine front cover. Finally, reinstall the crankshaft pulley.
    Posted by FordPartsDeal Specialist
    Q:
    How to Service and Repair a Crankshaft Seal with a Retainer Plate on Ford E-150? Posted by Customer
    A:
    The crankshaft main bearing seal service and repair process requires the first step to remove the oil pan installation. Use the Engine Support Bar to lower the engine and torque the four engine support insulator-to-support insulator bracket nuts to 90 Nm (66 lb-ft). The procedure begins by taking away the flexplate alongside the engine rear cover plate. Apply the Slide Hammer and Crankshaft Rear Oil Slinger Remover to eliminate both components: first the crankshaft oil slinger and then the crankshaft rear seal with the Slide Hammer and Crankshaft Rear Oil Seal Remover. Apply removal to the six bolts which secure the crankshaft rear seal retainer plate in position. A plastic scraper along with silicone gasket remover should be used to carefully clean sealing surfaces while making sure to prevent scratching with abrasive tools. The rear crankshaft seal retainer plate mating surface on the engine block receives a bead of gasket maker before tightening the six bolts to 10 Nm (89 lb-in) in the designated installation order. Use engine oil to moisten the new crankshaft rear seal together with crankshaft oil slinger through the use of Crankshaft Rear Oil Seal Installers and Crankshaft Rear Oil Slinger Installer. Install the engine rear cover plate together with the flexplate. Apply a 260.35 millimeter (10.25 inch) lift to the engine from the crankshaft pulley to the lower edge of the No. 1 crossmember after removing the four engine support insulator-to-support insulator bracket nuts. Finally, install the oil pan.
    Posted by FordPartsDeal Specialist
    Q:
    How to service the front crankshaft seal on Ford Explorer Sport Trac? Posted by Customer
    A:
    The first step for servicing the front crankshaft seal requires eliminating the crankshaft pulley. You must utilize the Crankshaft Front Oil Seal Remover to remove the previous crankshaft front seal which should be discarded. The process of installing the new front seal requires application of engine oil for lubrication purposes. The correct method of installing new crankshaft front seals requires both the Front Cover Aligner and Crankshaft Vibration Damper Installer tools. Finally, reinstall the crankshaft pulley.
    Posted by FordPartsDeal Specialist
    Q:
    How to Service and Repair the Main Bearing Crankshaft Seal on Ford Explorer? Posted by Customer
    A:
    A repair or service of the crankshaft main bearing seal requires flexplate removal first and then removal of both spacer plate and flexplate-to-crankshaft spacer. The original crankshaft rear seal lacks a metal speedy sleeve therefore removal of the sleeve is necessary when installing a replacement seal which contains one. Two screwdrivers or smaller pry bars should be used to safely remove the speedy sleeve by treating the crankshaft rear seal running surface with great caution to prevent scratching and damage which could produce oil leaks. The installation requires using an Oil Seal Remover to remove the crankshaft rear seal. A proper installation of a new crankshaft rear seal that contains a speedy sleeve requires cleaning the crankshaft rear sealing surface with extra-fine emery cloth or extra-fine 0000 steel wool followed by engine oil lubrication before each step. Fit the Adapter for 303-579 while using the Crankshaft Rear Oil Seal Screws which enables you to place the crankshaft rear seal on the adapter with the speedy sleeve installed. The speedy sleeve should be positioned on the crankshaft rear seal before insertion through the Crankshaft Rear Oil Seal Installer. The repair process concludes with reinstallation of the flexplate-to-crankshaft spacer along with the spacer plate and finally the flexplate.
    Posted by FordPartsDeal Specialist
    Q:
    How to service the front crankshaft seal on Mercury Grand Marquis? Posted by Customer
    A:
    The procedure to service front crankshaft seal begins with pulley crankshaft removal. The Crankshaft Front Oil Seal Remover should be employed to accomplish the removal of the crankshaft front seal. Clean engine oil should be used to lubricate both the engine front cover and the inner lip of the crankshaft front seal. The installation of a new crankshaft front seal into the engine front cover must be done with the Crankshaft Front Oil Seal Installer, Crankshaft Vibration Damper Installer and Front Cover Oil Seal Installer. Finally, reinstall the crankshaft pulley.
    Posted by FordPartsDeal Specialist
    Q:
    How to service the front crankshaft seal on Lincoln Town Car? Posted by Customer
    A:
    The service of front crankshaft seal requires the removal of crankshaft pulley as the first step. The Front Cover Seal Remover (part A) should be used to pull out the front cover seal (part B). The installation process requires front cover (part A) and inner lip of front oil seal (part B) lubrication with Super Premium SAE 5W-30 Motor Oil (part number XO-5W30-QSP) or WSS-M2C153-G equivalent quality oil. The Crankshaft Seal Replacer/Cover Aligner (part A) serves to mount part B the crankshaft front seal inside part C the engine front cover. Finally, reinstall the crankshaft pulley.
    Posted by FordPartsDeal Specialist
    Q:
    How to service the rear crankshaft seal with retainer plate on Mercury Grand Marquis? Posted by Customer
    A:
    The first step to work on the crankshaft rear seal with retainer plate requires depowering the fire suppression system to avoid personal injury. Install the vehicle onto a hoist in NEUTRAL position for removing the flexplate followed by the engine-to-transmission spacer plate. First use the Crankshaft Rear Oil Slinger Remover with Slide Hammer to remove the crankshaft oil slinger before using the same tool to extract the crankshaft rear seal. Place the Engine Lifting Bracket onto both RH and LH cylinder heads by removing the two engine mount nuts then feed the Engine Support Bar for lifting the engine. The drain plug needs installation followed by 23 Nm (17 lb-ft) of torque tightness. You should begin by detaching both pin-type wire harness retainers then remove the oil pan bolts in a specific order and finally lower the oil pan partially. Install the oil pump screen together with the pickup tube through the oil pan while disposing of both O-ring seal and gasket. The six bolts fastening the crankcase rear seal retainer plate need removal. A plastic scraping tool should be used to clean the sealing surfaces before applying gasket maker to the rear crankshaft seal retainer mating surface on the engine block. Lay the six crankcase rear seal retainer plate bolts initially but tighten them to 10 Nm (89 lb-in) using the specified sequence. Use the Crankshaft Rear Oil Seal Installers to put in the crankshaft rear seal that was treated with engine oil on its inner ring. Install the crankshaft oil slinger with the assistance of Crankshaft Rear Oil Slinger Installer. Install a new O-ring seal on the oil pan mating surface after cleaning before you position the oil pump screen with pickup tube into the oil pan. Use clean engine oil to lubricate this new O-ring seal. Apply clean engine oil to the new O-ring on the oil pan. Torque the oil pump screen attachment bolts to 10 Nm (89 lb-in) and the pump screen attachment bolt to the spacer at 25 Nm (18 lb-ft). After preparing the surfaces by applying silicone gasket and sealant on the rear seal retainer-to-cylinder block and engine front cover-to-cylinder block join points, allow the sealant to bond properly for four minutes to stop any leakage. The installation of oil pan bolts should begin with a initial torque to 20 Nm (177 lb-in) followed by an additional 60 degrees of rotation. Return the two wire harness retainers using pins and guide the engine mount studs before lowering the engine. Fasten the two engine mount nuts to 90 Nm (66 lb-ft) before reinstalling the engine-to-transmission spacer plate as well as the flexplate. Add clean engine oil to the unit while you start the motor for leak assessment. Proper repowering of a vehicle with a fire suppression system requires compliance with essential safety protocols.
    Posted by FordPartsDeal Specialist
    Q:
    How much silicone gasket and sealant should be applied to the oil pan for the 2009 Ford Escape? Posted by Customer
    A:
    Apply a 2.5 mm (0.09 in) bead of silicone gasket and sealant.
    Posted by FordPartsDeal Specialist
    See expert answers on similar Crankshaft Seal
    Q:
    What tools are used to install the new crankshaft rear seal for the 2009 Ford Crown Victoria? Posted by Customer
    A:
    The Crankshaft Rear Oil Seal Installers.
    Posted by FordPartsDeal Specialist
    See expert answers on similar Crankshaft Seal
    Q:
    What tool is used to extract the crankshaft oil slinger for the 2009 Ford E-250? Posted by Customer
    A:
    Utilize the Slide Hammer and Crankshaft Rear Oil Slinger Remover to extract the crankshaft oil slinger, which should be discarded.
    Posted by FordPartsDeal Specialist
    See expert answers on similar Crankshaft Seal
    Q:
    Where should silicone gasket and sealant be applied for the 2009 Ford E-250? Posted by Customer
    A:
    Apply it to the Woodruff key slot on the crankshaft pulley.
    Posted by FordPartsDeal Specialist
    See expert answers on similar Crankshaft Seal
    Q:
    What is the next step after removing the accessory drive belt for the 2009 Ford Expedition? Posted by Customer
    A:
    Remove the crankshaft pulley bolt and washer, discarding the bolt.
    Posted by FordPartsDeal Specialist
    See expert answers on similar Crankshaft Seal
    Q:
    What tool should be used to clean the sealing surfaces for the 2009 Ford F-250 Super Duty? Posted by Customer
    A:
    Use a plastic scraping tool to eliminate all traces of old sealant.
    Posted by FordPartsDeal Specialist
    See expert answers on similar Crankshaft Seal
    Q:
    How should the new crankshaft rear seal be prepared for installation for the 2009 Ford F-150? Posted by Customer
    A:
    Lubricate the inner lip of the new crankshaft rear seal with clean engine oil.
    Posted by FordPartsDeal Specialist
    See expert answers on similar Crankshaft Seal
    Q:
    What is the final step after installing the new crankshaft front seal for the 2009 Ford F-150? Posted by Customer
    A:
    Reinstall the crankshaft pulley.
    Posted by FordPartsDeal Specialist
    See expert answers on similar Crankshaft Seal
    Q:
    How is the crankshaft pulley installed for the 2009 Ford F-350 Super Duty? Posted by Customer
    A:
    Use the Crankshaft Vibration Damper Installer.
    Posted by FordPartsDeal Specialist
    See expert answers on similar Crankshaft Seal
    Q:
    What should be removed after positioning for the 2009 Ford Fusion? Posted by Customer
    A:
    Remove the flexplate or flywheel.
    Posted by FordPartsDeal Specialist
    See expert answers on similar Crankshaft Seal
    Q:
    What should be done after removing the crankshaft oil slinger for the 2009 Ford F-350 Super Duty? Posted by Customer
    A:
    Remove and discard the crankshaft rear seal using the Slide Hammer and the Crankshaft Rear Oil Seal Remover.
    Posted by FordPartsDeal Specialist
    See expert answers on similar Crankshaft Seal
    Q:
    How do you remove the old crankshaft front seal for the 2009 Ford Mustang? Posted by Customer
    A:
    Use the Crankshaft Front Oil Seal Remover to remove and discard the old crankshaft front seal.
    Posted by FordPartsDeal Specialist
    See expert answers on similar Crankshaft Seal
    Q:
    How should the sealing surfaces be cleaned for the 2009 Ford F-150? Posted by Customer
    A:
    Clean the sealing surfaces carefully with a plastic scraping tool to avoid scratches, and use silicone gasket remover and metal surface prep as directed on the packaging.
    Posted by FordPartsDeal Specialist
    See expert answers on similar Crankshaft Seal
    Q:
    What tool is used to install the crankshaft rear seal for the 2009 Ford Mustang? Posted by Customer
    A:
    Use the Crankshaft Rear Oil Seal Installer to install the seal.
    Posted by FordPartsDeal Specialist
    See expert answers on similar Crankshaft Seal
    Q:
    What is the final step after installing the seals and slinger for the 2009 Lincoln Navigator? Posted by Customer
    A:
    Reinstall the flexplate, tightening the 8 bolts to 80 Nm (59 lb-ft) in the specified sequence, and finally, reinstall the transmission.
    Posted by FordPartsDeal Specialist
    See expert answers on similar Crankshaft Seal
    Q:
    What should be removed after the transmission and oil pan for the 2009 Lincoln Navigator? Posted by Customer
    A:
    Take off the rear engine cover.
    Posted by FordPartsDeal Specialist
    See expert answers on similar Crankshaft Seal
    Q:
    What is the first step to service and repair the crankshaft main bearing seal for the 2009 Lincoln Town Car? Posted by Customer
    A:
    Position the vehicle on a hoist with the transmission in neutral.
    Posted by FordPartsDeal Specialist
    See expert answers on similar Crankshaft Seal
    Q:
    What does the disassembly and assembly of subassemblies involve for the 2001 Lincoln Town Car? Posted by Customer
    A:
    It involves servicing the cylinder head and piston, piston pin, and connecting rod assemblies.
    Posted by FordPartsDeal Specialist
    See expert answers on similar Crankshaft Seal
    Q:
    What is the first step to service the crankshaft main bearing seal for the 2009 Lincoln Town Car? Posted by Customer
    A:
    Ensure the vehicle is in NEUTRAL and positioned on a hoist.
    Posted by FordPartsDeal Specialist
    See expert answers on similar Crankshaft Seal
    Q:
    What should be done after removing the crankshaft pulley for the 2000 Mercury Sable? Posted by Customer
    A:
    Take out the crankshaft oil seal.
    Posted by FordPartsDeal Specialist
    See expert answers on similar Crankshaft Seal
    Q:
    How many bolts need to be removed to secure the crankshaft rear oil seal with retainer plate for the 2009 Mercury Mariner? Posted by Customer
    A:
    Remove the 6 bolts securing the crankshaft rear oil seal with retainer plate.
    Posted by FordPartsDeal Specialist
    See expert answers on similar Crankshaft Seal
    Q:
    What should be removed after positioning for the 2009 Mercury Milan? Posted by Customer
    A:
    Remove the flexplate or flywheel.
    Posted by FordPartsDeal Specialist
    See expert answers on similar Crankshaft Seal
    Q:
    What is the final step after installing the new crankshaft front seal for the 2009 Mercury Mountaineer? Posted by Customer
    A:
    Reinstall the crankshaft pulley.
    Posted by FordPartsDeal Specialist
    See expert answers on similar Crankshaft Seal
    If you have any questions about this product, please don't hesitate to ask us. We will be happy to help you!

OEM Ford F4AZ-6701-A, Excellent Performance and Perfect Fitment

To ensure reliability, purchase Ford part # F4AZ-6701-A Rear Main Seal. It is sometimes referred to as Ford Crankshaft Seal. For those Ford owners who aspire to maintain their vehicles in optimal shape, opting for OEM parts is a wise choice. Precisely engineered, these components adhere to stringent factory guidelines and are produced in state-of-the-art facilities using cutting-edge technologies. Moreover, they are subjected to thorough testing to certify their resilience and safety, thereby making them a dependable option for Ford owners.

FordPartsDeal.com is a leading supplier of genuine Ford parts such as Ford F4AZ6701A Rear Main Seal. A vast selection of genuine Ford parts is available on our website, all offered at discounted prices. Every OEM Ford part is covered by the manufacturer's warranty, which also applies to our hassle-free return policy. Enjoy fast delivery service, ensuring you get your parts when you need them. Your shopping experience here is guaranteed to be pleasurable. For detailed Ford parts information, click here.
Choose FordPartsDeal for discounted prices, exceptional service and fast delivery