FordParts
My Garage
My Account
Cart
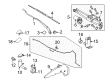
OEM Ford Wiper Pivot
Windshield Wiper Pivot- Select Vehicle by Model
- Select Vehicle by VIN
Select Vehicle by Model
orMake
Model
Year
Select Vehicle by VIN
For the most accurate results, select vehicle by your VIN (Vehicle Identification Number).
62 Wiper Pivots found


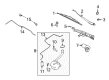
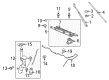
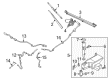
Ford Wiper Linkage Part Number: 8A8Z-17566-A
$153.36 MSRP: $236.67You Save: $83.31 (36%)Ships in 1-3 Business DaysProduct Specifications- Other Name: Arm And Pivot Shaft Assembly; Windshield Wiper Linkage; Front Transmission


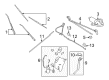
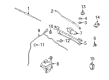
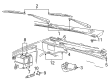
Ford Wiper Transmission, Front Part Number: 1C2Z-17566-AA
$82.55 MSRP: $120.17You Save: $37.62 (32%)Ships in 1 Business DayProduct Specifications- Other Name: Arm And Pivot Shaft Assembly; Windshield Wiper Linkage, Front; Pivot Arm; Arm & Pivot Assembly; Wiper Linkage
- Manufacturer Note: Assembly, RH and LH
- Position: Front
- Replaces: F2UZ-17566-A


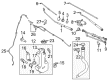
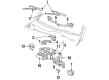
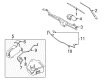
Ford Wiper Transmission Part Number: CK4Z-17566-B
$83.93 MSRP: $122.17You Save: $38.24 (32%)Product Specifications- Other Name: Arm And Pivot Shaft Assembly; Windshield Wiper Linkage; Wiper Linkage


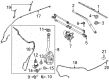
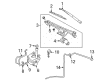
Ford Wiper Linkage Part Number: BB5Z-17566-A
$108.55 MSRP: $158.00You Save: $49.45 (32%)Product Specifications- Other Name: Arm And Pivot Shaft Assembly; Windshield Wiper Linkage; Front Transmission

Ford Wiper Transmission Part Number: EK4Z-17566-A
$90.00 MSRP: $131.00You Save: $41.00 (32%)Ships in 1-3 Business DaysProduct Specifications- Other Name: Arm And Pivot Shaft Assembly; Windshield Wiper Linkage; Wiper Linkage


Ford Wiper Transmission Part Number: 8R3Z-17566-A
$130.53 MSRP: $190.00You Save: $59.47 (32%)Ships in 1-3 Business DaysProduct Specifications- Other Name: Arm And Pivot Shaft Assembly; Windshield Wiper Linkage; Linkage; Wiper Linkage


Ford Wiper Transmission Part Number: BE8Z-17566-A
$217.92 MSRP: $320.00You Save: $102.08 (32%)Ships in 1-3 Business DaysProduct Specifications- Other Name: Arm And Pivot Shaft Assembly; Windshield Wiper Linkage; Linkage; Wiper Linkage


Ford Pivot Arm, Driver Side Part Number: D5UZ-17567-A
$70.42 MSRP: $97.42You Save: $27.00 (28%)Ships in 1-2 Business DaysProduct Specifications- Other Name: Arm And Pivot Shaft; Wiper Linkage
- Manufacturer Note: L.H.,
- Position: Driver Side


Ford Wiper Transmission Part Number: 6E5Z-17566-A
$101.22 MSRP: $140.03You Save: $38.81 (28%)Ships in 1-2 Business DaysProduct Specifications- Other Name: Linkage Assembly - Wiper; Windshield Wiper Linkage; Wiper Linkage


Ford Wiper Transmission, Driver Side Part Number: F6TZ-17567-AA
$123.91 MSRP: $171.42You Save: $47.51 (28%)Ships in 1-2 Business DaysProduct Specifications- Other Name: Arm And Pivot Shaft Assembly; Wiper Linkage; Linkage Assembly; Arm & Pivot Assembly
- Position: Driver Side
- Replaces: FOTZ-17567-A


Ford Wiper Transmission Part Number: 7L2Z-17566-AA
$77.18 MSRP: $105.02You Save: $27.84 (27%)Product Specifications- Other Name: Arm And Pivot Shaft Assembly; Windshield Wiper Linkage; Wiper Linkage; Linkage


Ford Wiper Transmission Part Number: JL3Z-17566-A
Product Specifications- Other Name: Arm And Pivot Shaft Assembly; Windshield Wiper Linkage; Wiper Linkage; Linkage
- Replaces: FL3Z-17566-A

Ford Wiper Transmission Part Number: FL3Z-17566-A
Product Specifications- Other Name: Arm And Pivot Shaft Assembly; Windshield Wiper Linkage; Wiper Linkage
- Replaced by: JL3Z-17566-A


Ford Wiper Pivot, Front Driver Side Part Number: F77Z-17567-BA
Product Specifications- Other Name: Arm And Pivot Shaft Assembly; Windshield Wiper Linkage, Front Left, Left
- Position: Driver Side

Ford Wiper Transmission, Passenger Side Part Number: F6TZ-17566-AB
Product Specifications- Other Name: Arm And Pivot Shaft Assembly; Wiper Linkage; Linkage Assembly; Arm & Pivot Assembly
- Position: Passenger Side
- Replaces: E8TZ-17566-A


Ford Wiper Transmission Part Number: BL3Z-17566-A
Product Specifications- Other Name: Arm And Pivot Shaft Assembly; Windshield Wiper Linkage; Linkage Assembly; Wiper Linkage


Ford Linkage Assembly Part Number: 9T1Z-17566-B
Product Specifications- Other Name: Linkage Assembly - Wiper; Windshield Wiper Linkage; Front Transmission; Wiper Linkage
- Replaces: 9T1Z-17566-A


Ford Wiper Transmission Part Number: 8W7Z-17566-A
Product Specifications- Other Name: Arm And Pivot Shaft Assembly; Windshield Wiper Linkage; Wiper Linkage; Arm & Pivot Assembly


Ford Wiper Transmission Part Number: 8L2Z-17566-A
Product Specifications- Other Name: Arm And Pivot Shaft Assembly; Windshield Wiper Linkage; Wiper Linkage; Front Transmission; Linkage

Ford Wiper Transmission Part Number: 6R3Z-17566-A
Product Specifications- Other Name: Arm And Pivot Shaft Assembly; Windshield Wiper Linkage; Linkage; Wiper Linkage
- Manufacturer Note: Less Motor
| Page 1 of 4 |Next >
1-20 of 62 Results
Ford Wiper Pivot
If you own Ford and want to keep it in top shape, choosing OEM Wiper Pivot is a smart move. They are precisely engineered and follow strict factory standards. They are made in advanced facilities that use cutting edge technology. Each part goes through thorough testing to confirm strength and safety, so you can trust it. FordPartsDeal.com gives you genuine Ford Wiper Pivot at some of the affordable online prices without cutting quality. Every OEM Ford part includes the manufacturer's warranty, easy returns, and super-fast delivery. So why wait? Shop now and get your vehicle back to peak condition.
Ford Wiper Pivot maintains the blades even and clear to ensure sharp and clear vision whenever the windshield is hit by rain. Ford has been pursuing practical developments since 1903, as opposed to glossy hype, and demonstrates that cars can be created that people can afford on a daily basis. In 1913, Ford changed production by introducing the moving assembly line, which saved money and allowed more drivers to sit behind the wheel. Ford has EcoBoost engines that kick but drink little fuel and thus, weekend excursions do not hurt pockets or the environment. Ford supports drivers using SYNC voice control and Co-Pilot360 assistant, which speak up when danger strikes. The F-150 Lightning is an electric truck that swaps fumes with immediate torque, demonstrating that the company can make power and responsibility a combination and the long trip remains enjoyable. When highways are pounded with storms, the Wiper Pivot focuses motor force in a sharp action sweeping away water before it can blind the driver. Its hard pins do not bend, bushings shake off grit and seals bar out corrosion on interminable cycles on salted winter roads. Since a Wiper Pivot will not bend even at highway speed, blades will follow straight and visibility is maintained high when there is sideways rain or a slushy spray. The experiment illustrates that a Wiper Pivot will last years longer than the surrounding rubber, relieving headaches caused by the need to replace the wipers and ensuring the driver is focused on the road and not the hood.
Ford Wiper Pivot Parts and Q&A
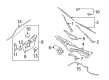
- Q: How is the Wiper Pivot and mounting arm installed and removed on Ford E-150?A:The windshield wiper mounting arm alongside its pivot shaft arrives for simultaneous installation. The first step is to separate the windshield wiper pivot arms from their position. Take off the cowl top vent panels before proceeding. The installation of the windshield wiper mounting arm and pivot shaft starts by removing the access cover from the dash panel followed by the retaining clip removal and lastly disconnecting it from the windshield wiper motor. You should detach the windshield wiper mounting arm and pivot shaft through unscrewing operations. During installation tighten screws all the way to 9 Nm torque value (80 lb-in) before finishing the installation according to the removal steps in reverse order.
- Q: How to service the Wiper Pivot and mounting arm on Ford Mustang?A:The right-hand and left-hand cowl vent screens must be removed before servicing wiper mounting arm and pivot shaft. You should remove the three bolts attaching the windshield wiper mounting arm and pivot shaft before installation while tightening them to 7 Nm (62 lb-in). You should begin by disconnecting the windshield wiper motor electrical connector followed by reversing the removal protocol to carry out the installation.


Related Ford Parts
 Ford Windshield Wiper
 Ford Door Lock Actuator
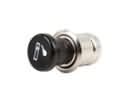 Ford Cigarette Lighter
 Ford Air Deflector
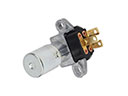 Ford Dimmer Switch
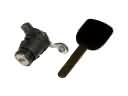 Ford Door Lock Cylinder
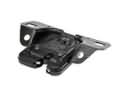 Ford Trunk Latch
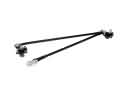 Ford Wiper Linkage
 Ford Hazard Warning Switch
 Ford Trunk Lid Latch
 Ford Weather Strip
 Ford Wiper Arm
Browse Ford Wiper Pivot by Models
Ranger Bronco Mustang Explorer Focus Fusion F-150 Maverick Escape Excursion Expedition Fiesta Taurus Flex Transit Connect Bronco Sport Explorer Sport Trac Crown Victoria Bronco II Escort F-250 Contour E-150 Econoline Explorer Sport F-350 Five Hundred Freestar Freestyle Mustang Mach-E Police Interceptor Utility Taurus X Windstar F-350 Super Duty Police Interceptor Sedan E-150 E-150 Club Wagon E-150 Econoline Club Wagon E-250 E-250 Econoline E-250 Econoline Club Wagon E-350 Club Wagon E-350 Econoline E-350 Econoline Club Wagon E-350 Super Duty E-Transit F-150 Lightning F-250 HD F-250 Super Duty Special Service Police Sedan Transit-150 Transit-250 Transit-350 Transit-350 HD