FordParts
My Garage
My Account
Cart
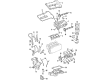
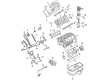
OEM Lincoln Oil Pan
Oil Drain Pan- Select Vehicle by Model
- Select Vehicle by VIN
Select Vehicle by Model
orMake
Model
Year
Select Vehicle by VIN
For the most accurate results, select vehicle by your VIN (Vehicle Identification Number).
34 Oil Pans found


Lincoln Oil Pan Part Number: 3W7Z-6675-BC
$87.79 MSRP: $127.78You Save: $39.99 (32%)Product Specifications- Other Name: Pan Assembly - Engine Oil; Engine Oil Pan
- Replaces: 3W7Z-6675-BB


Lincoln Oil Pan Part Number: 9L3Z-6675-A
$136.26 MSRP: $198.33You Save: $62.07 (32%)Product Specifications- Other Name: Pan Assembly - Engine Oil; Engine Oil Pan


Lincoln Oil Pan Part Number: 7T4Z-6675-A
$130.68 MSRP: $201.67You Save: $70.99 (36%)Ships in 1-3 Business DaysProduct Specifications- Other Name: Pan Assembly - Engine Oil; Engine Oil Pan
- Manufacturer Note: Use RTV Silicone Sealer In Place Of Gasket For This Application. Refer To Workshop Manual For Specification


Lincoln Oil Pan Part Number: 9L8Z-6675-A
$140.84 MSRP: $205.00You Save: $64.16 (32%)Ships in 1-2 Business DaysProduct Specifications- Other Name: Pan Assembly - Engine Oil; Engine Oil Pan
- Replaces: 6E5Z-6675-CA


Lincoln Oil Pan Part Number: AT4Z-6675-D
$149.88 MSRP: $218.17You Save: $68.29 (32%)Ships in 1-3 Business DaysProduct Specifications- Other Name: Pan Assembly - Engine Oil; Engine Oil Pan
- Replaces: AT4Z-6675-C

Lincoln Oil Pan Part Number: ML3Z-6675-D
$131.68 MSRP: $191.67You Save: $59.99 (32%)Ships in 1-2 Business DaysProduct Specifications- Other Name: Pan Assembly - Engine Oil; Engine Oil Pan
- Replaces: BR3Z-6675-B, BR3Z-6675-RB, BR3Z-6675-Q, BR3Z-6675-P, BR3Z-6675-RA, ML3Z-6675-A, ML3Z-6675-B


Lincoln Oil Pan Part Number: CM5Z-6675-D
$117.58 MSRP: $180.95You Save: $63.37 (36%)Ships in 1 Business DayProduct Specifications- Other Name: Pan Assembly - Engine Oil; Engine Oil Pan
- Replaces: CP9Z-6675-A, CM5Z-6675-B

Lincoln Pan Assembly - Engine Oil Part Number: KT4Z-6675-F
$128.88 MSRP: $198.33You Save: $69.45 (36%)Ships in 1-2 Business DaysProduct Specifications- Other Name: [PAN ASY - ENGINE OIL]
- Replaces: KT4Z-6675-E, KT4Z-6675-C, KT4Z-6675-B, KT4Z-6675-A, KT4Z-6675-D


Lincoln Oil Pan Part Number: DG1Z-6675-F
$110.26 MSRP: $160.50You Save: $50.24 (32%)Ships in 1-2 Business DaysProduct Specifications- Other Name: Pan Assembly - Engine Oil; Engine Oil Pan
- Replaces: DG1Z-6675-D, DG1Z-6675-E

Lincoln Pan Assembly - Engine Oil Part Number: L1MZ-6675-C
$129.39 MSRP: $188.33You Save: $58.94 (32%)Ships in 1-2 Business DaysProduct Specifications- Other Name: PAN ASY - ENGINE OIL
- Replaced by: L1MZ-6675-F
Lincoln Oil Pan Part Number: FT4Z-6675-D
$132.82 MSRP: $193.33You Save: $60.51 (32%)Product Specifications- Other Name: Pan Assembly - Engine Oil
- Replaces: FT4Z-6675-A, FT4Z-6675-C, FT4Z-6675-B

Lincoln Oil Pan Part Number: K2GZ-6675-D
$133.97 MSRP: $195.00You Save: $61.03 (32%)Ships in 1-3 Business DaysProduct Specifications- Other Name: Pan Assembly - Engine Oil; Engine Oil Pan
- Replaces: K2GZ-6675-A

Lincoln Oil Pan Part Number: 9E5Z-6675-B
$135.11 MSRP: $196.67You Save: $61.56 (32%)Ships in 1-3 Business DaysProduct Specifications- Other Name: Pan Assembly - Engine Oil; Engine Oil Pan
- Replaces: 9E5Z-6675-A, 8E5Z-6675-A


Lincoln Oil Pan Part Number: AA5Z-6675-J
Product Specifications- Other Name: Pan Assembly - Engine Oil; Engine Oil Pan
- Replaces: AA5Z-6675-H


Lincoln Oil Pan Part Number: HL3Z-6675-A
$99.75 MSRP: $145.20You Save: $45.45 (32%)Product Specifications- Other Name: Pan Assembly - Engine Oil; Engine Oil Pan
- Manufacturer Note: Gasket Is RTV. Refer To Workshop Manual For Proper Specs


Lincoln Oil Pan, Lower Part Number: XW4Z-6675-BA
Product Specifications- Other Name: Pan Assembly - Engine Oil; Engine Oil Pan, Lower; Engine Oil Pan
- Position: Lower


Lincoln Oil Pan Part Number: 3L3Z-6675-BA
Product Specifications- Other Name: Pan Assembly - Engine Oil; Engine Oil Pan
- Manufacturer Note: With Oil Temp Sensor Provision


Lincoln Oil Pan Part Number: 2W4Z-6675-BA
Product Specifications- Other Name: Pan Assembly - Engine Oil; Engine Oil Pan
- Replaces: YW4Z-6675-AA


Lincoln Oil Pan Part Number: 2L1Z-6675-BA
Product Specifications- Other Name: Pan Assembly - Engine Oil; Engine Oil Pan
- Manufacturer Note: Less oil temp sensor provision
- Replaces: 2L1Z-6675-AA


Lincoln Oil Pan Part Number: 1L2Z-6675-BA
Product Specifications- Other Name: Pan Assembly - Engine Oil; Engine Oil Pan
| Page 1 of 2 |Next >
1-20 of 34 Results
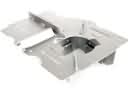
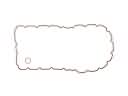
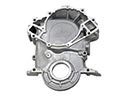
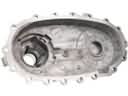
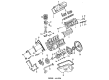
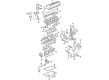
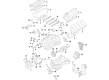
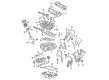
Lincoln Oil Pan
If you own Lincoln and want to keep it in top shape, choosing OEM Oil Pan is a smart move. They are precisely engineered and follow strict factory standards. They are made in advanced facilities that use cutting edge technology. Each part goes through thorough testing to confirm strength and safety, so you can trust it. FordPartsDeal.com gives you genuine Lincoln Oil Pan at some of the affordable online prices without cutting quality. Every OEM Lincoln part includes the manufacturer's warranty, easy returns, and super-fast delivery. So why wait? Shop now and get your vehicle back to peak condition.
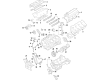
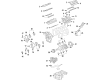
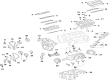
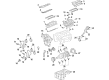
Lincoln Oil Pan stores engine lubricant and is on hand to protect powerplants against heat and friction. Lincoln lays emphasis on calmness, shutting the noises of the road, ensuring voices remain silent and music remains clear. Lincoln had been more than a century old when it acquired Ford and had climbed to heights of craftsmanship without having lost its polish. Lincoln boasts of Quiet Flight, a philosophy that cuts wind swirl and distractions allowing drivers to think about the journey. Lincoln equips the cabins with soft touch panels, crystal screens and Co-Pilot360 assistance that helps guide the car when drivers lose track. Every model year, softer materials, smarter code and hands-free highway help come due to the company and its ability to listen and adapt. Oil Pan serves to collect all the drops that the pump will dump through bearings, pistons and cam lobes during high revs. Oil Pan was cast aluminum and was resistant to heat, warping and tighter than old stamped steel trays. Cooling is also assisted by Oil Pan since the broad metal floor disperses the surface area of the liquid to bleed temperature till the next stroke. The failure of Oil Pans results in a leakage of the lubricant onto the pavements hence a healthy unit maintains its pressure and ensures that the engine is alive during every commute.
Lincoln Oil Pan Parts and Q&A
- Q: How to remove the oil pan in V6 engine on Lincoln MKX?A:The oil pan used on 2.7L engines is non-reusable, therefore if removed a new one must be fitted in its place. First securely jack up the vehicle and remove the engine oil then clean the oil drain plug and reinsert it. Pull out and, finally, discard the oil filter, and then, the lower engine splash shield and lastly the air filter housing. Subsequently, remove the crossover, and Y-pipe coupled with the converter assembly. On 2.7L engines, unbolt the radiator support panel and the guide pins and fasten the cooling module with plastic straps. Remove the underbody splash shield fasteners and both splash shields, right-side inner fender splash shield and roll restrictor mount. Loosen the stabilizer bar links from the struts, take off the rear crossmember and scribe the two subframe positions. A floor jack with jackstands are to be used to support the subframe and make sure the cooling module is safe. Take out the radiator lower support bolts, subframe rear bolts, and the front bolts and very slightly lower the subframe on both sides. The oil pan mounting bolts can be now removed, the sealant around can be broken, and then the oil pan can be gently lowered down while seeing to it; that it does not touch the exhaust. Replace the oil pump to oil pan seal. The engines that require this procedure to be done are 3.5L and 3.7L; first, unscrew the alternator nut and stud, second, while supporting the engine, shift the transaxle back slightly. Disconnect the transaxle roll restrictor mount and the catalytic converter although the transfer case support brackets in the 4WD version. Pull out the air compressor while keeping the lines on then, unbolt the driveplate inspection cover and several bell housing bolts if necessary. Open the bellhousing from the block, have to unscrew the oil pan fasteners and clean all the surface of the engine. Abuse offorce when mounting may also lead to scratching of the surfaces to which the machines will be mounted on. Replace a pan to oil pump seal on 2:7L engines, use RTV sealant in specific places and fit the oil pan and tighten corner bolts hard and soon. Tighten and check all bolts and fasteners and ensure they have been tightened to the right torque, replace self locking nuts that may be interfered with, replace the oil in the engine with new oil, replace the oil filter and do some leak checks after starting the engine.