FordParts
My Garage
My Account
Cart
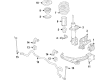
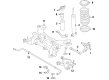
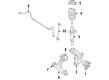
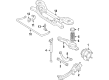
OEM Lincoln Shock Absorber
Suspension Shock Absorber- Select Vehicle by Model
- Select Vehicle by VIN
Select Vehicle by Model
orMake
Model
Year
Select Vehicle by VIN
For the most accurate results, select vehicle by your VIN (Vehicle Identification Number).
307 Shock Absorbers found


Lincoln Strut, Front Passenger Side Part Number: F2GZ-18124-AA
$156.91 MSRP: $258.18You Save: $101.27 (40%)Ships in 1-2 Business DaysProduct Specifications- Other Name: Shock Absorber Assembly; Suspension Strut, Front Right; Suspension Strut Assembly
- Position: Passenger Side
- Replaces: F2GZ-18124-G, F2GZ-18124-AS, F2GZ-18124-R, AST-24713, AST-24648, AST-24715, AST-84769, AST-24686, AST-24646, F2GZ-18124-K, F2GZ-18124-Z, F2GZ-18124-AB, F2GZ-18124-J, AST-24647, AST-24649, F2GZ-18124-H


Lincoln Shock Absorber, Rear Part Number: J2GZ-18125-C
$73.50 MSRP: $120.95You Save: $47.45 (40%)Ships in 1-2 Business DaysProduct Specifications- Other Name: Shock Absorber Assembly; Shock Absorber, Rear; Suspension Shock Absorber; Shock
- Manufacturer Note: RH/LH
- Position: Rear
- Replaces: ASH-24657, F2GZ-18125-F


Lincoln Shock Absorber, Rear Part Number: EG9Z-18125-L
$207.61 MSRP: $344.73You Save: $137.12 (40%)Product Specifications- Other Name: Shock Absorber Assembly; Suspension Shock Absorber, Rear Left, Rear Right; Shock
- Position: Driver Side
- Replaces: ASH-24635, ASH-24514, DG9Z-18125-B, EG9Z-18125-C, EG9Z-18125-B, ASH-24588

Lincoln Shock Absorber, Rear Part Number: EG9Z-18125-D
$213.28 MSRP: $346.91You Save: $133.63 (39%)Product Specifications- Other Name: Shock Absorber Assembly; Suspension Shock Absorber, Rear Left, Rear Right; Shock
- Manufacturer Note: (RH)
- Position: Passenger Side
- Replaces: ASH-24513, DG9Z-18125-A, ASH-24587, EG9Z-18125-A


Lincoln Strut, Driver Side Part Number: DA5Z-18124-K
$254.92 MSRP: $423.27You Save: $168.35 (40%)Ships in 1-2 Business DaysProduct Specifications- Other Name: Strut - Suspension
- Position: Driver Side
- Replaces: AST-12318, AST-12263, DA5Z-18124-B, DA5Z-18124-D


Lincoln Shock Absorber, Rear Part Number: 8T4Z-18125-A
$64.83 MSRP: $108.84You Save: $44.01 (41%)Ships in 1-2 Business DaysProduct Specifications- Other Name: Kit - Shock Absorber; Rear Suspension Strut and Shock Assembly; Complete Strut Set.; Shock; Suspension Shock Absorber
- Position: Rear
- Replaces: 7A1Z-18125-CA, 8A1Z-18125-C, 7T4Z-18125-AB, 8A1Z-18125-D, 8T4Z-18125-B, ASH-1158, ASH-1157, ASH-1160


Lincoln Strut, Front Driver Side Part Number: 7E5Z-18124-LH
$72.02 MSRP: $115.58You Save: $43.56 (38%)Ships in 1-2 Business DaysProduct Specifications- Other Name: Kit - Shock Absorber; Front Left Suspension Strut Assembly; Complete Strut Set.; Shock Absorber; Shock
- Position: Driver Side
- Replaces: 6E5Z-18124-BL, 6H6Z-18124-AL, 6E5Z-18124-AL, 7H6Z-18124-LH, 8E5Z-18124-L, AST-160, AST-159, AST-280, AST-389, AST-161, AST-336, 8H6Z-18124-B


Lincoln Shock Absorber, Gray/Red, Rear Part Number: 8W7Z-18125-D
$83.23 MSRP: $136.95You Save: $53.72 (40%)Ships in 1-2 Business DaysProduct Specifications- Other Name: Shock Absorber Assembly; Suspension Shock Absorber, Rear; Shock
- Position: Rear
- Replaces: ASH-1038, 4W7Z-18125-DA, 3U2Z-18125-AC, 3W7Z-18125-GA, 4W3Z-18125-AA, 6W1Z-18125-A, 7W1Z-18125-A, 7W7Z-18125-D, 8W3Z-18125-A, 7W3Z-18125-H, 8W7Z-18125-B, 8W7Z-18125-C, ASH-24537, ASH-1152, ASH-1041, ASH-24538, ASH-24536, ASH-267, ASH-12275, 6W7Z-18125-D, ASH-711


Lincoln Strut, Passenger Side Part Number: EJ7Z-18124-H
$82.08 MSRP: $176.36You Save: $94.28 (54%)Ships in 1-2 Business DaysProduct Specifications- Other Name: Shock Absorber Assembly
- Position: Passenger Side


Lincoln Shock Absorber, Front Part Number: 6L3Z-18124-AH
$99.89 MSRP: $164.36You Save: $64.47 (40%)Ships in 1-2 Business DaysProduct Specifications- Other Name: Shock Absorber Assembly; Front Suspension Shock; Strut and Shock Assembly Kit; Complete Strut.; Strut; Suspension Shock Absorber; Shock
- Position: Front
- Replaces: 6L3Z-18124-AG, 6L3Z-18124-CH, 6L3Z-18124-AE, ASH-1045


Lincoln Strut, Front Driver Side Part Number: AA8Z-18124-B
$105.23 MSRP: $168.87You Save: $63.64 (38%)Ships in 1-2 Business DaysProduct Specifications- Other Name: Shock Absorber Assembly - Front; Front Left Suspension Strut Kit; Complete Strut Set.; Shock Absorber
- Position: Driver Side
- Replaces: AA8Z-18124-D, AE9Z-18124-D, AE9Z-18124-B, AST-483, AST-429, AST-431


Lincoln Strut, Front Driver Side Part Number: BT4Z-18124-EC
$115.95 MSRP: $186.07You Save: $70.12 (38%)Ships in 1-2 Business DaysProduct Specifications- Other Name: Shock Absorber Assembly - Front; Front Left Suspension Strut Kit; Complete Strut Set.; Shock Absorber
- Position: Driver Side
- Replaces: AST-884, 9T4Z-18124-A


Lincoln Strut, Front Driver Side Part Number: BT4Z-18124-C
$117.56 MSRP: $216.36You Save: $98.80 (46%)Product Specifications- Other Name: Shock Absorber Assembly - Front; Front Left Suspension Strut Kit; Complete Strut Set.; Shock Absorber
- Position: Driver Side
- Replaced by: CT4Z-18124-A

Lincoln Strut, Front Driver Side Part Number: F2GZ-18124-AD
$151.76 MSRP: $284.56You Save: $132.80 (47%)Ships in 1-2 Business DaysProduct Specifications- Other Name: Shock Absorber Assembly - Front; Suspension Strut, Front Left; Suspension Strut Assembly
- Manufacturer Note: (LH)
- Position: Driver Side
- Replaces: F2GZ-18124-N, AST-24641, AST-24640, AST-24716, AST-24643, ASH-25828, AST-24684, F2GZ-18124-AR, F2GZ-18124-AC, F2GZ-18124-B, F2GZ-18124-C, F2GZ-18124-AE, F2GZ-18124-D, AST-24642, AST-24718, F2GZ-18124-A


Lincoln Shock Absorber, Rear Part Number: 6E5Z-18125-BA
$57.59 MSRP: $94.76You Save: $37.17 (40%)Ships in 1-2 Business DaysProduct Specifications- Other Name: Shock Absorber Assembly; Rear Suspension Shock Absorber Kit; Complete Strut Assembly.; Shock; Suspension Shock Absorber
- Position: Rear
- Replaces: AST-338, 6E5Z-18125-AA, 6H6Z-18125-AA, 8E5Z-18125-A, 7H6Z-18125-C, 7H6Z-18125-D, 7E5Z-18125-A, ASH-431, ASH-440, AE5Z-18125-D, AE5Z-18125-B, AE5Z-18125-E, AE5Z-18125-C, AE5Z-18125-A, AH6Z-18125-B, AE5Z-18125-G, AE5Z-18125-F, AST-179, AST-283, AH6Z-18125-A, ASH-422, ASH-424, ASH-421, AST-282, ASH-420, ASH-432, AST-177, AST-281, ASH-425, ASH-423


Lincoln Shock Absorber, Rear Part Number: CT4Z-18125-A
$61.91 MSRP: $101.87You Save: $39.96 (40%)Ships in 1 Business DayProduct Specifications- Other Name: Shock Absorber Assembly; Rear Suspension Shock Absorber Kit; Complete Strut Assembly.; Shock; Suspension Shock Absorber
- Position: Rear
- Replaces: BT4Z-18125-A, ASH-12225

Lincoln Strut, Front Passenger Side Part Number: 7E5Z-18124-RH
$64.38 MSRP: $105.93You Save: $41.55 (40%)Ships in 1-2 Business DaysProduct Specifications- Other Name: Kit - Shock Absorber; Front Right Suspension Strut Assembly; Complete Strut Kit.; Shock Absorber; Shock
- Position: Passenger Side
- Replaces: 6E5Z-18124-AR, 6H6Z-18124-AR, 6E5Z-18124-BR, 8E5Z-18124-R, AST-279, AST-164, AST-163, AST-337, AST-162, 7H6Z-18124-RL, 8H6Z-18124-A, AST-388


Lincoln Shock Absorber, Rear Part Number: 6L3Z-18125-L
$73.37 MSRP: $120.73You Save: $47.36 (40%)Ships in 1-2 Business DaysProduct Specifications- Other Name: Shock Absorber Assembly; Rear Suspension Shock; Strut and Shock Assembly Kit; Complete Strut.; Shock; Suspension Shock Absorber
- Position: Rear
- Replaces: 4L3Z-18125-EA, 4L3Z-18125-FA, 4L3Z-18125-DA, 5L3Z-18125-GA, 5L3Z-18125-EA, 5L3Z-18125-FA, 5L3Z-18125-DA, 6L3Z-18125-KA, ASH-793, ASH-810, ASH-794, ASH-795, ASH-847, 6L3Z-18125-N


Lincoln Shock Absorber, Rear Part Number: 5L3Z-18125-BA
$74.26 MSRP: $122.18You Save: $47.92 (40%)Ships in 1-2 Business DaysProduct Specifications- Other Name: Shock Absorber Assembly; Rear Suspension Shock; Strut and Shock Assembly Kit; Complete Strut.; Shock; Suspension Shock Absorber
- Position: Rear
- Replaces: 5L3Z-18125-MA, ASH-742, 4L3Z-18125-AA, 5L3Z-18125-AA, 4L3Z-18125-CA, 5L3Z-18125-CA, 5L3Z-18125-LA, 4L3Z-18125-BB, ASH-792, ASH-786

Lincoln Shock Absorber, Blue/Green, Rear Part Number: BW7Z-18125-B
$78.89 MSRP: $129.80You Save: $50.91 (40%)Ships in 1-2 Business DaysProduct Specifications- Other Name: Shock Absorber Assembly; Rear Suspension Shock; Strut & Shock Kit; Air to Coil Conversion; Complete Strut; Shock; Suspension Shock Absorber
- Position: Rear
- Replaces: 7W7Z-18125-B, 6W7Z-18125-C, 3U2Z-18125-AB, 3U2Z-18125-AF, 3W7Z-18125-FA, 4W7Z-18125-CA, 6W7Z-18125-B, 7W7Z-18125-C, 7W1Z-18125-G, 8W1Z-18125-B, 8W1Z-18125-C, 8W1Z-18125-D, ASH-710, ASH-24535, ASH-12276, ASH-24534, ASH-24491, ASH-1151, ASH-24490, ASH-1039, BW7Z-18125-A, ASH-1040, 8W1Z-18125-A
| Page 1 of 16 |Next >
1-20 of 307 Results
Lincoln Shock Absorber
If you own Lincoln and want to keep it in top shape, choosing OEM Shock Absorber is a smart move. They are precisely engineered and follow strict factory standards. They are made in advanced facilities that use cutting edge technology. Each part goes through thorough testing to confirm strength and safety, so you can trust it. FordPartsDeal.com gives you genuine Lincoln Shock Absorber at some of the affordable online prices without cutting quality. Every OEM Lincoln part includes the manufacturer's warranty, easy returns, and super-fast delivery. So why wait? Shop now and get your vehicle back to peak condition.
Lincoln Shock Absorber makes sure the ride is smooth as it eliminates bumps before they shake you off. Lincoln was opened in 1917 and then grew very fast, pursuing ultra-quiet cabins and no-nonsense driving to anyone who desires peace. The philosophy of Quiet Flight silences wind and tire screeches and sheds off distracting distractions of long journeys. Co-Pilot360 introduces lane keeping, blind spot warnings, parking aid, and self-adjusting high beams that allow drivers to concentrate on the scenery. ActiveGlide allows hands to rest on the highway, and soft fabrics combine with clear screens to keep minds fresh. The updates on the software are made on an on-the-fly basis since the company hearkens keenly to owners and makes amends within very short durations. Lincoln adjusts every Shock Absorber with two-tube or a single-tube guts which roll hydraulic fluid behind tight valves in a few milliseconds. Shock Absorber responds quickly when a wheel enters a pothole, allowing tires to remain stationary and steering wheels to keep edges. Lincoln also provides electrorheological and magnetorheological installations such that the Shock Absorber becomes firm or soft almost before the bump strikes. Where the roads wind or the loads get piled high, Lincoln will rely on the adaptive Shock Absorber to damp out body roll and make everything stable.
Lincoln Shock Absorber Parts and Q&A
- Q: Is it necessary to periodically check the steering linkage,Shock Absorber and suspension components for potential issues that can affect tire wear, ride quality, fuel economy, and vehicle handling on Lincoln Mark VII?A:The steering linkage and suspension components should be checked periodically as worn or damaged components can lead to excessive tire wear, poor ride quality, reduced fuel economy, and compromised vehicle handling. To check the shock absorbers, park the vehicle on level ground, turn off the engine, and set the parking brake. Push down at each corner of the vehicle and observe if it stops moving and returns to a level position within one or two bounces. If the vehicle continues to move or fails to return to its original position, it may indicate worn or weak shock absorbers. Raise the vehicle and inspect the shock absorbers for fluid leakage, ensuring that any fluid noted is from the shocks and not from another source. Replace the shocks as a set if leakage is present. Additionally, check the shock absorbers for secure mounting and any signs of damage. For the steering and suspension check, visually inspect the components for damage, leaks, and worn seals, boots, and fittings. Clean the lower end of the steering knuckle and have an assistant move the wheel in and out while checking for movement at the steering knuckle-to-control arm balljoint. If there is any movement, the suspension balljoint(s) should be replaced. Grasp each front tire at the front and rear edges, push in at the front and pull out at the rear to feel for play in the steering system components. If any play is noted, check the steering gear mounts and tie-rod ends for looseness. Finally, check the steering gear mount bolt tightness and if the tie-rods are loose, the balljoints may be worn.
- Q: How to remove and install front Coil Springs and Shock Absorber on Lincoln Navigator?A:If the vehicle is equipped with air suspension, turn OFF the air suspension system. The switch is located in the area of the right kick panel. If the vehicle is equipped with four-wheel air suspension, disconnect the upper end of the front height sensor from the upper frame bracket behind and above the left shock, then firmly push in the red ring on the shock body, hold it there, and pull out the air line. Loosen the front wheel lug nuts, raise the front of the vehicle and support it securely on jackstands. Apply the parking brake. Remove the wheels. Using an open-end wrench to hold the shock from turning, remove the upper shock mounting nut. To detach the upper end of the shock absorber from the frame bracket, remove this nut, the retainer and the bushing; you'll need a back-up wrench on the lower nut to prevent the shock from turning when you loosen the nut. Remove the retainer and bushing. Working from underneath the vehicle, remove the two nuts (2WD models) or bolt and nut (4WD models) which attach the lower end of the shock absorber to the lower control arm and pull the shock out from below. Installation is the reverse of removal. Be sure to tighten the upper mounting nut and the lower mounting bolts. On vehicles with four-wheel air suspension, make sure that at least 1/8-inch of air line is inserted into the red fitting. Tighten the upper nut and lower nut and bolt. Lower the vehicle and reactivate the air suspension system, if equipped. It is possible to replace the shocks or springs individually but the unit will have to be disassembled by a qualified repair shop with the proper equipment, and this will add considerable cost to the project. You can compare the cost of replacing the complete assemblies yourself to the cost of replacing individual components (with the help of a shop). Loosen the front wheel lug nuts. Raise the vehicle and support it securely on jackstands. Remove the front wheels. Remove the nuts that attach the upper end of the shock to the frame. Separate the tie-rod end from the steering knuckle and secure it aside. Separate the upper balljoint from the control arm. Remove the fasteners attaching the lower end of the shock absorber to the lower control arm. Remove the shock absorber/coil spring assembly. Inspect the shock absorber for leaking fluid, dents, cracks and other damage. Inspect the coil spring for chips and cracks which could cause premature failure. Inspect the spring seats for hardness and general deterioration. If any of the components of the assembly are worn or damaged, have the unit serviced by a qualified repair shop or replace it. Installation is the reverse of removal. Be sure to tighten the fasteners. Tighten the wheel lug nuts. The shock absorber lower mounting fasteners should be tightened with the vehicle at normal ride height. This can be done after the vehicle has been lowered to the ground (on vehicles with adequate clearance), or can be simulated by raising the lower control arm with a floor jack.


Related Lincoln Parts
 Lincoln Air Suspension Solenoid
 Lincoln Bump Stop
 Lincoln Coil Spring Insulator
 Lincoln Control Arm Bracket
 Lincoln Differential Mount
 Lincoln Leaf Spring Plate
 Lincoln Leaf Spring Shackle
 Lincoln Ride Height Sensor
 Lincoln Shock and Strut Boot
 Lincoln Steering Knuckle
 Lincoln Strut Bearing
 Lincoln Sway Bar Link Bushing