FordParts
My Garage
My Account
Cart
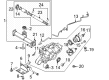
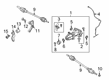
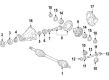
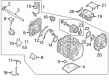
OEM Ford Differential
Front Differential- Select Vehicle by Model
- Select Vehicle by VIN
Select Vehicle by Model
orMake
Model
Year
Select Vehicle by VIN
For the most accurate results, select vehicle by your VIN (Vehicle Identification Number).
184 Differentials found


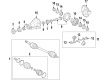
Ford Carrier, Rear Part Number: FR3Z-4310-B
$329.18 MSRP: $560.00You Save: $230.82 (42%)Product Specifications- Other Name: Carrier Assembly - Differential; Differential Housing, Rear; Differential
- Manufacturer Note: ALUMINUM
- Position: Rear


Ford Pinion Gear, Front Part Number: 5C3Z-4026-B
$486.28 MSRP: $784.62You Save: $298.34 (39%)Ships in 1-3 Business DaysProduct Specifications- Other Name: Differential Assembly; Differential Carrier, Front; Differential Case; Case; Differential
- Position: Front
- Replaces: 5C3Z-3204-AA


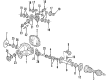
Ford Differential Case Part Number: 9L3Z-4204-B
$122.38 MSRP: $173.85You Save: $51.47 (30%)Ships in 1-3 Business DaysProduct Specifications- Other Name: Case - Differential; Case; Differential
- Replaces: 1L2Z-4204-BA, 1L2Z-4204-AA, E7TZ-4204-F, F85Z-4204-AA


Ford Differential Case, Front Part Number: 9L3Z-4204-A
$141.08 MSRP: $204.62You Save: $63.54 (32%)Ships in 1-3 Business DaysProduct Specifications- Other Name: Case - Differential; Differential Carrier, Front; Case; Differential
- Position: Front
- Replaces: E7TZ-4204-E


Ford Differential Case Part Number: F75Z-4204-BA
$156.67 MSRP: $216.74You Save: $60.07 (28%)Ships in 1-2 Business DaysProduct Specifications- Other Name: Case - Differential; Differential


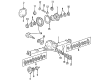
Ford Axle Housing, Rear Part Number: AL3Z-4026-A
$262.19 MSRP: $355.38You Save: $93.19 (27%)Ships in 1-2 Business DaysProduct Specifications- Other Name: Differential Assembly; Differential Housing, Rear; Differential; Differential Case
- Position: Rear
- Replaces: F85Z-4026-AA, 1L2Z-4026-BA, 2L2Z-4026-AA, 9L3Z-4026-D, F4TZ-4026-B


Ford Differential Part Number: AR3Z-4026-A
$327.11 MSRP: $443.38You Save: $116.27 (27%)Ships in 1-3 Business DaysProduct Specifications- Other Name: Differential Assembly
- Replaces: 2R3Z-4026-B, 2R3Z-4026-AA, 7R3Z-4026-A


Ford Ring & Pinion Part Number: BL3Z-4209-G
$351.85 MSRP: $476.92You Save: $125.07 (27%)Product Specifications- Other Name: Gear And Pinion Assembly - Driving; Ring And Pinion
- Replaces: BL3Z-4209-A


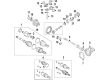
Ford Differential Assembly Part Number: BC3Z-4026-B
$795.38 MSRP: $1087.69You Save: $292.31 (27%)Ships in 1 Business DayProduct Specifications- Other Name: Differential


Ford Differential Assembly Part Number: F81Z-4026-A
$1100.25 MSRP: $1504.62You Save: $404.37 (27%)Product Specifications- Other Name: Differential Case; Differential
- Manufacturer Note: Complete Assembly
- Replaces: F81Z-4026-AB

Ford Differential Carrier Part Number: MB3Z-4141-B
$1183.50 MSRP: $1502.86You Save: $319.36 (22%)Product Specifications- Other Name: Carrier - Differential; Axle Shaft; Axle

Ford Differential Assembly, Rear Part Number: K2GZ-4000-U
$736.88 MSRP: $935.71You Save: $198.83 (22%)Ships in 1-3 Business DaysProduct Specifications- Other Name: Axle Assembly - Rear; Differential, Rear; Differential; Axle Shaft; Axle
- Position: Rear
- Replaces: K2GW-4000-FD, K2GZ-4000-H

Ford Differential Carrier, Rear Part Number: HL1Z-4310-B
$458.15 MSRP: $718.33You Save: $260.18 (37%)Ships in 1-3 Business DaysProduct Specifications- Other Name: Carrier Assembly - Differential; Differential Housing, Rear; Axle Housing
- Position: Rear


Ford Differential Assembly Part Number: 9L3Z-4026-E
$720.23 MSRP: $1067.00You Save: $346.77 (33%)Product Specifications- Other Name: Kit; Differential; Gear Kit
- Replaces: 9L3Z-4215-A, 9L3Z-4880-B, 9L3Z-4026-A

Ford Gear Assembly - Planet Part Number: NL3Z-7F465-B
$1498.61 MSRP: $2220.17You Save: $721.56 (33%)Ships in 1-2 Business DaysProduct Specifications- Other Name: GEAR ASY - PLANET
- Replaces: NL3Z-7F465-A


Ford Differential Part Number: AR3Z-4026-B
Product Specifications- Other Name: Differential Assembly
- Replaces: 9R3Z-4026-A, AR3Z-4026-C

Ford Differential Assembly Part Number: 8C3Z-4026-A
Product Specifications- Other Name: Differential Case; Differential
- Manufacturer Note: 2 Pinion
- Replaces: F75Z-4026-DA

Ford Differential Part Number: AR3Z-4026-D
$266.73 MSRP: $361.54You Save: $94.81 (27%)Product Specifications- Other Name: Differential Assembly
- Replaces: BR3Z-4026-A, AR3Z-4026-E

Ford Differential Case Part Number: F6TZ-4204-AA
Product Specifications- Other Name: Case - Differential; Differential


Ford Differential Carrier, Front Part Number: 1L2Z-4026-A
Product Specifications- Other Name: Differential Assembly; Differential Carrier, Front; Differential Case; Gear Kit; Differential
- Position: Front
| Page 1 of 10 |Next >
1-20 of 184 Results
Ford Differential
If you own Ford and want to keep it in top shape, choosing OEM Differential is a smart move. They are precisely engineered and follow strict factory standards. They are made in advanced facilities that use cutting edge technology. Each part goes through thorough testing to confirm strength and safety, so you can trust it. FordPartsDeal.com gives you genuine Ford Differential at some of the affordable online prices without cutting quality. Every OEM Ford part includes the manufacturer's warranty, easy returns, and super-fast delivery. So why wait? Shop now and get your vehicle back to peak condition.
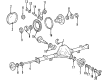
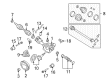
Ford Differential allows left and right wheels to freely turn whilst maintaining power flow. Ford began with the radical concept of assembly line by Henry and continues to drive production at a pace beyond its competitors, evidence that it is always moving and this is in its DNA. Ford expects to bring together brains and brawn by EcoBoost engines powered by turbos that provide powerful acceleration with lighter fuel bills that will allow families to save a dime. Ford has SYNC loaded in such a way that teenagers scream a song request or a route and the cabin complies without interrupting, eliminating distraction and minimizing driver distraction. Ford includes Co-Pilot360 and even fully electric pickups to demonstrate that safety and emissions can go together, making big claims with actual hardware. Differential in the drive train separates torque across the wheels, allowing each to choose its own speed on the corner and eliminates tire squeal and fight at the wheel. Open Differential provides an equal twist to both directions and that is smooth until one of the tires loses grip, a compromise that is in favor of simplicity. Limited slip Differential adds torque to the slipping wheel, propelling the grip-remaining wheel, sharpening handling and increasing traction on loose gravel or rain. By checking fluids frequently and audibly hearing knocks, drivers do not cause the Differential to fail after thousands of hard miles but create large repair bills and wasted time.
Ford Differential Parts and Q&A
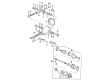
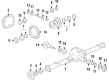
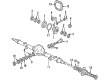
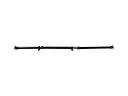
- Q: How to service the 9.75 Inch Rear Differential axle shaft on Ford F-150?A:Begin service of the Ford 9.75 Inch Rear Differential axle shaft only after turning off the air suspension power through the switch in the RH kick panel area to avoid unintended air spring inflation or deflation. First securely elevate the vehicle before taking out wheels and tires and differential housing cover. Extract the lubricating fluid before uninstalling the brake calipers and the discs. To continue the disassembly process remove the differential pinion shaft by breaking its lock bolt free before pulling out the shaft. When removing the U-washers through axle shaft pushing ensure that the rubber O-rings in the axle shaft grooves remain intact. It is crucial to extract the two axle shafts with extreme caution to avoid damaging the wheel bearing oil seal. Apply Premium Long-Life Grease XG-1-C or an equivalent approved by Ford specification ESA-M1C75-B on the oil seal lip for installation purposes. Position the two axle shafts while avoiding O-ring damage in U-washer grooves before placing U-washers on shaft buttons before external shaft extraction. Threadlock and Sealer EOAZ-19554-AA or equivalent WSK-M2G351-A5 material from Ford specifications must be applied to new pinion shaft lock bolt threads before differential pinion shaft installation by positioning the shaft hole over the case lock bolt hole and securing it with a new lock bolt. After refitting the brake discs it is necessary to install the differential housing cover and apply the specified lubricant into the rear axle housing followed by wheel and tire installation before allowing the vehicle to lower.
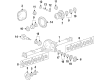
- Q: How to service and repair the 8.8-inch rear differential on Ford Ranger?A:The Ford 8.8-inch rear differential requires repair and maintenance after vehicle lifting and wheel support followed by tire removal. Drain the lubricant after removing the brake drum (1126) as well as the differential housing cover (4033). You must discard the bolt and extract the shaft of the differential pinion (4211). When removing the U-washer (4N237) through the rubber O-ring (4A332) groove of the U-washer you should avoid pushing the axle shaft (4234) towards the inside of the assembly. Perform the extraction of the axle shaft while you keep the wheel bearing oil seal (1177) from any kind of damage. The wheel bearing oil seal requires greasing before installation while positioning the U-washer on the axle shaft button end and extending the axle shaft outward but avoiding damage to the rubber O-ring in the U-washer groove. The existing bolt should have its threads coated with threadlock as an alternative to obtaining a new bolt when installing the differential pinion shaft by positioning the bolt hole on the shaft to match the case and tightening it with the new bolt. After filling the differential housing with proper lubricant one should install the brake drum and differential housing cover and put on the rear wheel and tire assembly while lowering the vehicle.


Related Ford Parts
 Ford Drive Shaft
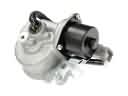 Ford 4WD Actuator
 Ford Universal Joint
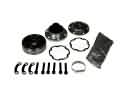 Ford CV Joint
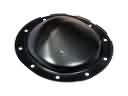 Ford Differential Cover
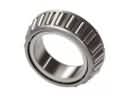 Ford Differential Bearing
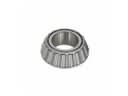 Ford Differential Pinion Bearing
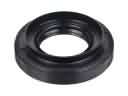 Ford Differential Seal
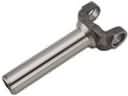 Ford Driveshaft Yokes
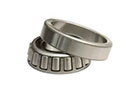 Ford Pinion Bearing
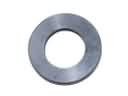 Ford Pinion Washer
 Ford Transfer Case Shim
Browse Ford Differential by Models
Ranger Bronco Mustang Explorer Fusion F-150 Maverick Escape Edge Excursion Expedition Taurus Thunderbird Flex Bronco Sport Explorer Sport Trac Crown Victoria Bronco II EcoSport F-250 Aerostar Country Squire E-150 Econoline F-350 Five Hundred Freestyle LTD Police Interceptor Utility F-350 Super Duty LTD Crown Victoria Police Interceptor Sedan E-150 E-150 Econoline Club Wagon E-250 E-250 Econoline E-350 Econoline E-350 Econoline Club Wagon E-350 Super Duty F-150 Heritage F-150 Lightning F-250 HD F-250 Super Duty Special Service Police Sedan Transit-150 Transit-250 Transit-350 Transit-350 HD