FordParts
My Garage
My Account
Cart
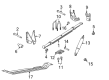
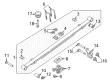
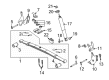
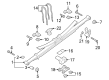
OEM Ford Leaf Spring
Leaf Helper Spring- Select Vehicle by Model
- Select Vehicle by VIN
Select Vehicle by Model
orMake
Model
Year
Select Vehicle by VIN
For the most accurate results, select vehicle by your VIN (Vehicle Identification Number).
117 Leaf Springs found


Ford Leaf Spring Part Number: BC3Z-5560-F
$606.63 MSRP: $1007.27You Save: $400.64 (40%)Ships in 1-3 Business DaysProduct Specifications- Other Name: Spring


Ford Leaf Spring Part Number: BC3Z-5560-E
$655.91 MSRP: $1089.09You Save: $433.18 (40%)Ships in 1-2 Business DaysProduct Specifications- Other Name: Spring

Ford Leaf Spring, Rear Part Number: DC3Z-5560-A
$796.07 MSRP: $1321.82You Save: $525.75 (40%)Ships in 1-2 Business DaysProduct Specifications- Other Name: Spring; Leaf Spring, Rear; Coil Springs
- Position: Rear
- Replaces: BC3Z-5560-B


Ford Leaf Spring, Rear Part Number: DL3Z-5560-D
$399.69 MSRP: $626.67You Save: $226.98 (37%)Ships in 1-2 Business DaysProduct Specifications- Other Name: Spring - Rear; Leaf Spring, Rear; Coil Springs; Spring
- Position: Rear
- Replaces: 9L3Z-5560-G, 9L3Z-5560-L, AL3Z-5560-C, CL3Z-5560-L

Ford Leaf Spring, Rear Part Number: DL3Z-5560-A
$388.17 MSRP: $570.00You Save: $181.83 (32%)Ships in 1-2 Business DaysProduct Specifications- Other Name: Spring - Rear; Leaf Spring, Rear; Coil Springs; Spring
- Position: Rear
- Replaces: 9L3Z-5560-J, CL3Z-5560-K


Ford Leaf Spring, Rear Part Number: DL3Z-5560-F
$424.49 MSRP: $623.33You Save: $198.84 (32%)Product Specifications- Other Name: Spring - Rear; Leaf Spring, Rear; Coil Springs; Spring
- Position: Rear
- Replaces: AL3Z-5560-A, CL3Z-5560-H


Ford Leaf Spring, Rear Part Number: 6L3Z-5560-MD
$424.49 MSRP: $623.33You Save: $198.84 (32%)Ships in 1-3 Business DaysProduct Specifications- Other Name: Spring - Rear; Leaf Spring, Rear
- Position: Rear


Ford Leaf Spring, Rear Part Number: FL3Z-5560-C
$434.71 MSRP: $638.33You Save: $203.62 (32%)Ships in 1-2 Business DaysProduct Specifications- Other Name: Spring - Rear; Leaf Spring, Rear; Coil Springs; Spring
- Position: Rear

Ford Leaf Spring, Rear Part Number: FL3Z-5560-A
$407.13 MSRP: $638.33You Save: $231.20 (37%)Ships in 1-3 Business DaysProduct Specifications- Other Name: Spring - Rear; Leaf Spring, Rear; Coil Springs; Spring
- Position: Rear


Ford Leaf Spring, Rear Part Number: HL3Z-5560-C
$438.11 MSRP: $643.33You Save: $205.22 (32%)Product Specifications- Other Name: Spring - Rear; Leaf Spring, Rear; Coil Springs; Spring
- Position: Rear
- Replaces: HL3Z-5560-B

Ford Leaf Spring, Rear Part Number: DL3Z-5560-G
$528.91 MSRP: $776.67You Save: $247.76 (32%)Ships in 1-3 Business DaysProduct Specifications- Other Name: Spring - Rear; Leaf Spring, Rear; Coil Springs; Spring
- Position: Rear
- Replaces: BL3Z-5560-A, CL3Z-5560-J

Ford Leaf Spring, Rear Part Number: DL3Z-5560-B
$325.32 MSRP: $446.34You Save: $121.02 (28%)Product Specifications- Other Name: Spring - Rear; Leaf Spring, Rear; Coil Springs; Spring
- Position: Rear
- Replaces: 9L3Z-5560-K, CL3Z-5560-B

Ford Leaf Spring, Rear Part Number: 8C2Z-5560-RB
$348.45 MSRP: $511.67You Save: $163.22 (32%)Ships in 1-3 Business DaysProduct Specifications- Other Name: Spring - Rear; Leaf Spring, Rear
- Position: Rear
- Replaces: 5C2Z-5560-RA, F5UZ-5560-C

Ford Spring Part Number: PC3Z-5560-P
$698.61 MSRP: $1160.00You Save: $461.39 (40%)Ships in 1-2 Business DaysProduct Specifications- Replaces: PC3Z-5560-J


Ford Auxiliary Spring, Rear Part Number: YC3Z-5588-AA
Product Specifications- Other Name: Spring; Coil Spring Damper, Rear
- Manufacturer Note: Wide Frame WB (Raised over Axle)
- Position: Rear


Ford Leaf Spring, Rear Part Number: 3C3Z-5560-CA
$370.01 MSRP: $543.33You Save: $173.32 (32%)Product Specifications- Other Name: Spring; Leaf Spring, Rear; Coil Springs
- Position: Rear

Ford Auxiliary Spring, Rear Part Number: F81Z-5588-DA
Product Specifications- Other Name: Spring; Coil Spring Damper, Rear
- Manufacturer Note: DRW, Narrow Frame WB (straight over Axle)
- Position: Rear


Ford Leaf Spring, Rear Part Number: 9L5Z-5560-A
Product Specifications- Other Name: Spring - Rear
- Position: Rear
- Replaces: 4L5Z-5560-DA

Ford Auxiliary Spring, Rear Part Number: 5C3Z-5588-CA
Product Specifications- Other Name: Spring; Coil Spring Damper, Rear
- Position: Rear


Ford Leaf Spring, Rear Part Number: 2T1Z-5560-A
Product Specifications- Other Name: Spring - Rear; Leaf Spring, Rear; Coil Springs; Spring
- Position: Rear
| Page 1 of 6 |Next >
1-20 of 117 Results
Ford Leaf Spring
If you own Ford and want to keep it in top shape, choosing OEM Leaf Spring is a smart move. They are precisely engineered and follow strict factory standards. They are made in advanced facilities that use cutting edge technology. Each part goes through thorough testing to confirm strength and safety, so you can trust it. FordPartsDeal.com gives you genuine Ford Leaf Spring at some of the affordable online prices without cutting quality. Every OEM Ford part includes the manufacturer's warranty, easy returns, and super-fast delivery. So why wait? Shop now and get your vehicle back to peak condition.
Ford Leaf Spring absorbs the bumps and makes the axle firmly planted to ensure a stable and load-friendly ride. The gamble that Henry made in 1903 was the starting point of Ford and in 1913, the moving assembly line reduced the time of building cars, lowered costs, and helped people afford a car in the increasingly populated cities. Ford pushes performance and thrift along with EcoBoost, extracting turbo power out of small blocks and reducing trips to the pump, thus drivers feel fast without hurting their wallets. Ford continues to keep drivers connected through SYNC, allowing teens to yell at voice command to playlists or directions without looking out of traffic and does not need to go to phone shops to update the software. Ford supports confidence also with Co-Pilot360 and all-electric models such as the F-150 Lightning, demonstrating that the badge will pursue speed, safety, and zero emission miles in a single step. Leaf Spring bends steel leaves into a tight bundle that is connected to the chassis, dampens loads, centrally positions the axle, and transforms pothole pokes into noise dampened swears to vans, pickups, or other vehicles with actual cargo. The reason why Leaf Spring remains dependable is that the moving leaves damp themselves, losing heat, friction, and coughing off rust more effectively than the weakly built coils. Leaf Spring is easy to match with add-a-leaf or lowering kits, so the owner can adjust payload or stance with no re-engineering of the undercarriage. The Leaf Spring can go mile after mile, allowing the drivers to make a load, turn straight, and drive with ease without having to plan on having to replace the spring every other day.
Ford Leaf Spring Parts and Q&A
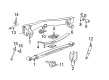
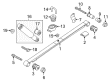
- Q: How to remove and install Leaf Spring on Ford Excursion?A:Loosen the rear wheel lug nuts, then raise the rear of the vehicle and support it securely on jackstands while blocking the front wheels before removing the wheel. Support the vehicle on jackstands placed under the frame rails and use a floor jack under the axle tube to raise it slightly, taking the weight of the axle. Remove the nuts from the U-bolts, followed by the U-bolts and the spring plate, then lower the jack to relieve tension on the spring. Remove the lower bolt and nut securing the shackle assembly to the frame bracket at the rear of the spring, followed by the spring hanger bolt and nut at the front of the spring, and then remove the spring. Inspect the spring eye bushings for wear or distortion, and if they are worn or damaged, have them replaced by a dealer service department or a properly equipped shop. For installation, place the spring in the front bracket and tighten the bolt and nut finger-tight. Position the spring shackle in the frame bracket, install the bolt and nut, and tighten them finger-tight. Raise the axle into contact with the spring and install the spring seat, ensuring the spring tie-bolt or pin is positioned in the hole in the seat before installing the U-bolts and nuts. Finally, install the wheel and lug nuts, lower the vehicle to the ground, and tighten the spring bracket bolt and nut, spring U-bolts, and shackle-to-frame bracket bolt and nut to the specified torque values, followed by tightening the lug nuts to the appropriate torque.
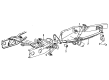
- Q: How to remove and install the Leaf Spring on 1993-2011 Ford Ranger?A:To remove the rear spring, while standing firmly on the ground, lift the vehicle until the weight is off the rear springs then secure it on jack-stands and use a jack to support the rear axle in any position, do not stand under a vehicle that is supported only on a jack. Finally, take out the nut and bolt that holds the lower end of the shock to the spring plate, so as to compress the shock and bring it out of the working area. Take off the nuts of the U-bolts, thereafter, the U-bolts and spring plate. Loosen the bolts and nuts which were used to fix the shackle assembly to the rear of the spring, thus the spring will tilt down on the floor. Take out the spring hanger bolt and nut at the front of the spring then pull out the spring. Visually check the condition of the spring eye bushings for signs of wear or distortion in the radial or axial direction; if severely worn, replace at a dealership or equipped shop. To install, insert the spring into the rear shackle and use another bolt and nut tightened only with fingers. Place the spring to the front bracket and use the bolt and nut and screw them loosely. Place the rear shackle on the frame, so that it has to be fixed with a bolt and nut, which should be tightened using fingers only. Place the axle to the spring, fit the spring-seat making sure that the spring tie-bolt is in the right hole, then put the U-bolts and nuts in place and tighten by hand. Last of all, drop off the vehicle on its tyres and then fasten the spring bracket bolt and nut and nut, the two shackle bolts and nut and the two U-bolt nuts by using a criss-cross pattern to the advised torque.


Related Ford Parts
 Ford Track Bar
 Ford Spindle
 Ford Steering Knuckle
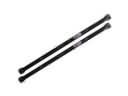 Ford Torsion Bar
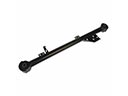 Ford Trailing Arm
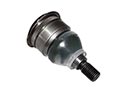 Ford Ball Joint
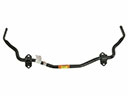 Ford Sway Bars
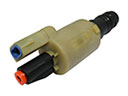 Ford Air Suspension Solenoid
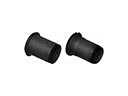 Ford Control Arm Bushing
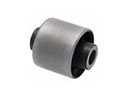 Ford Differential Mount
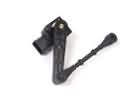 Ford Ride Height Sensor
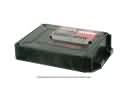 Ford Suspension Control Module
Browse Ford Leaf Spring by Models
Ranger Bronco Explorer Focus F-150 Edge Excursion Transit Connect Explorer Sport Trac F-250 E-150 Econoline Explorer Sport F-350 F-350 Super Duty E-150 E-150 Club Wagon E-150 Econoline Club Wagon E-250 E-250 Econoline E-350 Club Wagon E-350 Econoline E-350 Econoline Club Wagon E-350 Super Duty F-150 Heritage F-250 HD F-250 Super Duty Transit-150 Transit-250 Transit-350 Transit-350 HD