FordParts
My Garage
My Account
Cart
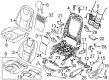
OEM Ford Seat Motor
Car Seat Motor- Select Vehicle by Model
- Select Vehicle by VIN
Select Vehicle by Model
orMake
Model
Year
Select Vehicle by VIN
For the most accurate results, select vehicle by your VIN (Vehicle Identification Number).
43 Seat Motors found


Ford Adjust Motor, Front Driver Side Part Number: CU5Z-14547-D
$187.25 MSRP: $310.91You Save: $123.66 (40%)Ships in 1-2 Business DaysProduct Specifications- Other Name: Motor Assembly - Seat Adjuster; Seat Motor, Front Left; Motor
- Position: Driver Side
- Replaces: DU5Z-14547-C, MM-1125


Ford Adjust Motor, Center Part Number: FB5Z-74600E22-A
$135.00 MSRP: $227.27You Save: $92.27 (41%)Ships in 1-3 Business DaysProduct Specifications- Other Name: Motor Assembly - Seat Adjuster; Seat Motor, Center; Motor
- Manufacturer Note: RH/LH
- Position: Center


Ford Recline Motor, Driver Side Part Number: AA1Z-14547-B
$93.48 MSRP: $153.82You Save: $60.34 (40%)Product Specifications- Other Name: Motor Assembly - Seat Adjuster; Seat Motor, Front Left, Left
- Manufacturer Note: For Power Recliner
- Position: Driver Side
- Replaces: 7A1Z-14547-B


Ford Recline Motor, Front Passenger Side Part Number: AA1Z-14547-A
$103.10 MSRP: $169.64You Save: $66.54 (40%)Ships in 1-2 Business DaysProduct Specifications- Other Name: Motor Assembly - Seat Adjuster; Seat Motor, Front Right, Right
- Manufacturer Note: For Power Recliner
- Position: Passenger Side
- Replaces: 7A1Z-14547-A


Ford Adjust Motor, Front Driver Side Part Number: 9U5Z-14547-B
$131.50 MSRP: $216.36You Save: $84.86 (40%)Ships in 1-2 Business DaysProduct Specifications- Other Name: Motor Assembly - Seat Adjuster; Seat Motor, Front Left
- Position: Driver Side


Ford Adjust Motor, Front Passenger Side Part Number: 9U5Z-14547-A
$131.50 MSRP: $216.36You Save: $84.86 (40%)Ships in 1-2 Business DaysProduct Specifications- Other Name: Motor Assembly - Seat Adjuster; Seat Motor, Front Right, Right; Motor
- Position: Passenger Side

Ford Adjust Motor, Front Driver Side Part Number: 9U5Z-14547-C
$135.92 MSRP: $223.64You Save: $87.72 (40%)Ships in 1-2 Business DaysProduct Specifications- Other Name: Motor Assembly - Seat Adjuster; Seat Motor, Front Left, Left; Motor
- Position: Driver Side

Ford Motor Assembly, Front Driver Side Part Number: CU5Z-14547-C
$179.01 MSRP: $294.55You Save: $115.54 (40%)Ships in 1-2 Business DaysProduct Specifications- Other Name: Motor Assembly - Seat Adjuster; Seat Motor, Front Left; Adjust Motor; Motor
- Position: Driver Side
- Replaces: DU5Z-14547-B, MM-1124


Ford Adjust Motor, Front Passenger Side Part Number: CU5Z-14547-B
$179.01 MSRP: $294.55You Save: $115.54 (40%)Ships in 1-2 Business DaysProduct Specifications- Other Name: Motor Assembly - Seat Adjuster; Seat Motor, Front Right; Motor
- Manufacturer Note: RH/LH
- Position: Passenger Side
- Replaces: DU5Z-14547-A, MM-1123


Ford Adjust Motor, Front Passenger Side Part Number: FL3Z-14547-E
$192.72 MSRP: $320.00You Save: $127.28 (40%)Ships in 1-3 Business DaysProduct Specifications- Other Name: Motor Assembly - Seat Adjuster; Seat Motor, Front Right; Seat Adjust Assembly; Motor
- Manufacturer Note: Fore / Aft Motor
- Position: Passenger Side
- Replaces: FL3Z-14547-A, MM-1141


Ford Adjust Motor, Passenger Side Part Number: 8A5Z-14547-A
$34.92 MSRP: $55.45You Save: $20.53 (38%)Ships in 1 Business DayProduct Specifications- Other Name: Motor Assembly - Seat Adjuster; Seat Motor, Front, Front Left, Front Right, Right; Recline Motor; Motor
- Position: Passenger Side


Ford Adjust Motor, Driver Side Part Number: 8A5Z-14547-B
$37.21 MSRP: $59.09You Save: $21.88 (38%)Ships in 1-2 Business DaysProduct Specifications- Other Name: Motor Assembly - Seat Adjuster; Seat Motor, Front Left, Left; Recline Motor; Motor
- Position: Driver Side

Ford Adjust Motor, Front Passenger Side Part Number: NU5Z-14547-C
$201.48 MSRP: $334.55You Save: $133.07 (40%)Ships in 1-2 Business DaysProduct Specifications- Other Name: Motor Assembly - Seat Adjuster; Seat Motor, Front Right
- Position: Passenger Side

Ford Adjust Motor, Rear Part Number: FE9Z-74600E22-A
Product Specifications- Other Name: Motor Assembly - Seat Adjuster; Seat Motor, Rear; Motor
- Position: Rear
- Replaces: AE9Z-74600E22-A


Ford Adjust Motor, Front Driver Side Part Number: 6H6Z-14547-A
Product Specifications- Other Name: Motor Assembly - Seat Adjuster; Seat Motor, Front Left; Recline Motor
- Position: Front Driver Side
- Replaces: BH6Z-14547-A, MM-1052


Ford Motor Part Number: 2L1Z-14547-EA
Product Specifications- Other Name: Motor Assembly - Seat Adjuster


Ford Recline Motor, Driver Side Part Number: 6L2Z-14547-AA
Product Specifications- Other Name: Motor Assembly - Seat Adjuster; Seat Motor, Front, Front Left, Left
- Manufacturer Note: Motor - Seat Recline
- Position: Driver Side


Ford Motor Part Number: 5L1Z-14547-BA
Product Specifications- Other Name: Motor Assembly - Seat Adjuster
- Replaces: 4L1Z-14547-AA


Ford Motor Part Number: 2L1Z-14547-CA
Product Specifications- Other Name: Motor Assembly - Seat Adjuster


Ford Motor Part Number: 2L1Z-14547-BA
Product Specifications- Other Name: Motor Assembly - Seat Adjuster
| Page 1 of 3 |Next >
1-20 of 43 Results
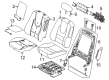
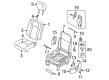
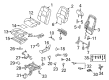
Ford Seat Motor
If you own Ford and want to keep it in top shape, choosing OEM Seat Motor is a smart move. They are precisely engineered and follow strict factory standards. They are made in advanced facilities that use cutting edge technology. Each part goes through thorough testing to confirm strength and safety, so you can trust it. FordPartsDeal.com gives you genuine Ford Seat Motor at some of the affordable online prices without cutting quality. Every OEM Ford part includes the manufacturer's warranty, easy returns, and super-fast delivery. So why wait? Shop now and get your vehicle back to peak condition.
Ford Seat Motor allows any driver to slide the seat into the desirable position within seconds. Since 1903, Ford has ridden the first moving assembly line, squeezed EcoBoost turbos to give it punch, wired SYNC so that a spoken command makes the songs and maps answer, and coded Co-Pilot360 so that it brakes before metal grinds or steers back when paint lines blur and then charged rides real paychecks and refused stale thinking. Ford now attaches batteries to pickups such as F-150 Lightning, being silent torque can pull, haul and run, without leaving the sky a single puff, demonstrating that the badge still makes usable power greater than showroom fluff. Seat Motor moves, tilts and raises the chair using quiet electric gears that are controlled by fingertip switches and offers each body a unique drive position to better control and reduce fatigue during long runs. Ford offers this Seat Motor with memory recall as well as heating and cooling to ensure comfort returns as soon as you press the start button. Seat Motor also holds the driver in an unchanging position allowing airbags and belts to discharge at the correct split second in the case of abrupt halts or rough paths. In every section Ford is retailing, the Seat Motor remains the silent laborer, driving accuracy above flaunting showmanship.
Ford Seat Motor Parts and Q&A
- Q: How to service the power-fold seat motor for the rear seat on Ford Edge?A:Service of the power-fold seat motor for the rear seat begins with removing the affected 40 percent or 60 percent seat. The next step requires removal of the screws attaching the outboard lower side shield. The service of the power fold motor begins by unscrewing the two screws that attach to the motor first. Pull the cable housing out of the recliner before turning the cable end until its tab crosses the slot in the lever which splits the cable. Cut off the access to the power fold motor during the last stage of the installation process. Installation of the new motor requires execution of steps in reverse order to removal.
- Q: How to service and repair the power-fold seat motor on Ford Expedition?A:The first step to serve or repair the power-fold seat motor requires the safety belts to be unfastened to protect the third row seat. Before working on the power-fold seat motor users must first raise the backrests and clear anything in front of the third row seats. The procedure starts with taking out the rear load floor panel followed by unfastening the jack assembly and then stripping the load floor panel latch striker bolts and latch. After removing the three pin-type retainers while also taking out the jack storage compartment liner users should proceed to remove the two bolts in the mid-floor support. The front section of mid-floor panel support needs lifting to free the retainer clips before removing the support panel. A suitable tool should be used to manually lift the seat backrest from the outboard side of the third row power seat motor when the backrest is down and the motor fails to operate. A suitable tool will lift the seat backrest from the drive gear assembly if the motor fails operation or driver cable suffers damage. Position the inboard side shield out of your work space by first lifting the cushion to remove the screw and sliding the shield in an upward direction. To separate the components from the power-fold seat motor bracket start by removing the bolt which unfastens the safety belt anchor before taking out the nut from the inboard slide bracket and splitting the inboard slide bracket away from the power-fold seat motor bracket. Remove the power-fold seat motor assembly only when you are installing a cable assembly service kit. The motor removal should be the last step after detaching both bolts. The reverse of the removal method will complete the installation steps.


Related Ford Parts
 Ford Seat Covers
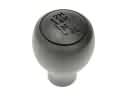 Ford Shift Knob
 Ford Cigarette Lighter
 Ford Armrest
 Ford Cup Holder
 Ford Dimmer Switch
 Ford Door Seal
 Ford Seat Cushion
 Ford Seat Switch
 Ford Center Console Base
 Ford Hazard Warning Switch
 Ford Seat Heater
Browse Ford Seat Motor by Models
Mustang Explorer Focus Fusion F-150 Maverick Escape Edge Expedition Taurus Flex Transit Connect Bronco Sport Explorer Sport Trac Crown Victoria Mustang Mach-E Police Interceptor Utility Taurus X F-350 Super Duty Police Interceptor Sedan E-Transit F-250 Super Duty Police Responder Hybrid Special Service Police Sedan SSV Plug-In Hybrid Transit-150 Transit-250 Transit-350 Transit-350 HD