FordParts
My Garage
My Account
Cart
OEM Mercury Coil Springs
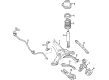
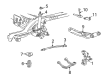
Strut Spring- Select Vehicle by Model
- Select Vehicle by VIN
Select Vehicle by Model
orMake
Model
Year
Select Vehicle by VIN
For the most accurate results, select vehicle by your VIN (Vehicle Identification Number).
117 Coil Springs found


Mercury Coil Spring, Rear Part Number: AE5Z-5560-C
$43.04 MSRP: $59.55You Save: $16.51 (28%)Ships in 1-2 Business DaysProduct Specifications- Other Name: Spring - Rear; Coil Spring, Rear; Coil Springs; Spring
- Position: Rear


Mercury Coil Spring, Rear Part Number: 8E5Z-5560-F
$65.55 MSRP: $90.68You Save: $25.13 (28%)Ships in 1-2 Business DaysProduct Specifications- Other Name: Spring - Rear; Coil Spring, Rear; Coil Springs; Spring
- Position: Rear
- Replaces: 6E5Z-5560-AA


Mercury Coil Spring, Rear Part Number: 8G1Z-5560-C
$94.74 MSRP: $131.06You Save: $36.32 (28%)Ships in 1-2 Business DaysProduct Specifications- Other Name: Spring - Rear; Air Suspension Spring, Rear; Coil Springs; Spring
- Position: Rear
- Replaces: 8G1Z-5560-A


Mercury Coil Spring, Yellow, Rear Part Number: 3W7Z-5560-CA
$100.76 MSRP: $139.39You Save: $38.63 (28%)Ships in 1-2 Business DaysProduct Specifications- Other Name: Spring - Rear; Coil Spring, Rear; Coil Springs; Spring
- Position: Rear
- Replaces: F4AZ-5560-A, F8AZ-5560-DA


Mercury Coil Spring, Front Part Number: AE5Z-5310-F
$103.82 MSRP: $141.28You Save: $37.46 (27%)Product Specifications- Other Name: Spring - Front; Coil Spring, Front; Coil Springs; Spring
- Position: Front


Mercury Coil Spring, Rear Part Number: FOCZ-5560-B
$188.85 MSRP: $256.98You Save: $68.13 (27%)Product Specifications- Other Name: Spring - Rear; Coil Spring Kit Rear Cargo; Coil Spring Set; Coil Springs; Spring
- Position: Rear

Mercury Coil Spring, Green, Front Part Number: 9W7Z-5310-C
$117.94 MSRP: $171.67You Save: $53.73 (32%)Ships in 1-3 Business DaysProduct Specifications- Other Name: Spring - Front; Coil Spring, Front; Coil Spring Kit Front; Coil Spring Set; Coil Springs; Spring
- Position: Front
- Replaces: 3W1Z-5310-DA, 3W1Z-5310-EA
Mercury Coil Spring, Front Part Number: 3W1Z-5310-DA
$117.94 MSRP: $171.67You Save: $53.73 (32%)Ships in 1-3 Business DaysProduct Specifications- Other Name: Spring - Front; Coil Spring, Front; Coil Springs
- Manufacturer Note: Module ID: 3W73-18B036-S*, "EHD", Red., with sport equipment package
- Position: Front
- Replaced by: 9W7Z-5310-C


Mercury Coil Spring, Front Part Number: 9M6Z-5310-A
$130.53 MSRP: $190.00You Save: $59.47 (32%)Ships in 1-3 Business DaysProduct Specifications- Other Name: Spring - Front; Coil Spring, Front; Coil Springs; Spring
- Position: Front


Mercury Coil Spring, Front Part Number: AE5Z-5310-B
$141.98 MSRP: $206.67You Save: $64.69 (32%)Ships in 1-3 Business DaysProduct Specifications- Other Name: Spring - Front; Coil Spring, Front; Coil Springs; Spring
- Position: Front

Mercury Coil Spring, Rear Part Number: 6L2Z-5560-BA
$148.85 MSRP: $216.67You Save: $67.82 (32%)Ships in 1-3 Business DaysProduct Specifications- Other Name: Spring - Coil; Coil Spring, Rear; Coil Spring Kit Rear; Coil Spring Set; Coil Springs; Spring
- Position: Rear

Mercury Coil Spring, Front Part Number: 9L2Z-5310-C
$232.68 MSRP: $341.67You Save: $108.99 (32%)Ships in 1-3 Business DaysProduct Specifications- Other Name: Spring - Front; Coil Spring, Front; Coil Springs; Spring
- Position: Front
- Replaces: 6L2Z-5310-C, 6L2Z-5310-CA

Mercury Spring, Rear Part Number: 5F1Z-5560-D
$6.10 MSRP: $8.44You Save: $2.34 (28%)Ships in 1-2 Business DaysProduct Specifications- Other Name: Spring - Rear; Coil Springs
- Manufacturer Note: Spring code,J, spring tag: JUG. Same as F6DZ,5560,E except it does not include the spring damper (E6DZ,5A669,A) or retainer (D6SZ,5A545,A). , all suspension
- Position: Rear


Mercury Coil Spring, Rear Part Number: AE5Z-5560-A
Product Specifications- Other Name: Spring - Rear; Coil Spring, Rear; Coil Springs; Spring
- Position: Rear


Mercury Coil Spring, Front Part Number: XF5Z-5310-AA
Product Specifications- Other Name: Spring - Front; Coil Springs; Spring
- Position: Front


Mercury Coil Spring, Rear Part Number: F5RZ-5560-D
Product Specifications- Other Name: Spring - Rear; Coil Springs; Spring
- Position: Rear


Mercury Coil Spring, Rear Part Number: 8G1Z-5560-D
Product Specifications- Other Name: Spring - Rear; Air Suspension Spring, Rear; Coil Springs; Spring
- Position: Rear
- Replaces: 8G1Z-5560-B


Mercury Coil Spring, Rear Part Number: 8E5Z-5560-G
Product Specifications- Other Name: Spring - Rear; Coil Spring, Rear; Coil Springs; Spring
- Position: Rear
- Replaces: 6E5Z-5560-A


Mercury Coil Spring, Rear Part Number: 5G1Z-5560-BA
Product Specifications- Other Name: Spring - Rear; Coil Spring, Rear; Coil Springs; Spring
- Position: Rear


Mercury Coil Spring, Rear Part Number: 2F1Z-5560-BB
Product Specifications- Other Name: Spring - Rear; Coil Spring, Rear; Coil Springs; Spring
- Manufacturer Note: Spring code,2, spring tag: EPA
- Position: Rear
| Page 1 of 6 |Next >
1-20 of 117 Results
Mercury Coil Springs
If you own Mercury and want to keep it in top shape, choosing OEM Coil Springs is a smart move. They are precisely engineered and follow strict factory standards. They are made in advanced facilities that use cutting edge technology. Each part goes through thorough testing to confirm strength and safety, so you can trust it. FordPartsDeal.com gives you genuine Mercury Coil Springs at some of the affordable online prices without cutting quality. Every OEM Mercury part includes the manufacturer's warranty, easy returns, and super-fast delivery. So why wait? Shop now and get your vehicle back to peak condition.
Mercury Coil Springs raise the automobile, absorb shocks, and maintain all the driving levels. Mercury began in 1938, with a golden mean between cost-effectiveness and luxurious ride to families that could afford it. Its showrooms had sharp-lined mid-sized bodies, spacious cabins, and more relaxed interiors, which reduced road noise and road stress. They preferred the way that Mercury was able to strike the right balance between smooth suspension and assured control that made road trips feel easy compared to many of its competitors. Brands such as the Cougar and the Grand Marquis rolled out year after year with Mercury continually updating the comfort tech until the product was dropped in 2011. Coil Springs are installed in any Mercury between the chassis and the wheels, support the weight of the vehicle, absorb potholes in the city roads, and remain composed even when one is on a local winding road. When Coil Springs sink, you can feel the body falling and hear ugly scrapes on speed bumps that were previously not harmful. Bad Coil Springs also shred tire edges and allow the suspension to bang over rough pavement, making control loose and fatigued. Fresh Coil Springs bring back ride height, curb body roll, and allow drivers to choose either linear progressive or variable rates to suit their cornering and cargo loading preferences.
Mercury Coil Springs Parts and Q&A
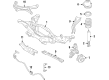
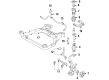
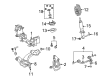
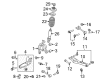
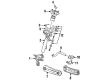
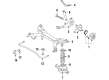
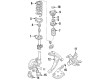
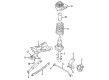
- Q: How to remove and replace the rear coil springs on Mercury Grand Marquis?A:A vehicle must be in neutral gear positioned on a hoist before starting rear coil spring removal or replacement operations. After disassembly of stabilizer bar links through their bushings and nuts you can free the stabilizer bar from its position on those links by rotating it away from the links. Use appropriate jack supports to secure the rear axle before removing lateral arm frame attachments with their corresponding bolts and nuts along with their replacement fasteners. The vehicle contains shock absorbers with pressure-filled gas that expands automatically without manual intervention; therefore avoid using heat or flame on them. The shock absorbers need their nuts and bolts removed to disconnect from the axle before discarding the old fasteners. Lower down the jack or jack stands carefully while removing the springs together with their spring insulators. Check the mounting brackets of the spring insulators and replace them with new ones if needed. Set the spring insulators on top of the vehicle springs then position them correctly inside the vehicle before lowering the axle with the jack holds. After raising the axle using the jack stands or jack, attach the shock absorbers to the axle using new bolts and nuts while inserting the bolts through the inboard side followed by a 90 Nm (66 lb-ft) nut torque. Install fresh bolts along with nuts between the lateral arms and frame while keeping them loose for now. Fire up the jacks until the axle reaches its appropriate position and follow by tightening both lateral arm-to-frame bolts to 90 Nm torque (66 lb-ft torque). Lower down the axle then remove both the jack and jack stands. Wrap up stabilizer bar installation by placing it on stabilizer bar links then inserting bushings before torquing nuts to 20 Nm (15 lb-ft). Repower the vehicle after installing the system when it includes a fire suppression system.
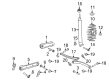
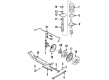
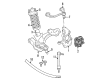
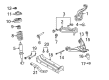
- Q: How to Remove and Replace the Rear Coil Springs on Mercury Mariner?A:Start removing and replacing the rear coil spring by removing the wheels, tires and then detaching the brake hose bracket-to-wheel knuckle bolt. The brake tube needs removal from the wheel cylinder followed by removal of the brake tube bracket under drum braking systems. The brake caliper guide bolts must be taken out on vehicles with disc brakes after ensuring clearance from the brake hose to prevent damage. Mechanics wire should then be used to support the caliper. Support the wheel knuckle then you should discard the upper ball joint nut and remove both the lower shock absorber nut and its washer and bolt. First remove the upper arm inner bolt and discard it before pulling out the upper arm component while loosening the lower arm inner bolt. Lower the wheel knuckle support with caution and remove the coil spring by maintaining the noted position of the coil spring insulator and coil spring. Align the coil spring and coil spring insulator in their noted position after raising the wheel knuckle support cautiously and position the upper control arm with the installation of the upper arm inner bolt before tightening to 115 Nm (85 lb-ft) under wheel tire weight. After bolt installation of the lower shock absorber with washer and nut tighten these fasteners to 175 Nm (129 lb-ft). Subsequently, install the upper ball joint nut before removing the wheel knuckle support by tightening to 63 Nm (46 lb-ft). I should position the brake caliper and install two brake caliper guide pin bolts which need tightening at 35 Nm (26 lb-ft). Drum brake vehicles require you to connect the brake tube fitting to the wheel cylinder before tightening it to 17 Nm (13 lb-ft) and following it by installing the brake tube bracket bolt and tightening it to 22 Nm (16 lb-ft). As a final step, screw and tighten the brake hose bracket-to-wheel knuckle bolt to 22 Nm (16 lb-ft) and perform brake bleeding on vehicles that use drum brakes.


Related Mercury Parts
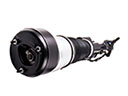 Mercury Air Suspension
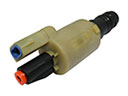 Mercury Air Suspension Solenoid
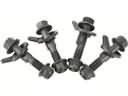 Mercury Camber and Alignment Kit
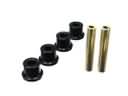 Mercury Crossmember Bushing
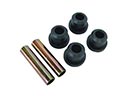 Mercury Leaf Spring Bushing
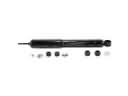 Mercury Shock Absorber
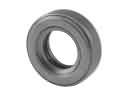 Mercury Strut Bearing
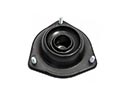 Mercury Strut Mounts
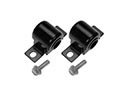 Mercury Sway Bar Bushing
 Mercury Sway Bar Link
 Mercury Track Bar
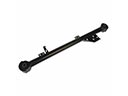 Mercury Trailing Arm