FordParts
My Garage
My Account
Cart
OEM Mercury Fuel Rail
Engine Fuel Rail- Select Vehicle by Model
- Select Vehicle by VIN
Select Vehicle by Model
orMake
Model
Year
Select Vehicle by VIN
For the most accurate results, select vehicle by your VIN (Vehicle Identification Number).
40 Fuel Rails found


Mercury Fuel Rail Part Number: 6M8Z-9D280-C
$86.91 MSRP: $138.00You Save: $51.09 (38%)Ships in 1-3 Business DaysProduct Specifications- Other Name: Manifold Assembly - Fuel Supply


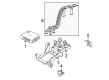
Mercury Fuel Rail Part Number: 7T4Z-9F792-G
$585.00 MSRP: $866.67You Save: $281.67 (33%)Product Specifications- Other Name: Manifold Assembly - Fuel Supply
- Replaces: 7T4Z-9F792-F


Mercury Fuel Pressure Regulator Part Number: XF2Z-9F792-BA
$101.77 MSRP: $138.49You Save: $36.72 (27%)Product Specifications- Other Name: Manifold Assembly - Fuel; Fuel Rail; Manifold Assembly - Fuel Supply

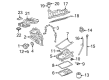
Mercury Fuel Rail Part Number: 5L8Z-9D280-AA
$172.32 MSRP: $238.38You Save: $66.06 (28%)Ships in 1-2 Business DaysProduct Specifications- Other Name: Manifold Assembly - Fuel Supply


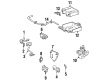
Mercury Fuel Rail Part Number: 1L2Z-9D280-ED
$207.25 MSRP: $332.00You Save: $124.75 (38%)Product Specifications- Other Name: Manifold Assembly - Fuel Supply
- Replaces: 1L2Z-9D280-EA


Mercury Fuel Rail Part Number: 5W7Z-9F792-AC
$312.13 MSRP: $458.33You Save: $146.20 (32%)Product Specifications- Other Name: Manifold Assembly - Fuel Supply
- Replaces: 5W7Z-9F792-AA


Mercury Fuel Rail Part Number: 7L2Z-9F792-A
Product Specifications- Other Name: Manifold Assembly - Fuel Supply
- Replaces: 6L2Z-9F792-EC


Mercury Fuel Rail, Passenger Side Part Number: 6L2Z-9D280-B
Product Specifications- Other Name: Manifold Assembly - Fuel Supply
- Position: Passenger Side


Mercury Fuel Rail Part Number: 6L2Z-9D280-A
Product Specifications- Other Name: Manifold Assembly - Fuel Supply


Mercury Fuel Rail Part Number: 5L8Z-9D280-AE
Product Specifications- Other Name: Manifold Assembly - Fuel Supply


Mercury Fuel Rail Part Number: 5F9Z-9F792-CA
Product Specifications- Other Name: Manifold Assembly - Fuel Supply


Mercury Fuel Rail Part Number: 4L8Z-9F792-BE
Product Specifications- Other Name: Manifold Assembly - Fuel Supply

Mercury Fuel Rail Part Number: XS2Z-9D280-CB
Product Specifications- Other Name: Manifold Assembly - Fuel; Manifold Assembly - Fuel Supply
- Manufacturer Note: does not include 9F896 tube., DOHC

Mercury Fuel Rail Part Number: 3F1Z-9F792-JA
Product Specifications- Other Name: Manifold Assembly - Fuel; Manifold Assembly - Fuel Supply
- Manufacturer Note: 2V-Flex Fuel(Methanol/Ethanol)

Mercury Fuel Rail Part Number: YS4Z-9D280-AA
Product Specifications- Other Name: Manifold Assembly - Fuel; Manifold Assembly - Fuel Supply
- Manufacturer Note: SPI
- Replaces: F8CZ-9D280-AA
Mercury Fuel Rail Part Number: YF1Z-9F792-GA
Product Specifications- Other Name: Manifold Assembly - Fuel; Manifold Assembly - Fuel Supply
- Manufacturer Note: 2V-Flex Fuel(Methanol/Ethanol)
Mercury Fuel Rail Part Number: YF1Z-9F792-FA
Product Specifications- Other Name: Manifold Assembly - Fuel; Manifold Assembly - Fuel Supply
- Manufacturer Note: 4V

Mercury Fuel Rail Part Number: XW1Z-9F792-AA
Product Specifications- Other Name: Manifold Assembly - Fuel; Manifold Assembly - Fuel Supply
- Manufacturer Note: Includes fuel pressure regulator

Mercury Fuel Rail Part Number: XS8Z-9D280-AF
Product Specifications- Other Name: Manifold Assembly - Fuel

Mercury Fuel Rail Part Number: XS4Z-9D280-AA
Product Specifications- Other Name: Manifold Assembly - Fuel; Manifold Assembly - Fuel Supply
- Manufacturer Note: 2 dr, Coupe - DOHC
| Page 1 of 2 |Next >
1-20 of 40 Results
Mercury Fuel Rail
If you own Mercury and want to keep it in top shape, choosing OEM Fuel Rail is a smart move. They are precisely engineered and follow strict factory standards. They are made in advanced facilities that use cutting edge technology. Each part goes through thorough testing to confirm strength and safety, so you can trust it. FordPartsDeal.com gives you genuine Mercury Fuel Rail at some of the affordable online prices without cutting quality. Every OEM Mercury part includes the manufacturer's warranty, easy returns, and super-fast delivery. So why wait? Shop now and get your vehicle back to peak condition.
Mercury Fuel Rail shoots pressurized gasoline directly to the injectors to ensure that each engine pulse is sharp. Mercury produced vehicles that provided comfortable cushiness, sleek appearance and a name that lingered in your mind because of the speed-god badge and kept the price of its vehicles within the means of common people. Mercury continued perfecting the suspension travel and cabin silence so that families would cruise over the tarmac without having to turn on the radio, and it sprayed chrome and grilles to make grocery trips appear like parades. Mercury was releasing Cougars, Grand Marquis and other crowd pleasers decade after decade with decent price tags and soft steering feel which showed that comfort and attitude could be on the same driveway. Mercury walked away with a value-conscious image which resounds in swap meets, forums and parking lots with owners showing off big trunks, quiet rides even after the production ceased in 2011. The Fuel Rail on these engines is the solid backbone of the injection system and directs the high-pressure fuel of the pump to each of the nozzles and resists heat, vibration and corrosive additives to the current gasoline mixtures. In throttle body injection configuration, the Fuel Rail meters feed to a central injector although it is also compatible with port configurations where multiple solenoids are switching simultaneously to reduce waste and trim emissions to make starts smoother and exhaust cleaner. More recent revisions have enabled the Fuel Rail to accommodate sensors and regulators programmed to accept gasoline direct injection, inflating pressure, atomizing droplets and getting every stroke to squeeze out additional torque with no loss of durability.
Mercury Fuel Rail Parts and Q&A
- Q: How to service the fuel rail safely and effectively on Mercury Mariner?A:Safety should be your highest priority before serving the fuel rail because highly flammable mixtures exist in the fuel components so stay away from open flames and smoking near the area. Clearing the fuel system pressure first will stop fuel spray accidents and cleaning all fuel residue from beneath the engine stops autoignitions during its operation. All work on evaporative emission system components and fuel-related parts must begin with disconnecting the ground cable of the battery. To commence the removal process begin by venting the fuel pressure then disconnect the battery ground cable followed by taking off the fuel supply tube from the fuel quick connect coupling. The next step requires workers to disconnect four fuel injector electrical connectors after which they should remove the nut to position the radio capacitor aside followed by detaching the two pin-type wire harness retainers from the fuel rail then they need to remove the two fuel rail stud bolts. Take the fuel rail assembly together with injectors out of the way followed by discarding and removing the eight fuel injector O-ring seals. To install the unit use brand new seals made from fuel-resistant materials which should replace all old seals. New O-rings require engine oil lubrication before you use them to attach four fuel injectors along with their retainer clips onto the fuel rail. Fitting the fuel rail and its injectors together as an assembly requires securing it with 23 Nm (17 lb-ft) torque setting on the two fuel rail stud bolts. You should reinstall the fuel rail and injectors as an assembly immediately before tightening the two screw-type wire harness retainers onto the fuel rail. Then position the radio capacitor and fasten the nut to 10 Nm (89 lb-in). Complete the repair process by attaching battery ground cable along with the electrical connectors of four fuel injectors and by fastening the fuel supply tube to the fuel rail quick connect coupling.
- Q: How to service the fuel rail on without a returnless fuel system on Mercury Cougar?A:Servicing the fuel rail starts with releasing fuel system pressure on vehicles that have no returnless fuel systems. First detach the air cleaner outlet tube along with resonator before you remove the fuel supply and return pipe spring lock couplings. For fuel rail service begin with unclamping the supply hoses followed by disconnecting the return hose from the pressure regulator and the accelerator cable clip removal before unfastening the cable at the bracket. Owners of speed control vehicles should remove the speed control cable from the throttle body while detaching it from the bracket and pushing the retaining clip to extract the cable free. First detach the fuel injector electrical connectors before pulling off the variable camshaft timing solenoid electrical connector grommet which is attached to the engine cover and finally disconnecting the variable camshaft timing solenoid electrical connector. The fuel injection wiring harness needs to get placed on its side before removing the fuel injection supply manifold assembly. Apply new fuel injector lower O-ring seals during installation by lubricating them with XO-10W30-QSP or DSP engine oil or equivalent fluid according to Ford WSS-M2C-153-H specification before reversing the installation sequence for completion. Safety measures should always be followed because highly flammable vapors exist in the vicinity of fuel-related components.


Related Mercury Parts
 Mercury Fuel Tank
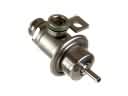 Mercury Fuel Pressure Regulator
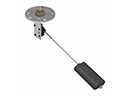 Mercury Fuel Sending Unit
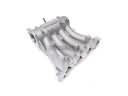 Mercury Intake Manifold
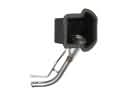 Mercury Fuel Filler Neck
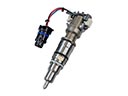 Mercury Fuel Injector
 Mercury Fuel Injector O-Rings
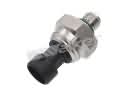 Mercury Fuel Pressure Sensor
 Mercury Fuel Pump Tank Seal
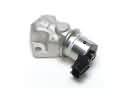 Mercury Idle Control Valve
 Mercury Intake Manifold Gasket
 Mercury Throttle Body